
Table of Contents
Single sign-on (SSO) has become a powerful enabler for digital journeys, transforming users' interactions with multiple platforms and services from a friction-filled experience into a single, seamless path.
Well-executed SSO simplifies and unifies authentication so that users only need to sign in once to gain access to many distinct services, making transitions between different digital properties essentially invisible. SSO also reduces knowledge factor-related security risks by reducing password fatigue and minimizing the attack surface.
Supabase is an open-source alternative to Firebase that provides developers with diverse tools, including a Postgres database, authentication systems, and real-time APIs. While Supabase offers built-in authentication options, its customizability can be limited for some advanced use cases, mainly when aiming to implement SSO solutions.
This is where the integration of Descope as an identity provider (IdP) comes into play. By leveraging Supabase's support for SAML SSO, we can implement Descope as our authentication layer while retaining all the powerful features Supabase offers.
In this guide, we'll walk through implementing SSO in a Supabase project using Descope and demonstrate how to utilize Supabase's advanced row-level security for granular data access control. By the end, you'll be equipped to create a seamless, secure authentication system that can scale with your application's needs.
Note: You must sign up for a paid Supabase plan before you can add SSO to your project.
Adding SSO to a Supabase project
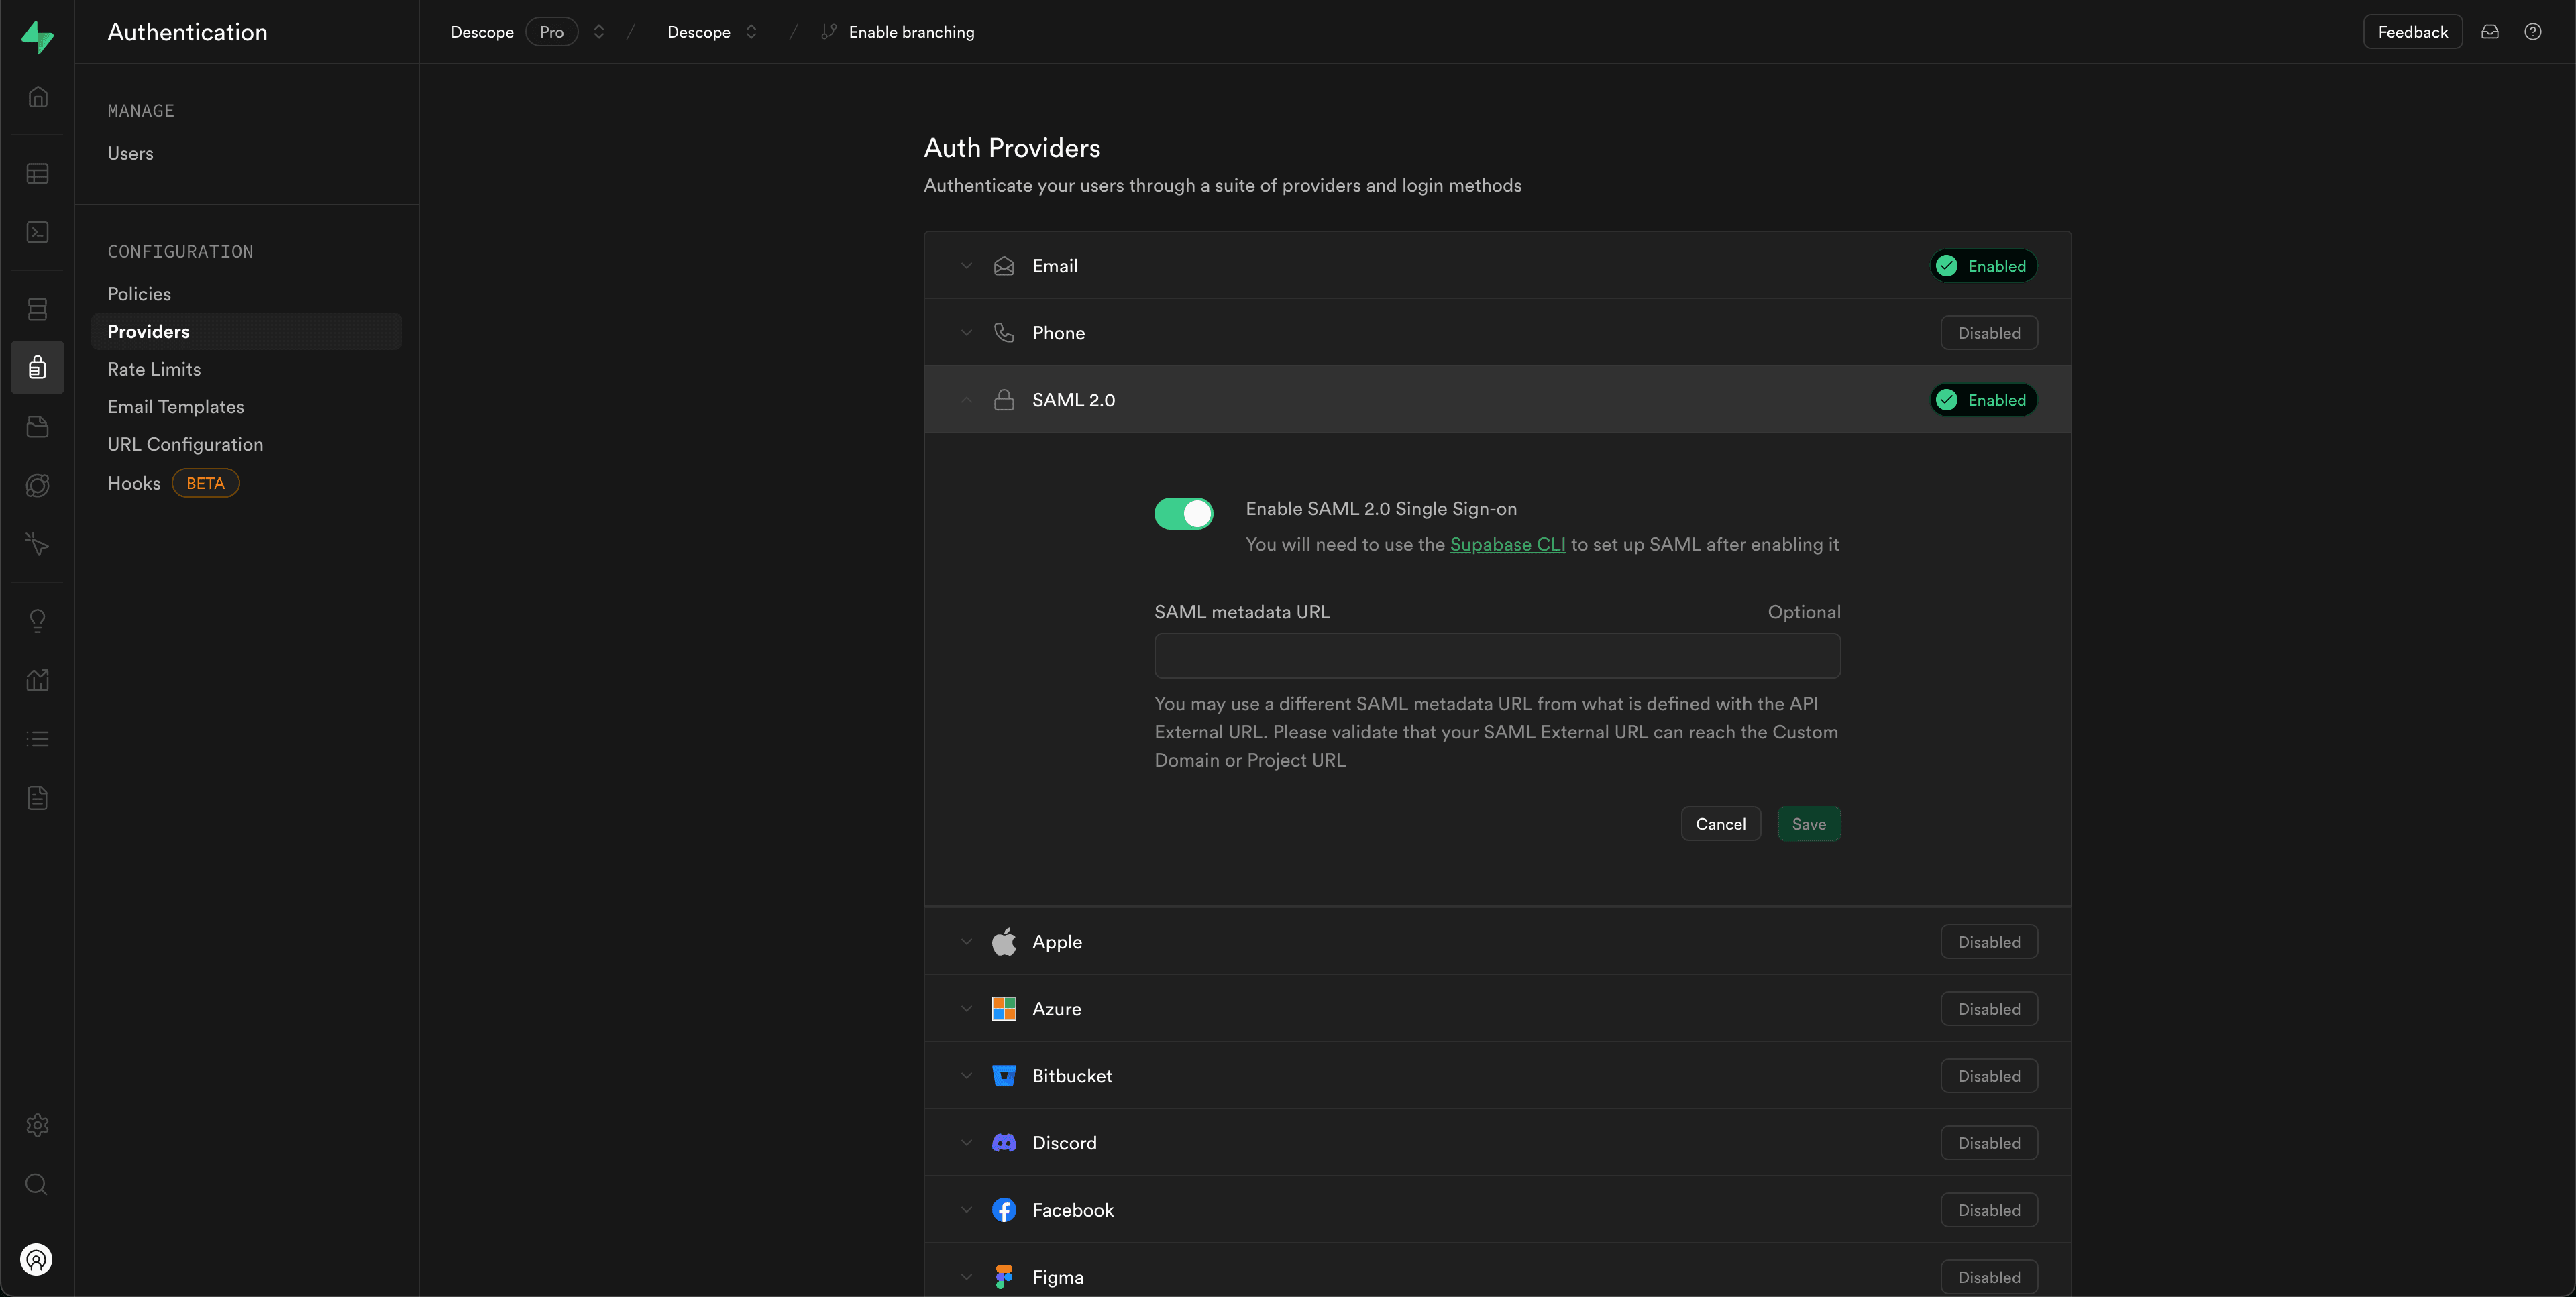
Create a Supabase project, then navigate to Authentication in the sidebar. Go to Providers, select SAML 2.0, and enable it.
You can open whichever project you plan to add Supabase SSO to. For this example, we’ll be building a ReactJS project. You must install the Supabase CLI; instructions can be found here. The supabase-js library also needs to be installed using this command:
npm install @supabase/supabase-jsThe following also needs to be added to the App.js file in your project:
import { createClient } from '@supabase/supabase-js'
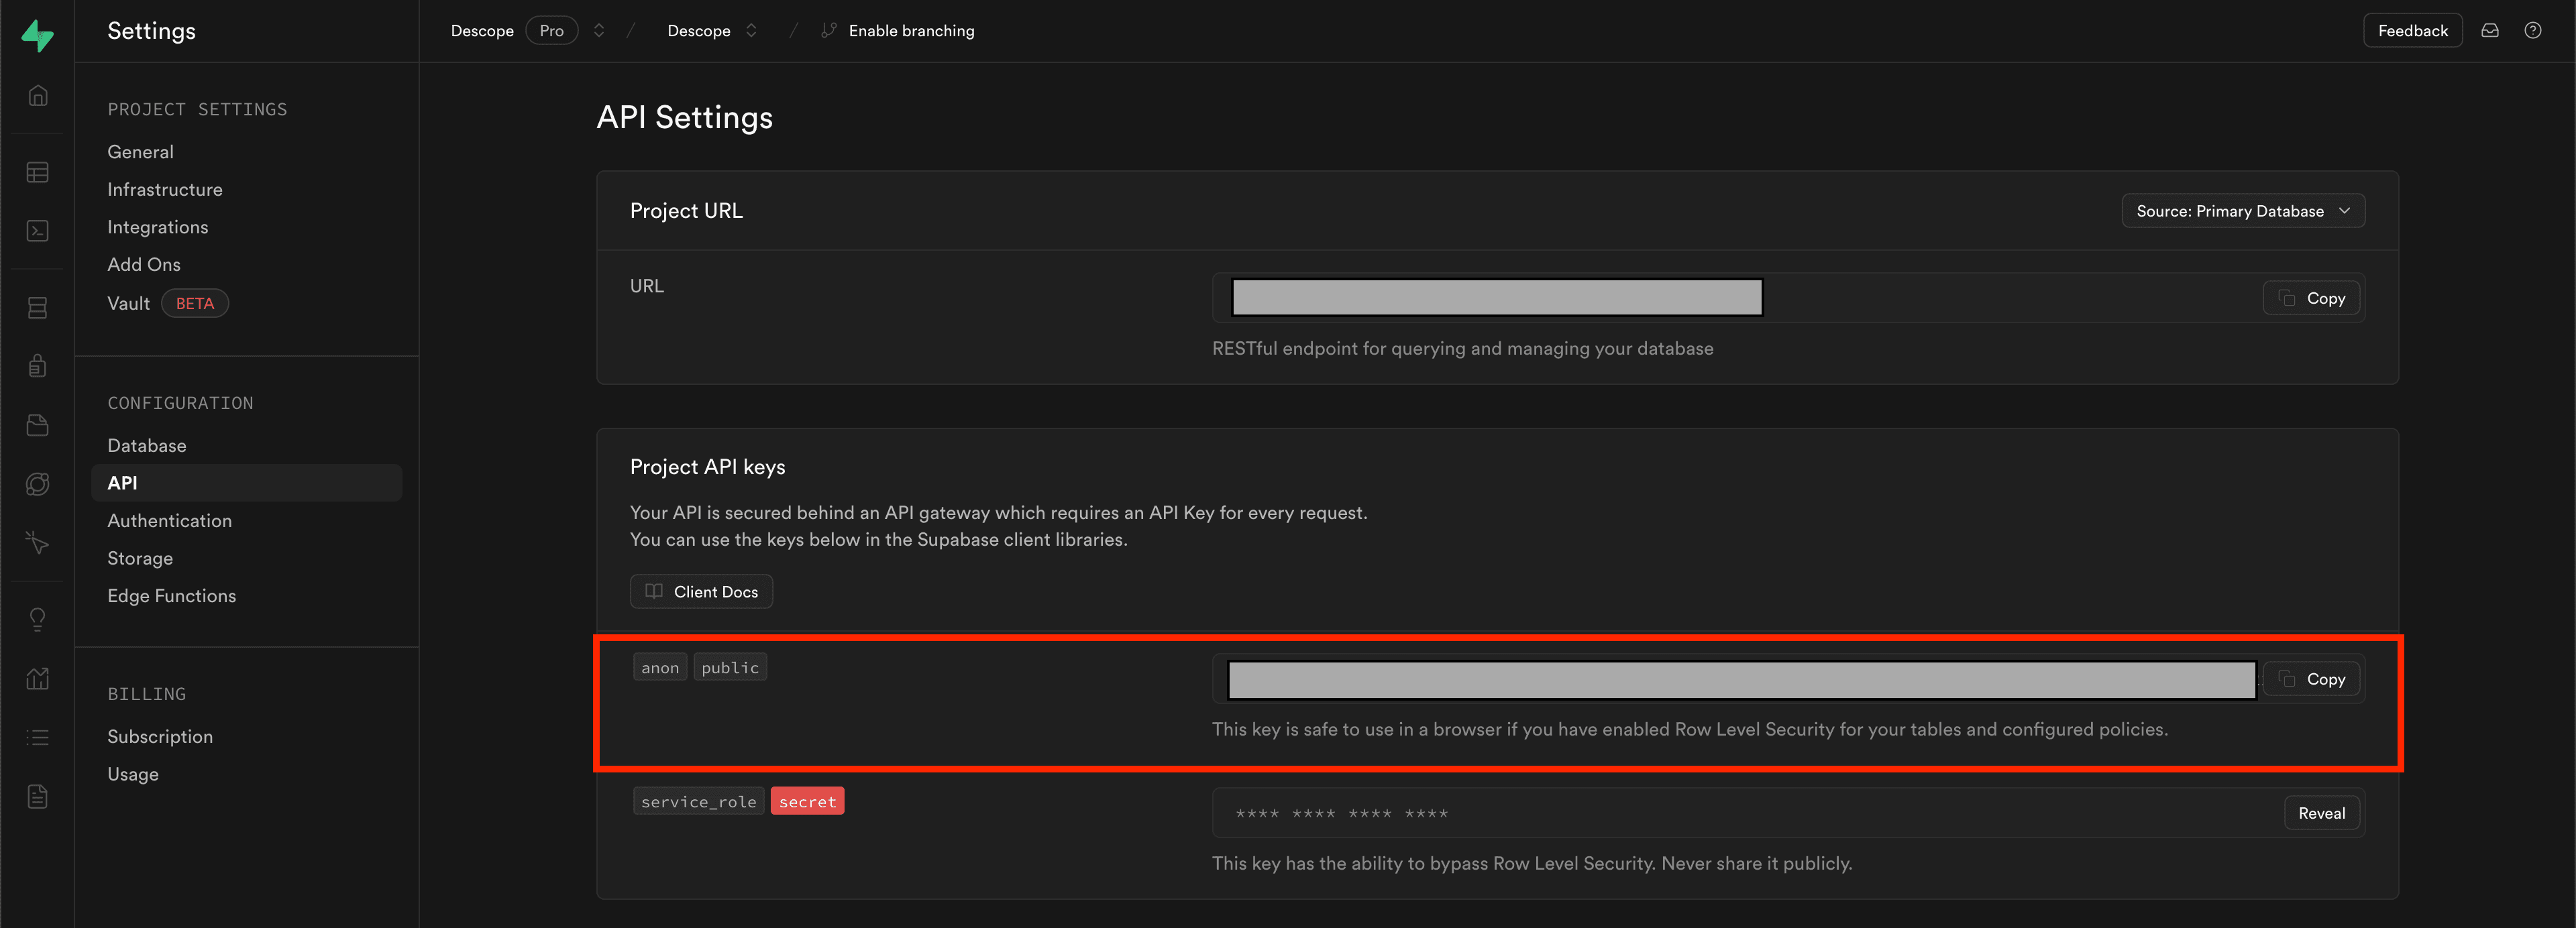
const supabase = createClient("https://<project>.supabase.co", "<your-anon-key>");The project and anon key are in the Project Settings for your Supabase project. The project is under General Settings, and the anon key is under API Settings.
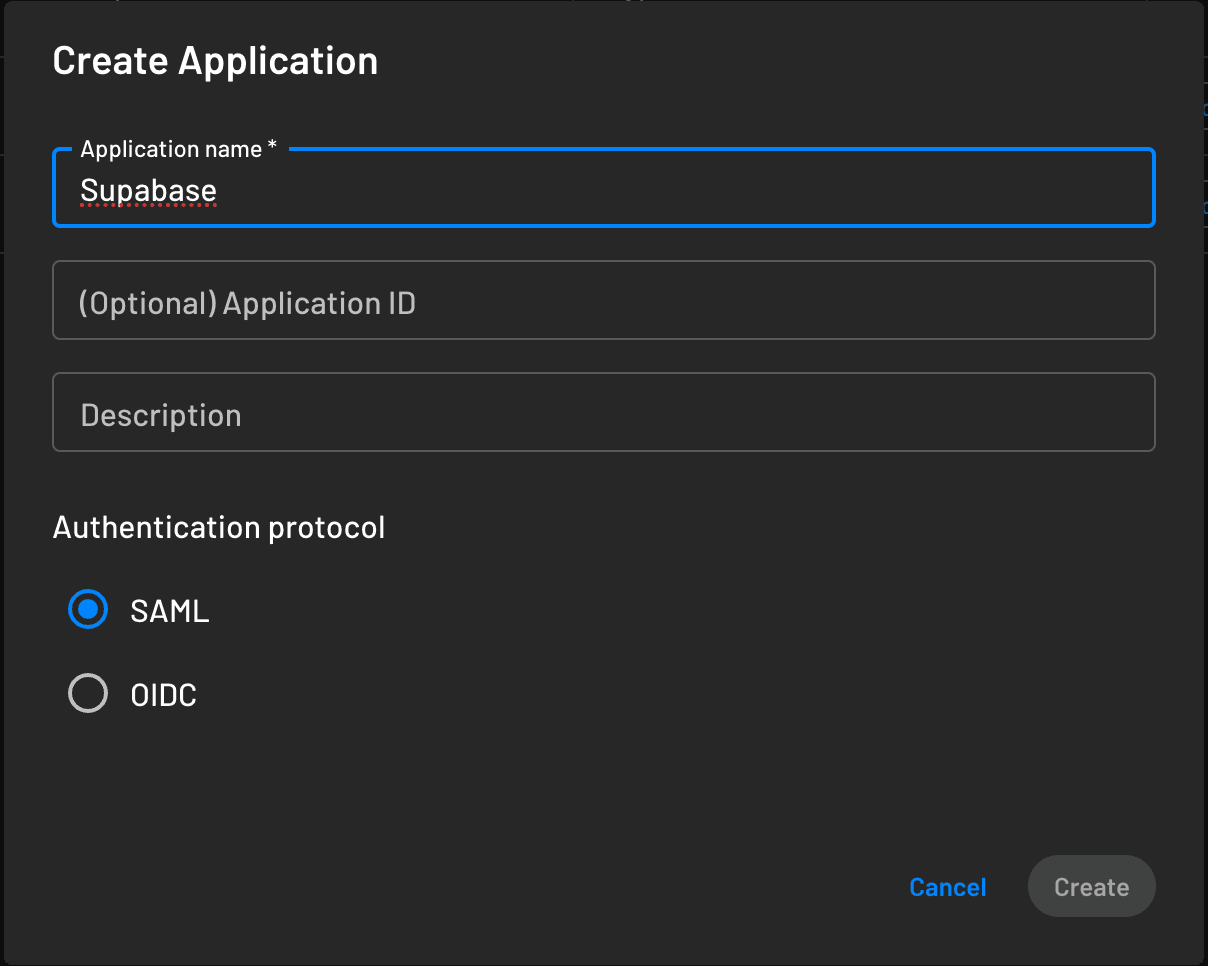
Go to the Descope Console and navigate to Applications. Use the button at the top right to create a new SAML application.
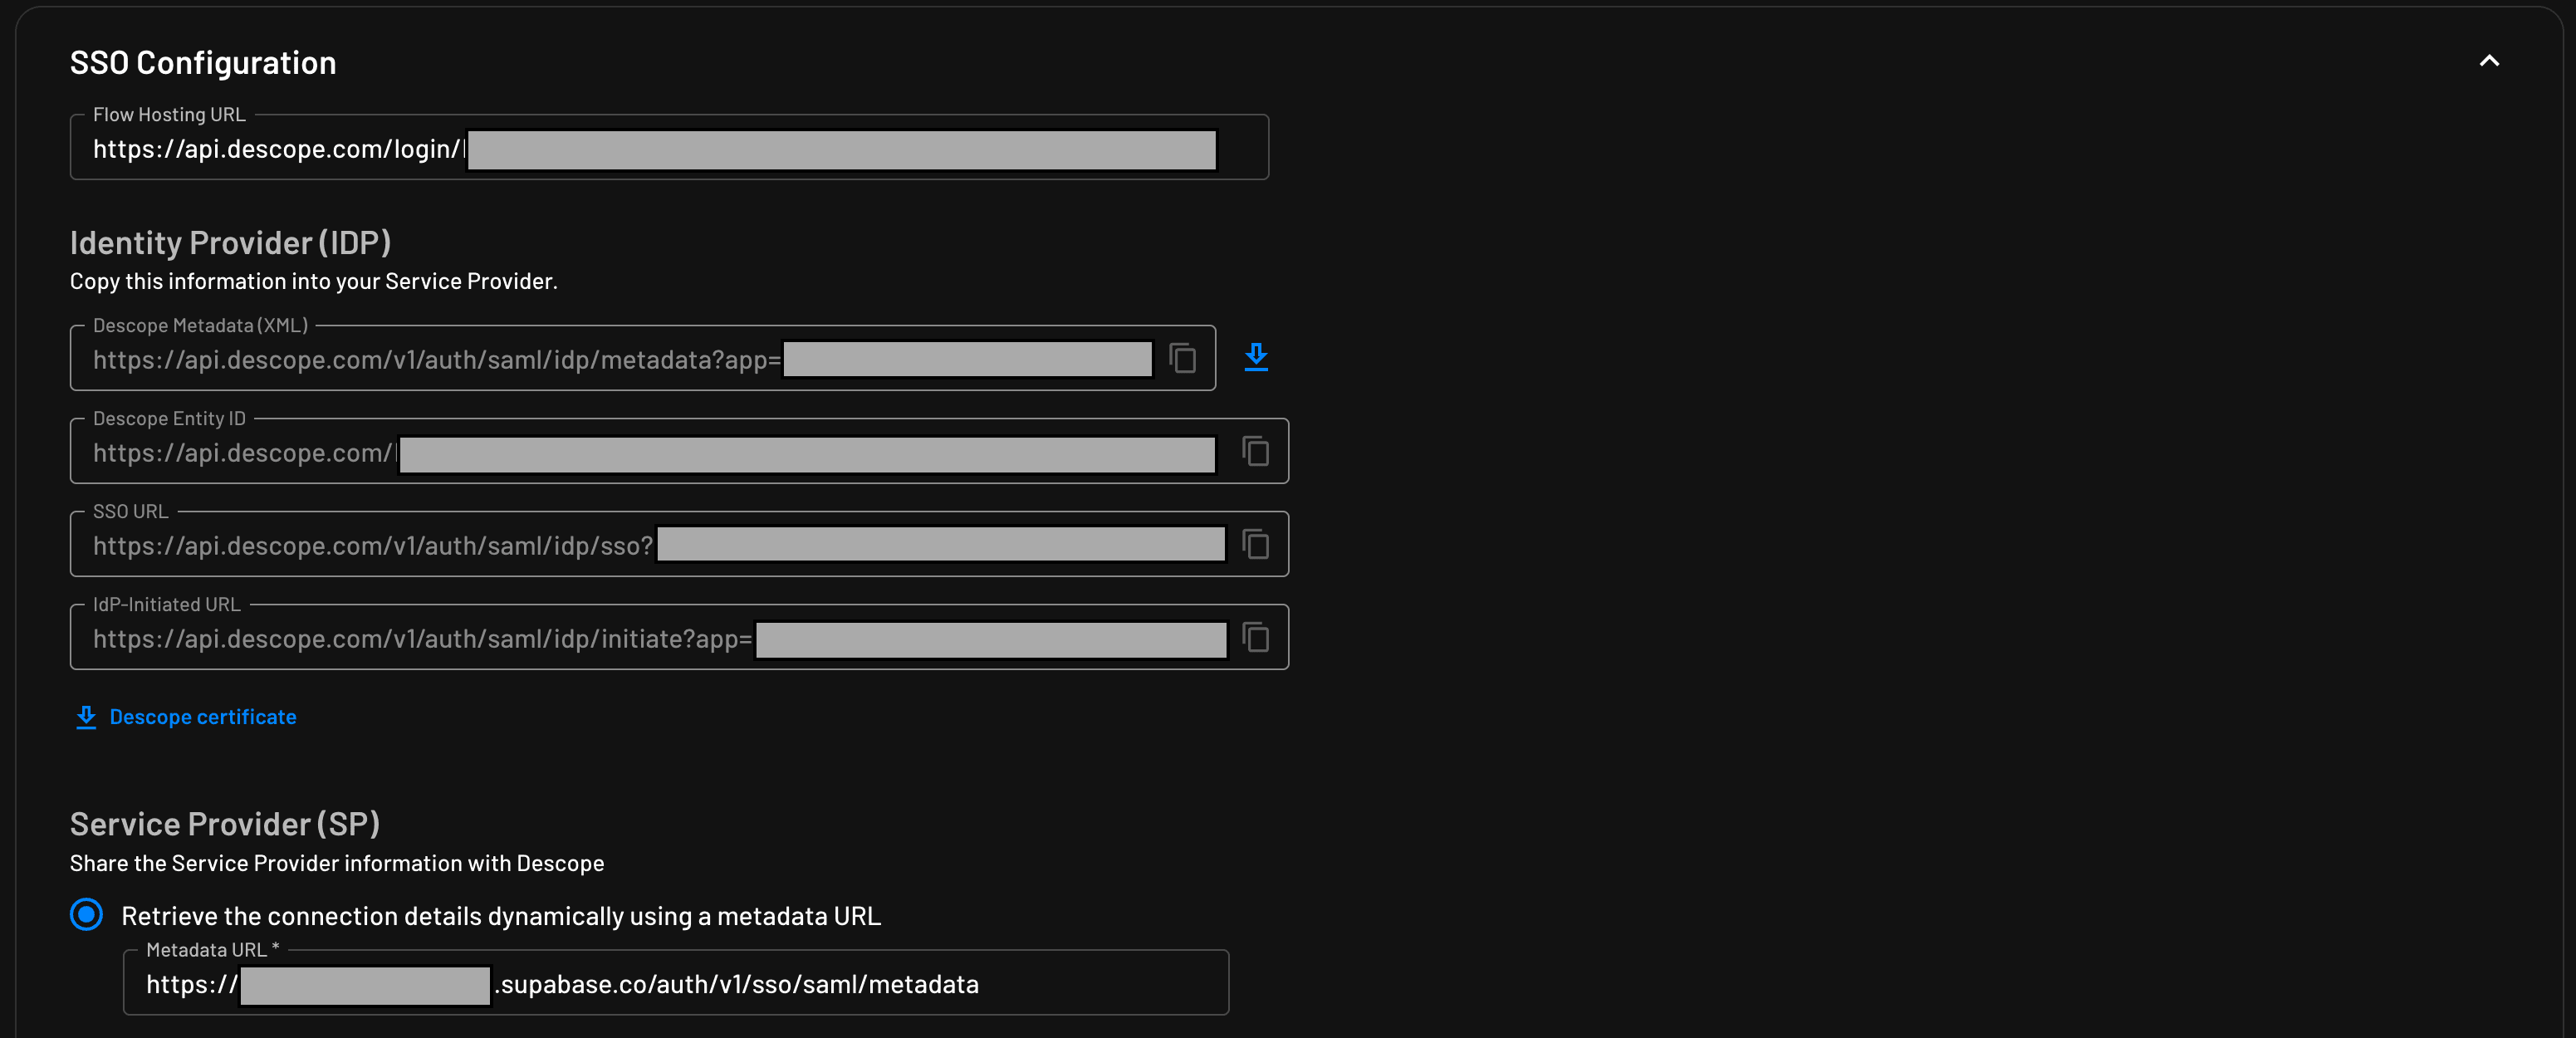
Enter the new application’s settings, and under SSO Configuration, set the SP metadata URL to https://<project>.supabase.co/auth/v1/sso/saml/metadata using the same <project> value as earlier. Then, copy the Descope Metadata (XML) URL.
Return to your project, and in the terminal, enter the following command:
supabase sso add --type saml --project-ref <project> \
  --metadata-url '<descope-metadata-url>' \
  --domains <domain>
Use the metadata URL you copied from Descope to replace the <descope-metadata-url> and use the same Supabase <project> value. For the domain, use whichever email domain will use SSO to authenticate your project. (e.g., google.com, outlook.com, descope.com).
You’ve now enabled SSO, but it still needs to be added to the project. The following function will authenticate whenever it is called. We can add it to a button’s onClick property to call the function whenever the user presses Log in with SSO.
const login = async () => {
    await supabase.auth.signInWithSSO({
      domain: '<domain>'
    }).then(result => {
      if (result?.data.url) {
        // redirect the user to the descope flow
        window.location.href = result.data.url
      }
    })
  }
Now that SSO has been added to the project, when logging in, we’ll redirect the user to a page hosted on the custom domain on which you configured your Descope project. This page will have the flow listed in the flow hosting URL under the Application you created in the Descope console. By default, this is the Sign In or Up flow.
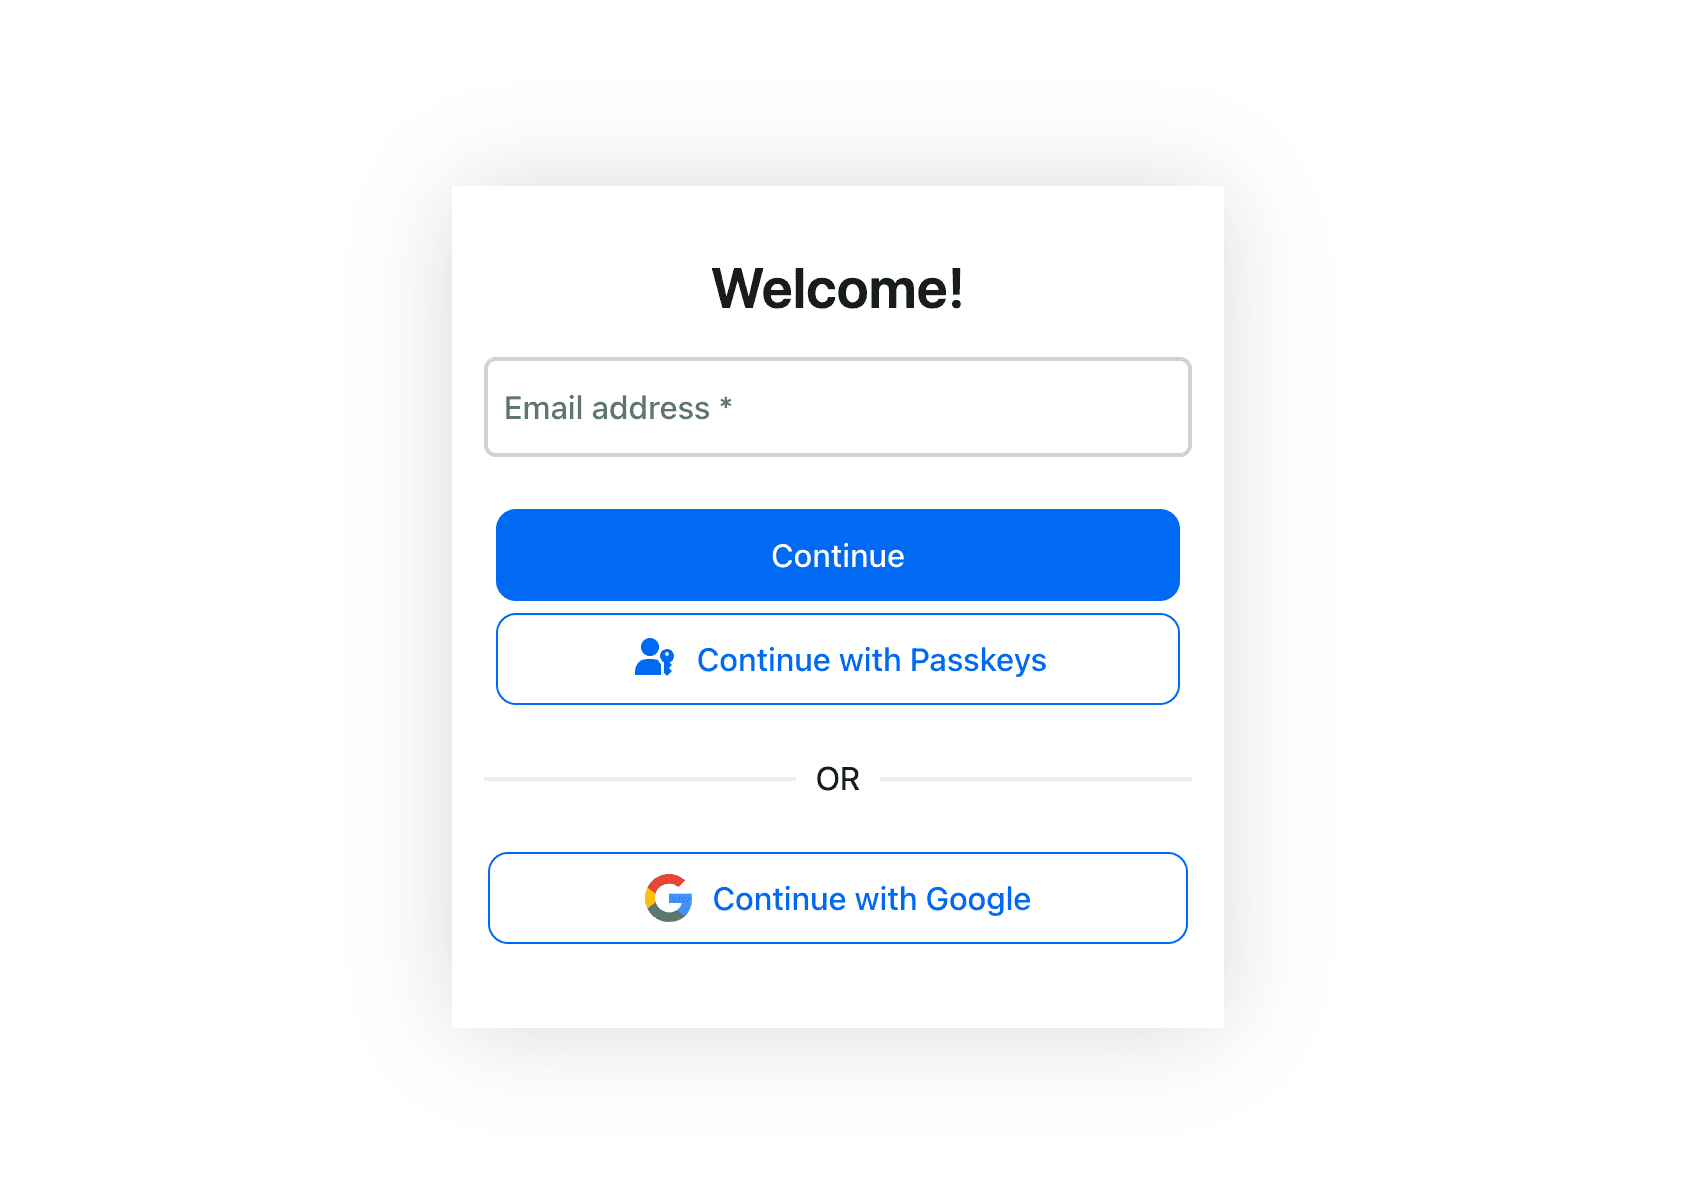
If you use Descope's Next SDK, this flow can be embedded directly into the app instead of redirecting to a new page.
Using row-level security
Supabase has some advanced database security features we can leverage when configuring authentication. Row-level security (RLS) allows you to set policies on tables in the database and restrict who can read or write to the database based on whether or not a user is authenticated. We are applying this to a specific B2C use case.
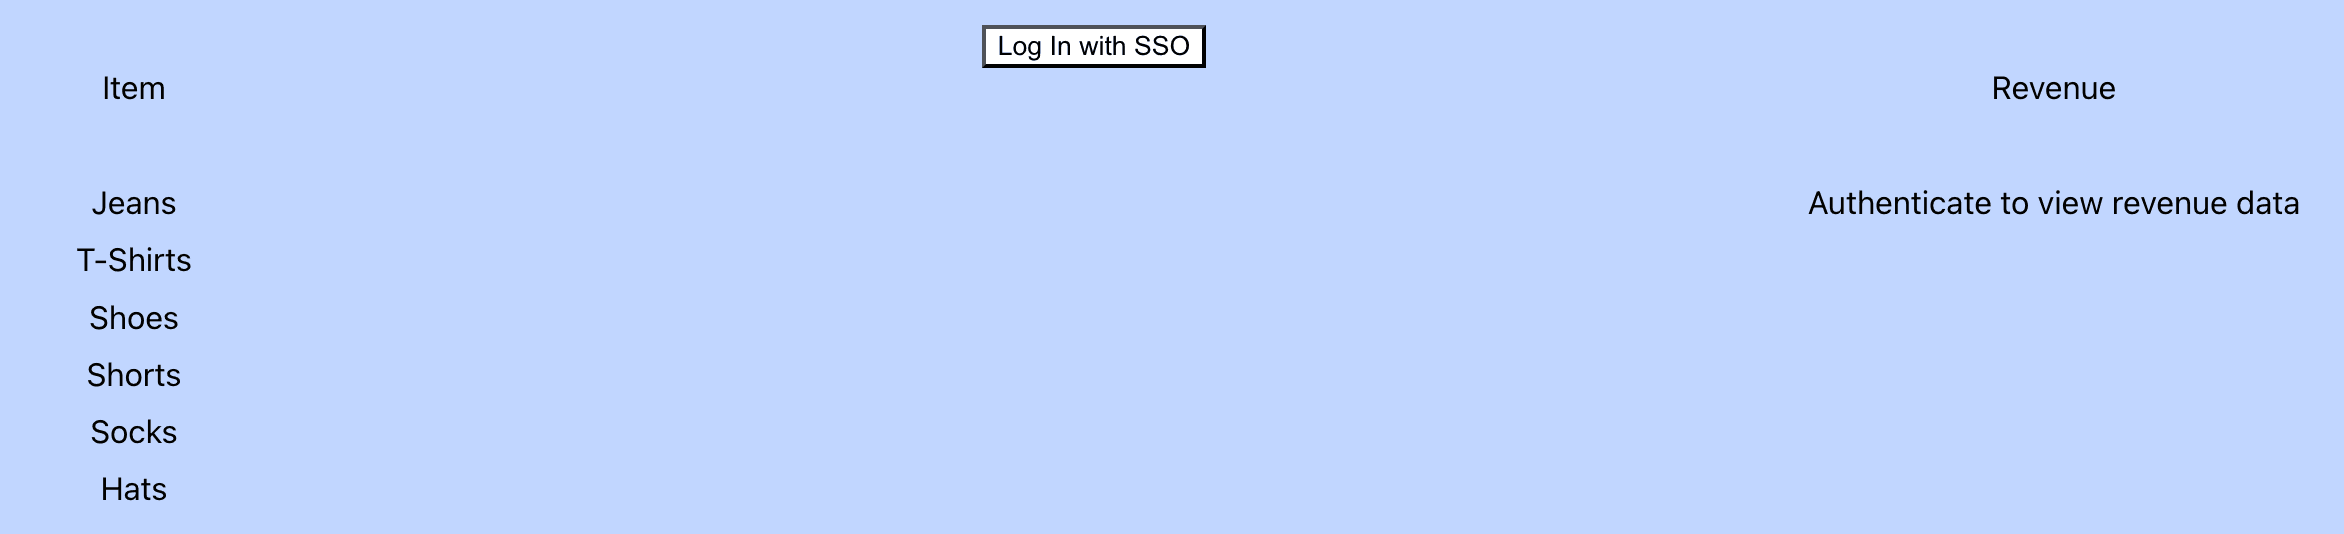
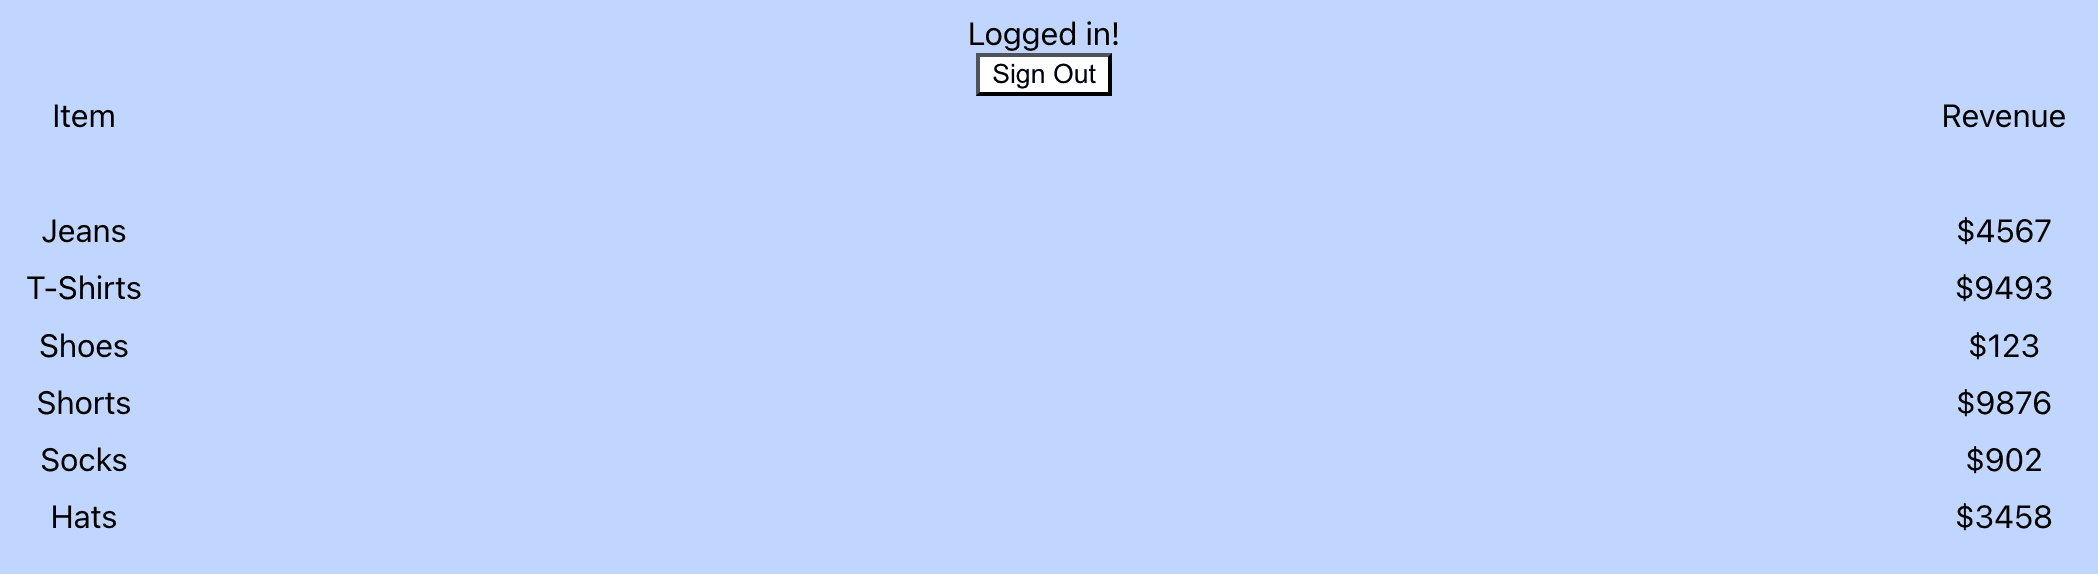
This guide's example is a clothing store. This clothing store will list all available items to anyone who visits the site, but the store will need to hide some information from unauthenticated users. If the user signs in with SSO, we will only hide how much revenue each item has made. This will only allow employees to see the revenue from each item.
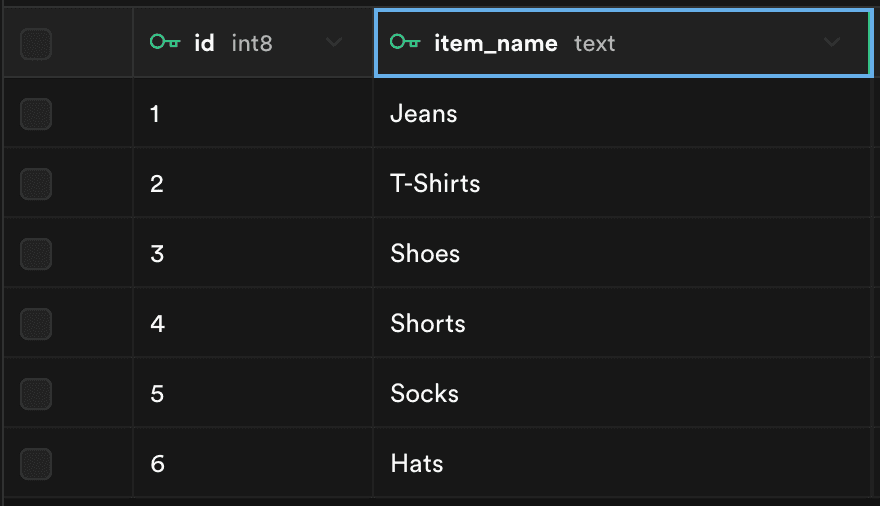
We start by creating a table in Supabase with only the available items. We are not enforcing any rules for reading permissions for this table.
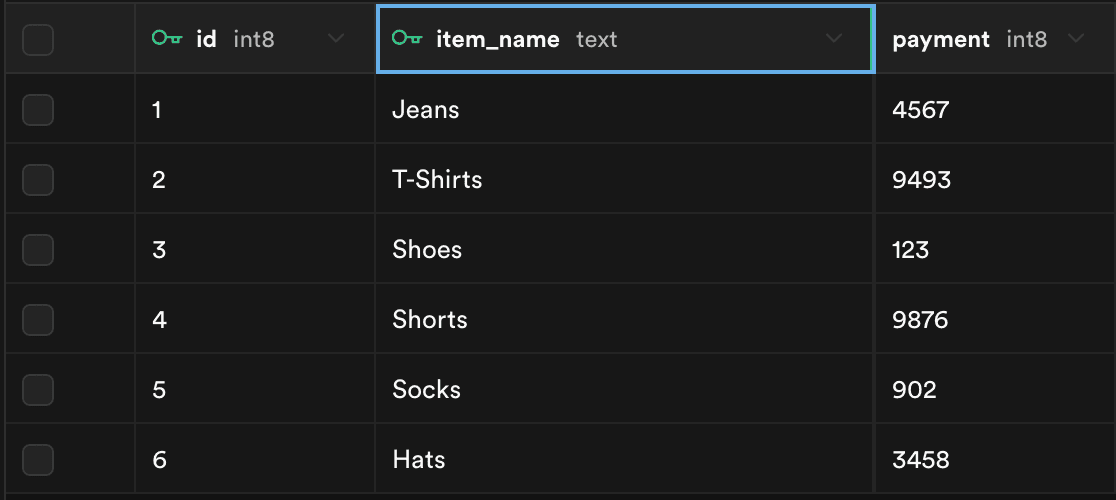
We’ll then create another table that includes revenue for these items. We added an RLS auth policy to this table that restricted read access to only authenticated users.

In our project, we can run a function to read from these tables.
const {data, error} = await sb
      .from('items')
      .select()

if (data) {
        setCompanies(
          <div className='column fixed'>
            {
              data?.map((item) => (
                <div className='item'>{item.item_name}</div>
              ))
            }
          </div>
        )
      }
We do the same with the revenue table, but we’ll check that the data our function read was at least one element long. If it has no elements, that means that the function was unable to read from the table. The function’s inability to read from the table indicates that the RLS policy applied and did not authenticate the user when trying to read the data. Remember, the user must be authenticated to view revenue data.
Combining SSO with Supabase’s RLS allows information on sites to be secure, but you can do more on top of RLS. Aside from just using authenticated and unauthenticated to secure your site, you can also use custom roles created in Supabase for role-based access control (RBAC).
Read more on how you can use RBAC in conjunction with RLS here.
Conclusion
In this article, you learned how to add SSO to a Supabase project using Descope as an IdP and Supabase’s RLS to prevent data from being shown when not authenticated. Integrating Descope's SSO with Supabase is a business enabler that can significantly enhance your application's user experience, security posture, and scalability.
SSO unifies your users' login experience while reducing the threat of password-related attacks. You’re not just making things easier for yourself; you’re setting the stage for a better customer journey. Approaching SSO this way allows you to continue using all the features that Supabase offers while using Descope to simplify and enhance your authentication.
The bottom line: Descope's SSO, combined with Supabase's backend, provides a foundation for building truly user-friendly and secure applications. To learn more, sign up for a Descope account or request a demo.