
Table of Contents
This tutorial was written by Vivek Maskara, a Software Development Engineer at Remitly. Connect with him on his website or X to see more of his work!
Effective access control mechanisms are an essential part of security in user-facing web applications, particularly when sensitive user data is involved. These mechanisms ensure that only individuals with adequate permissions can access or modify sensitive information. Access control is particularly important in retrieval-augmented generation (RAG) applications, which interact with large data sets to generate responses or insights. The diverse and extensive nature of the data in RAG applications increases the risk of unauthorized users accessing sensitive information without proper access control.
If you’re building new RAG apps or adding authentication and authorization to existing ones, you need to implement strict access control measures to maintain user data privacy. By integrating robust authentication and authorization protocols, you can safeguard against unauthorized access, ensuring that users view only the data they are permitted to access.
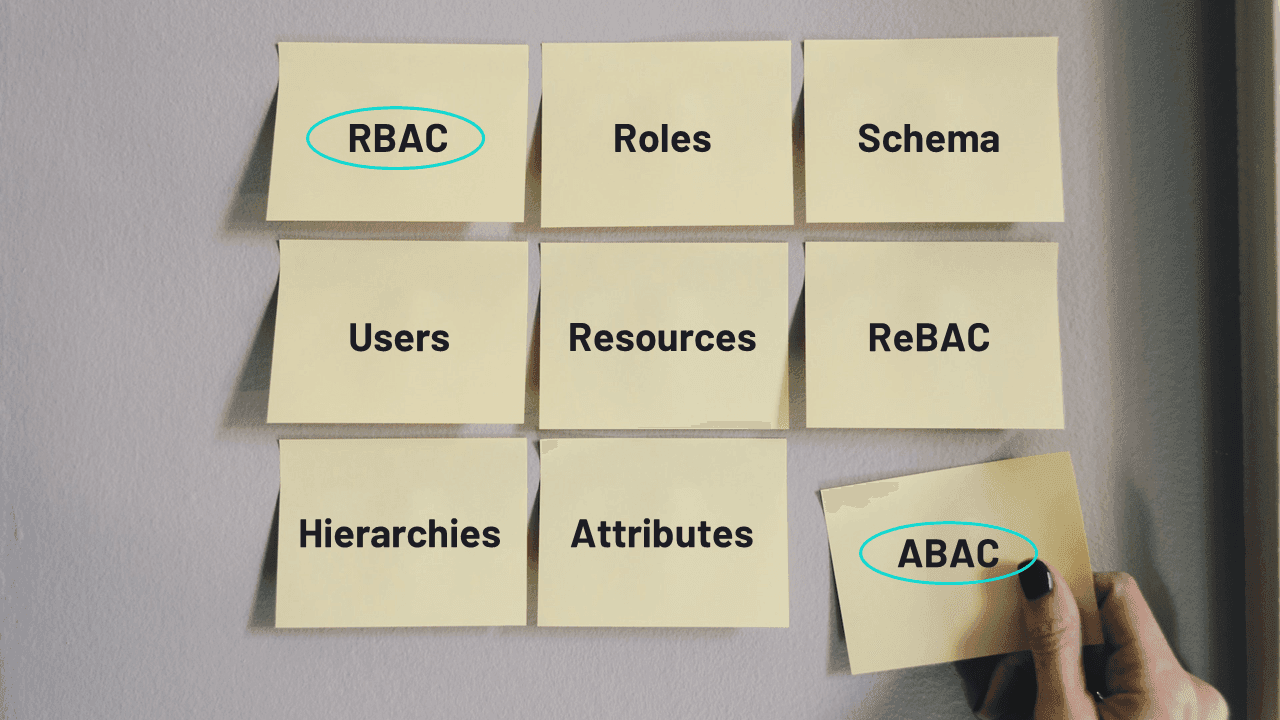
In this tutorial, you will learn how to implement authentication and authorization (relationship-based access control or ReBAC) using Descope in a RAG application.
Understanding access control
Access control is a critical component of any secure application, encompassing authentication and authorization. Authentication ascertains the identity of a user using methods like usernames and passwords, biometric scans, or multifactor authentication (MFA). In contrast, authorization determines the access level for an authenticated user, such as reading, writing, or deleting data in a database. For example, on Facebook, you must log in (authenticate) to access features like posting content or editing your profile. However, you are authorized to post only on your profile, and you cannot edit your friend’s profile.
RAG is an approach that combines retrieval-based and generative models to generate more accurate and contextually relevant responses, leveraging large data sets. These applications typically involve two main processes:
Ingestion: During this process, data is collected, processed, and stored for quick retrieval.
Querying: This involves accessing the stored data to generate responses based on user input.
In RAG applications, user identity can be linked with resources during the ingestion phase so that only authorized users can access and utilize specific data. For example, if a user uploads their travel itinerary, the large language model (LLM) will use the context from the report to answer their queries. However, the LLM shouldn’t use this context when responding to queries from other users who are not authorized to view the itinerary. Resources can also be linked to a user role, enabling context to be shared with all users with that role. For example, when a user from the finance department uploads a sales report, other users from the same department should be able to access this information.
Post-query filtering removes or masks data that users should not see, even if they have initiated a valid query. This layered approach protects sensitive information, maintains data integrity, and complies with privacy regulations.
Building a RAG application using Pinecone and Descope
Pinecone is a specialized vector database service that simplifies building RAG applications. It can handle large-scale, high-dimensional data, such as embeddings generated by LLM models. In this tutorial, you will build a Next.js RAG app powered by Pinecone that returns responses in a chatbot. The application will allow you to feed web URLs to enable contextual responses. It will crawl the web page contents and update its knowledge base by updating the Pinecone index. When you query the RAG application, it will provide contextual responses based on the knowledge gained from the indexed documents.
You will add authentication and authorization to the RAG application using Descope. Descope is an identity management platform that provides authentication and authorization solutions to enhance the security and management of user access in applications.
Setting up prerequisites
Before starting, you need to do the following:
Setting up the Pinecone project
Begin by cloning the starter code for a Pinecone app and follow the instructions in the Readme.md file to set up the app. When you run the starter app, you will notice that you are directly taken to the dashboard page without authentication:
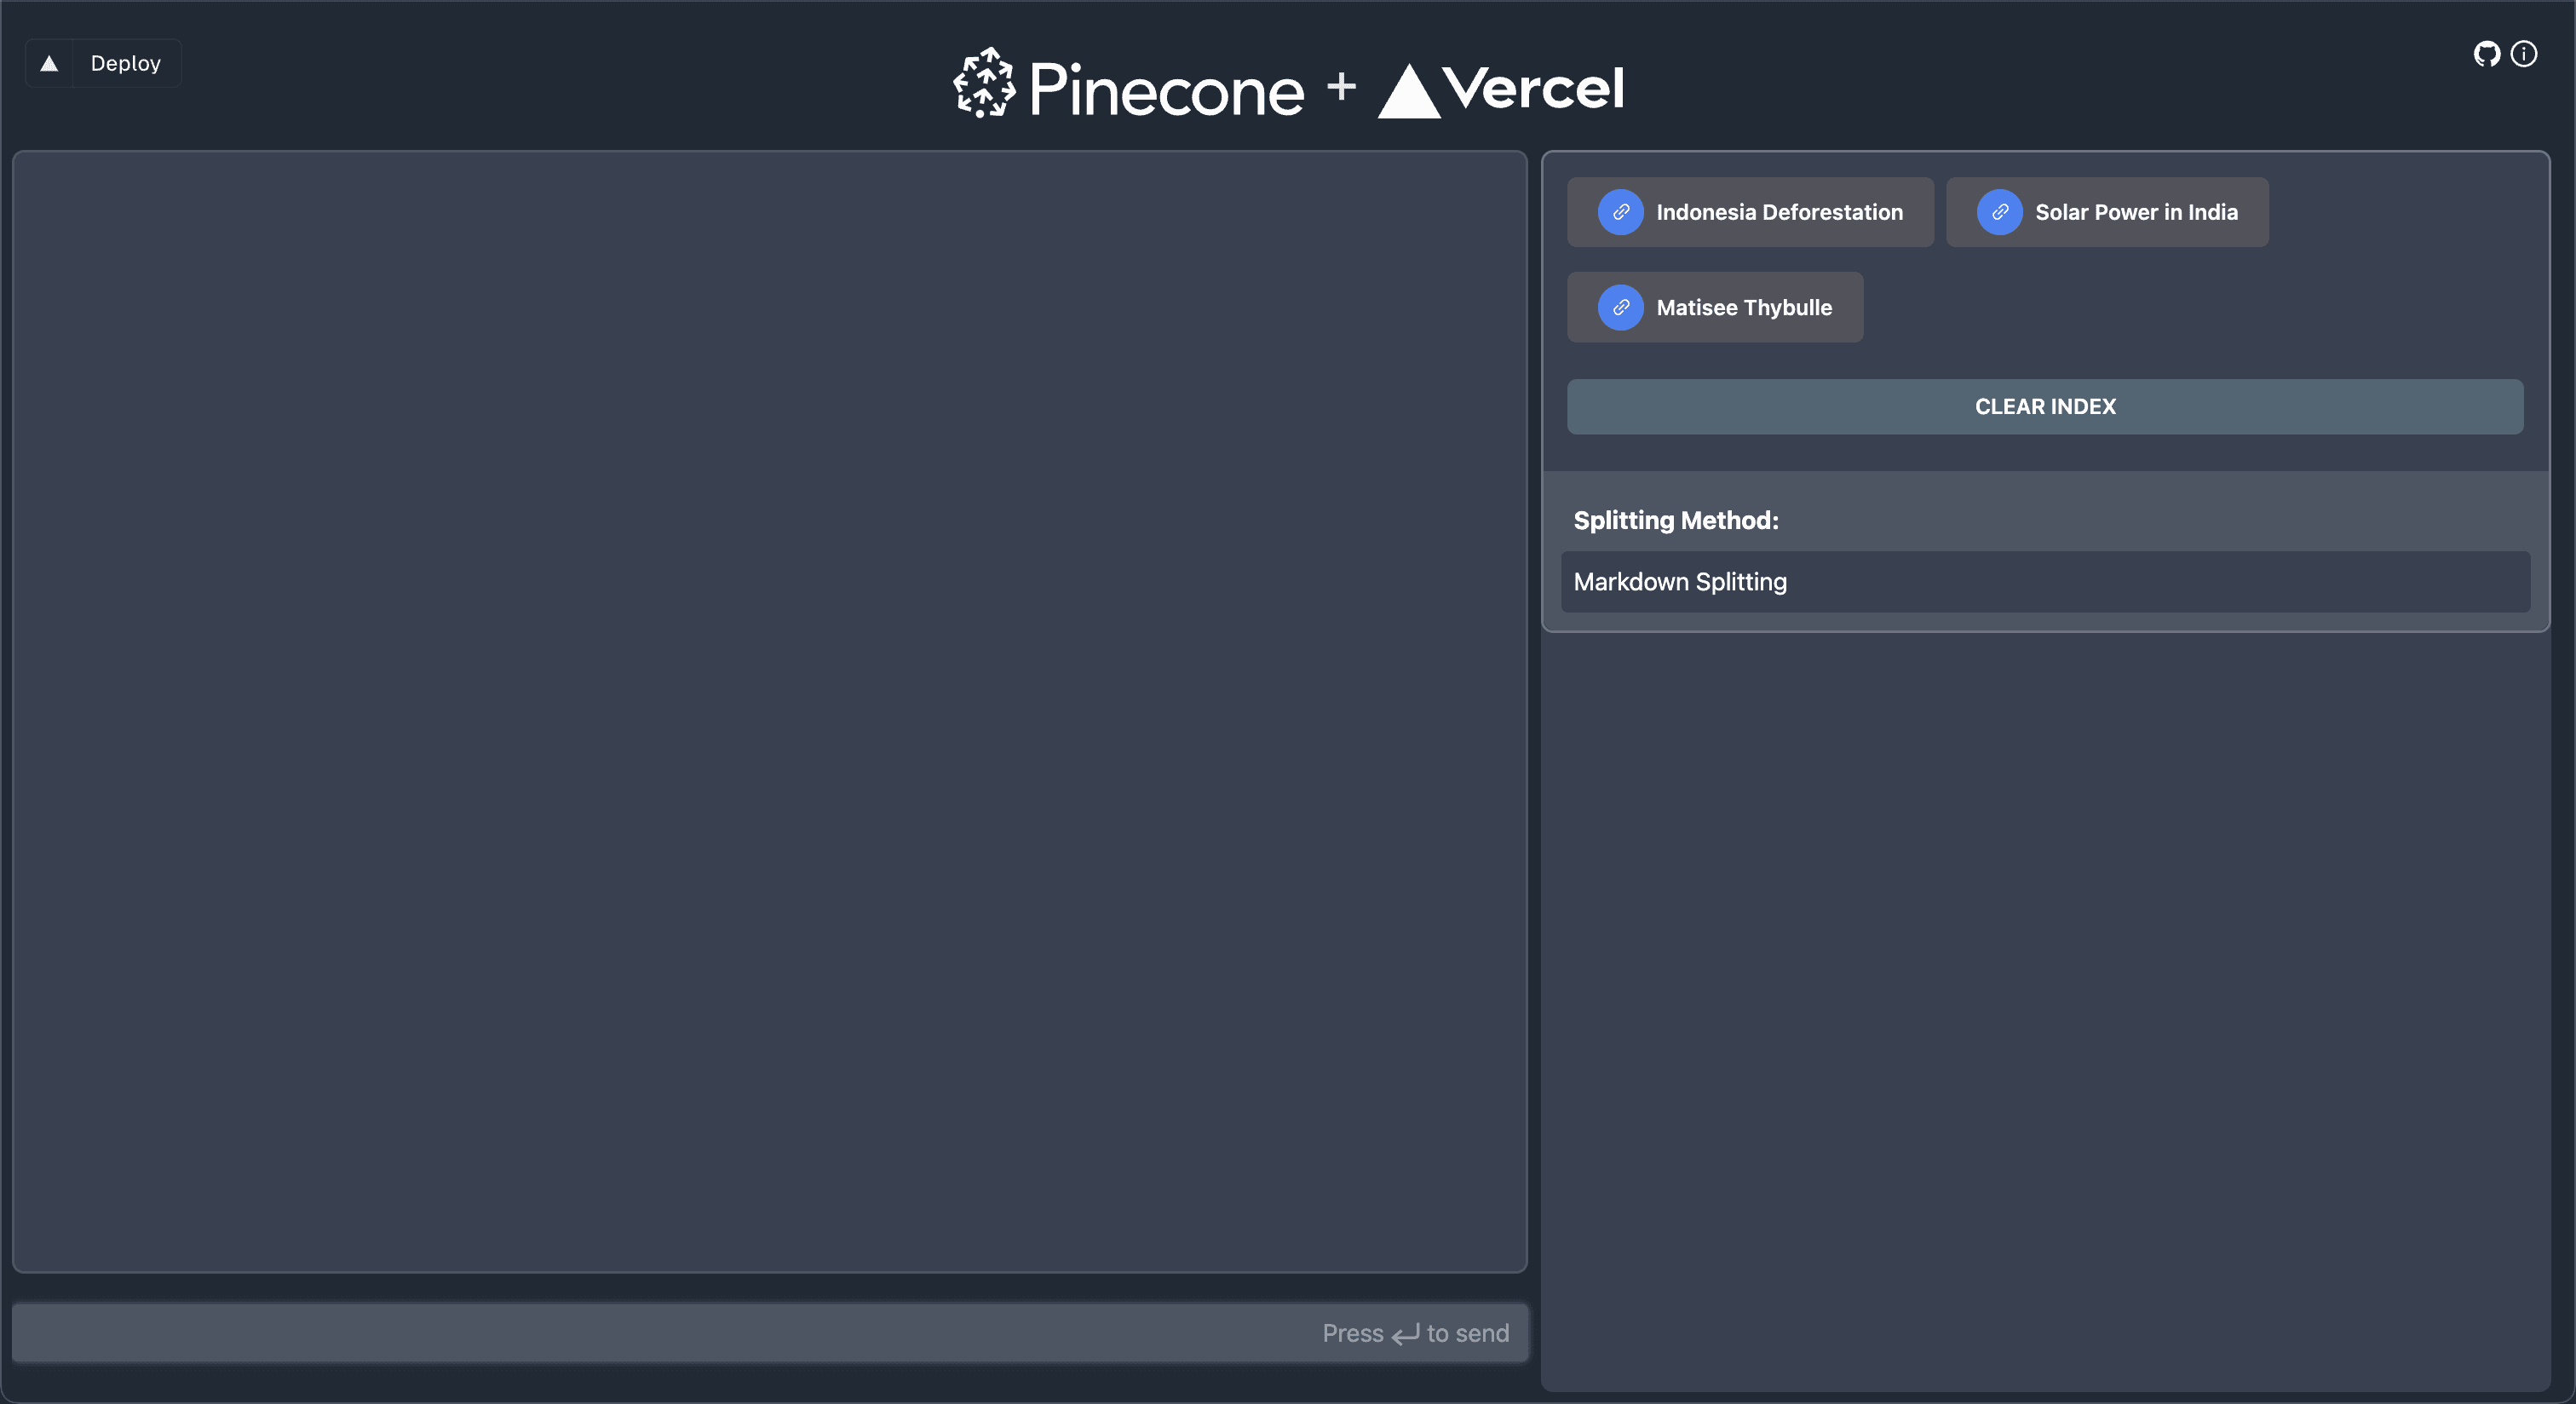
Let’s get familiar with the starter app before adding authentication. The dashboard has the following components:
The right section contains a few hardcoded web URLs that you can click to index. Clicking a link invokes the
/api/crawlroute, which seeds the knowledge base based on the page contents. It crawls the web page, splits the page contents, and updates the Pinecone index based on them.Once the knowledge base is updated, you can use the input field to post queries and receive responses from the chatbot. The chatbot uses the context gained from the documents to return contextually relevant responses.
Next, let’s examine the vector index records using the Pinecone dashboard. To view the index, navigate to the Projects > Indexes screen using the Pinecone dashboard:
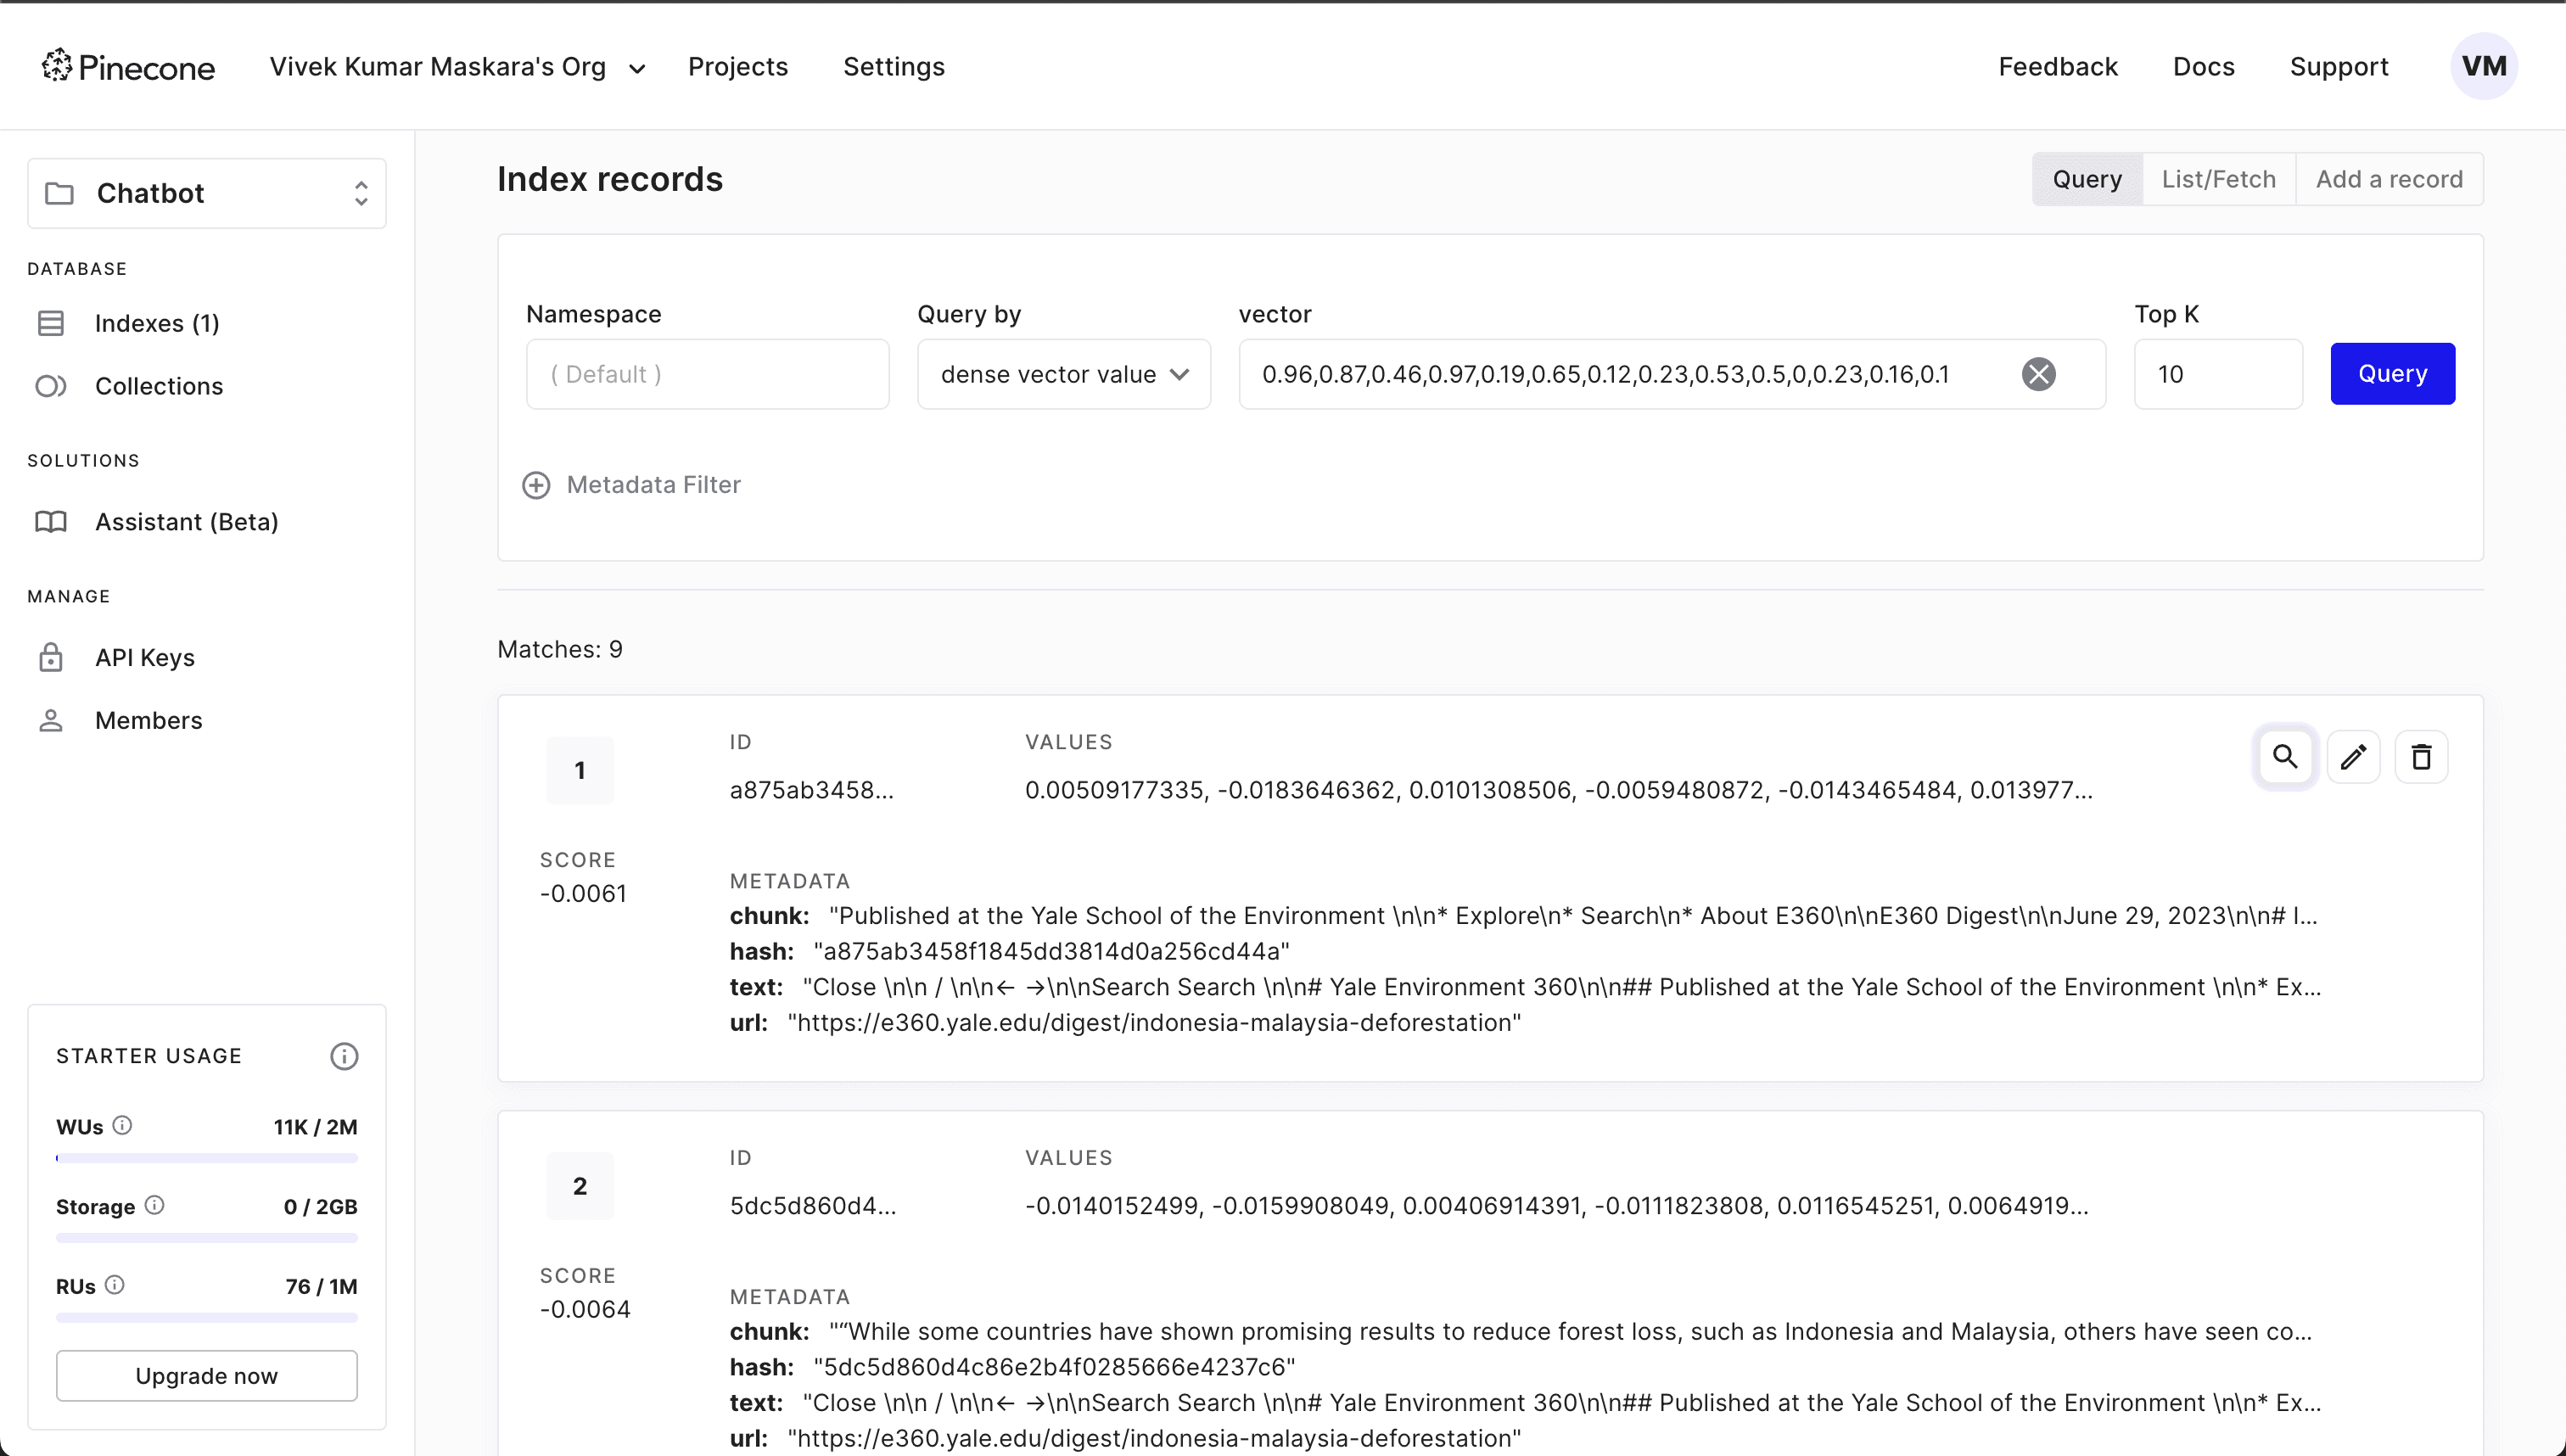
Notice that each index record contains the record ID, a decimal array of VALUES and METADATA with additional fields. Later, you’ll use the METADATA to associate the index record with the user identity for authorization purposes.
In the following sections, you will update this app to add the following features:
Add a site-wide authentication using Descope SDK for NextJS to redirect unauthenticated users to an OpenID Connect (OIDC) login page before allowing them to access the application.
Add an input field instead of hardcoded URLs to allow users to seed the knowledge base with any web page.
Add ReBAC authorization and link user identity with URLs so that only authorized users can access their links.
Installing NPM dependencies
You need to add a dependency to the Descope SDK for NextJS to add authentication to your RAG app. Install the library using the following command:
yarn add @descope/nextjs-sdk

# or using NPM
npm install @descope/nextjs-sdk
Use the Descope SDK for Node.js to integrate authorization into the app. This SDK operates on the server side (in the Next.js API layer) and the Descope management APIs for ReBAC operations. Install the SDK using the following command:
yarn add @descope/node-sdk

# or using NPM
npm install @descope/node-sdk
Configuring Descope
Before you can integrate Descope authentication into your application, you need to create a new authentication flow using the Descope portal.
Log in to the Descope portal and follow their Getting Started guide to create a new flow.
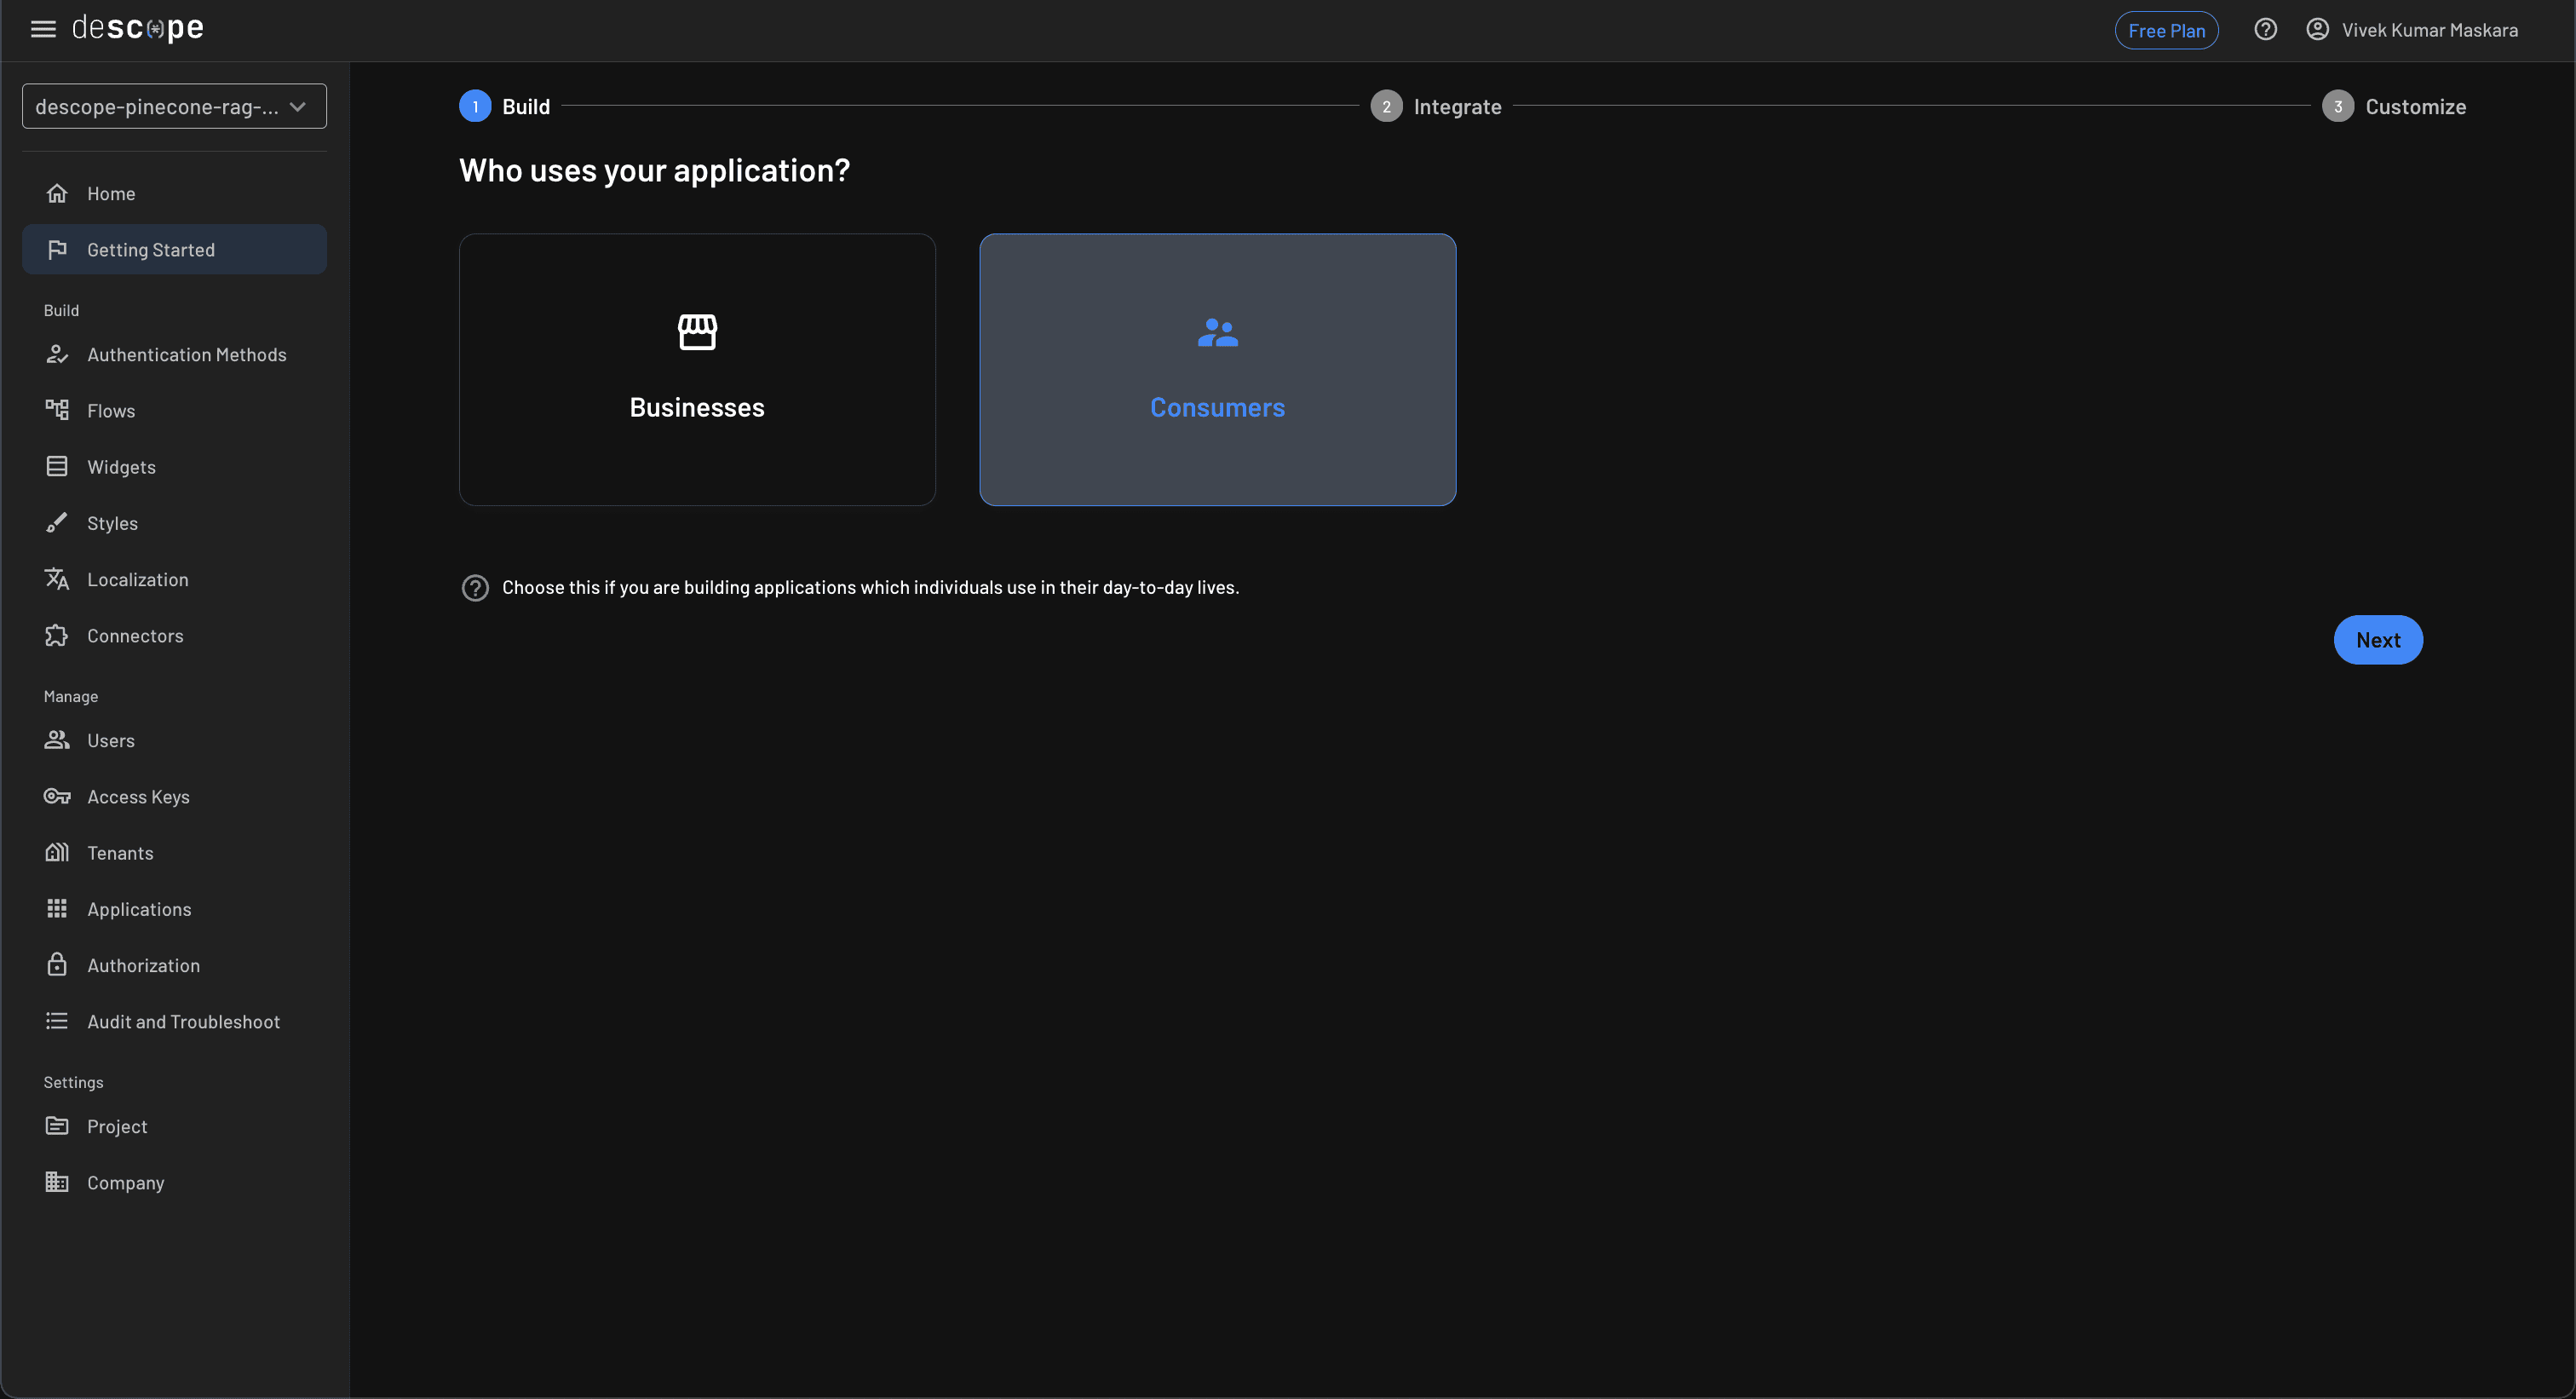
Begin by choosing Consumers as the target audience for your app:
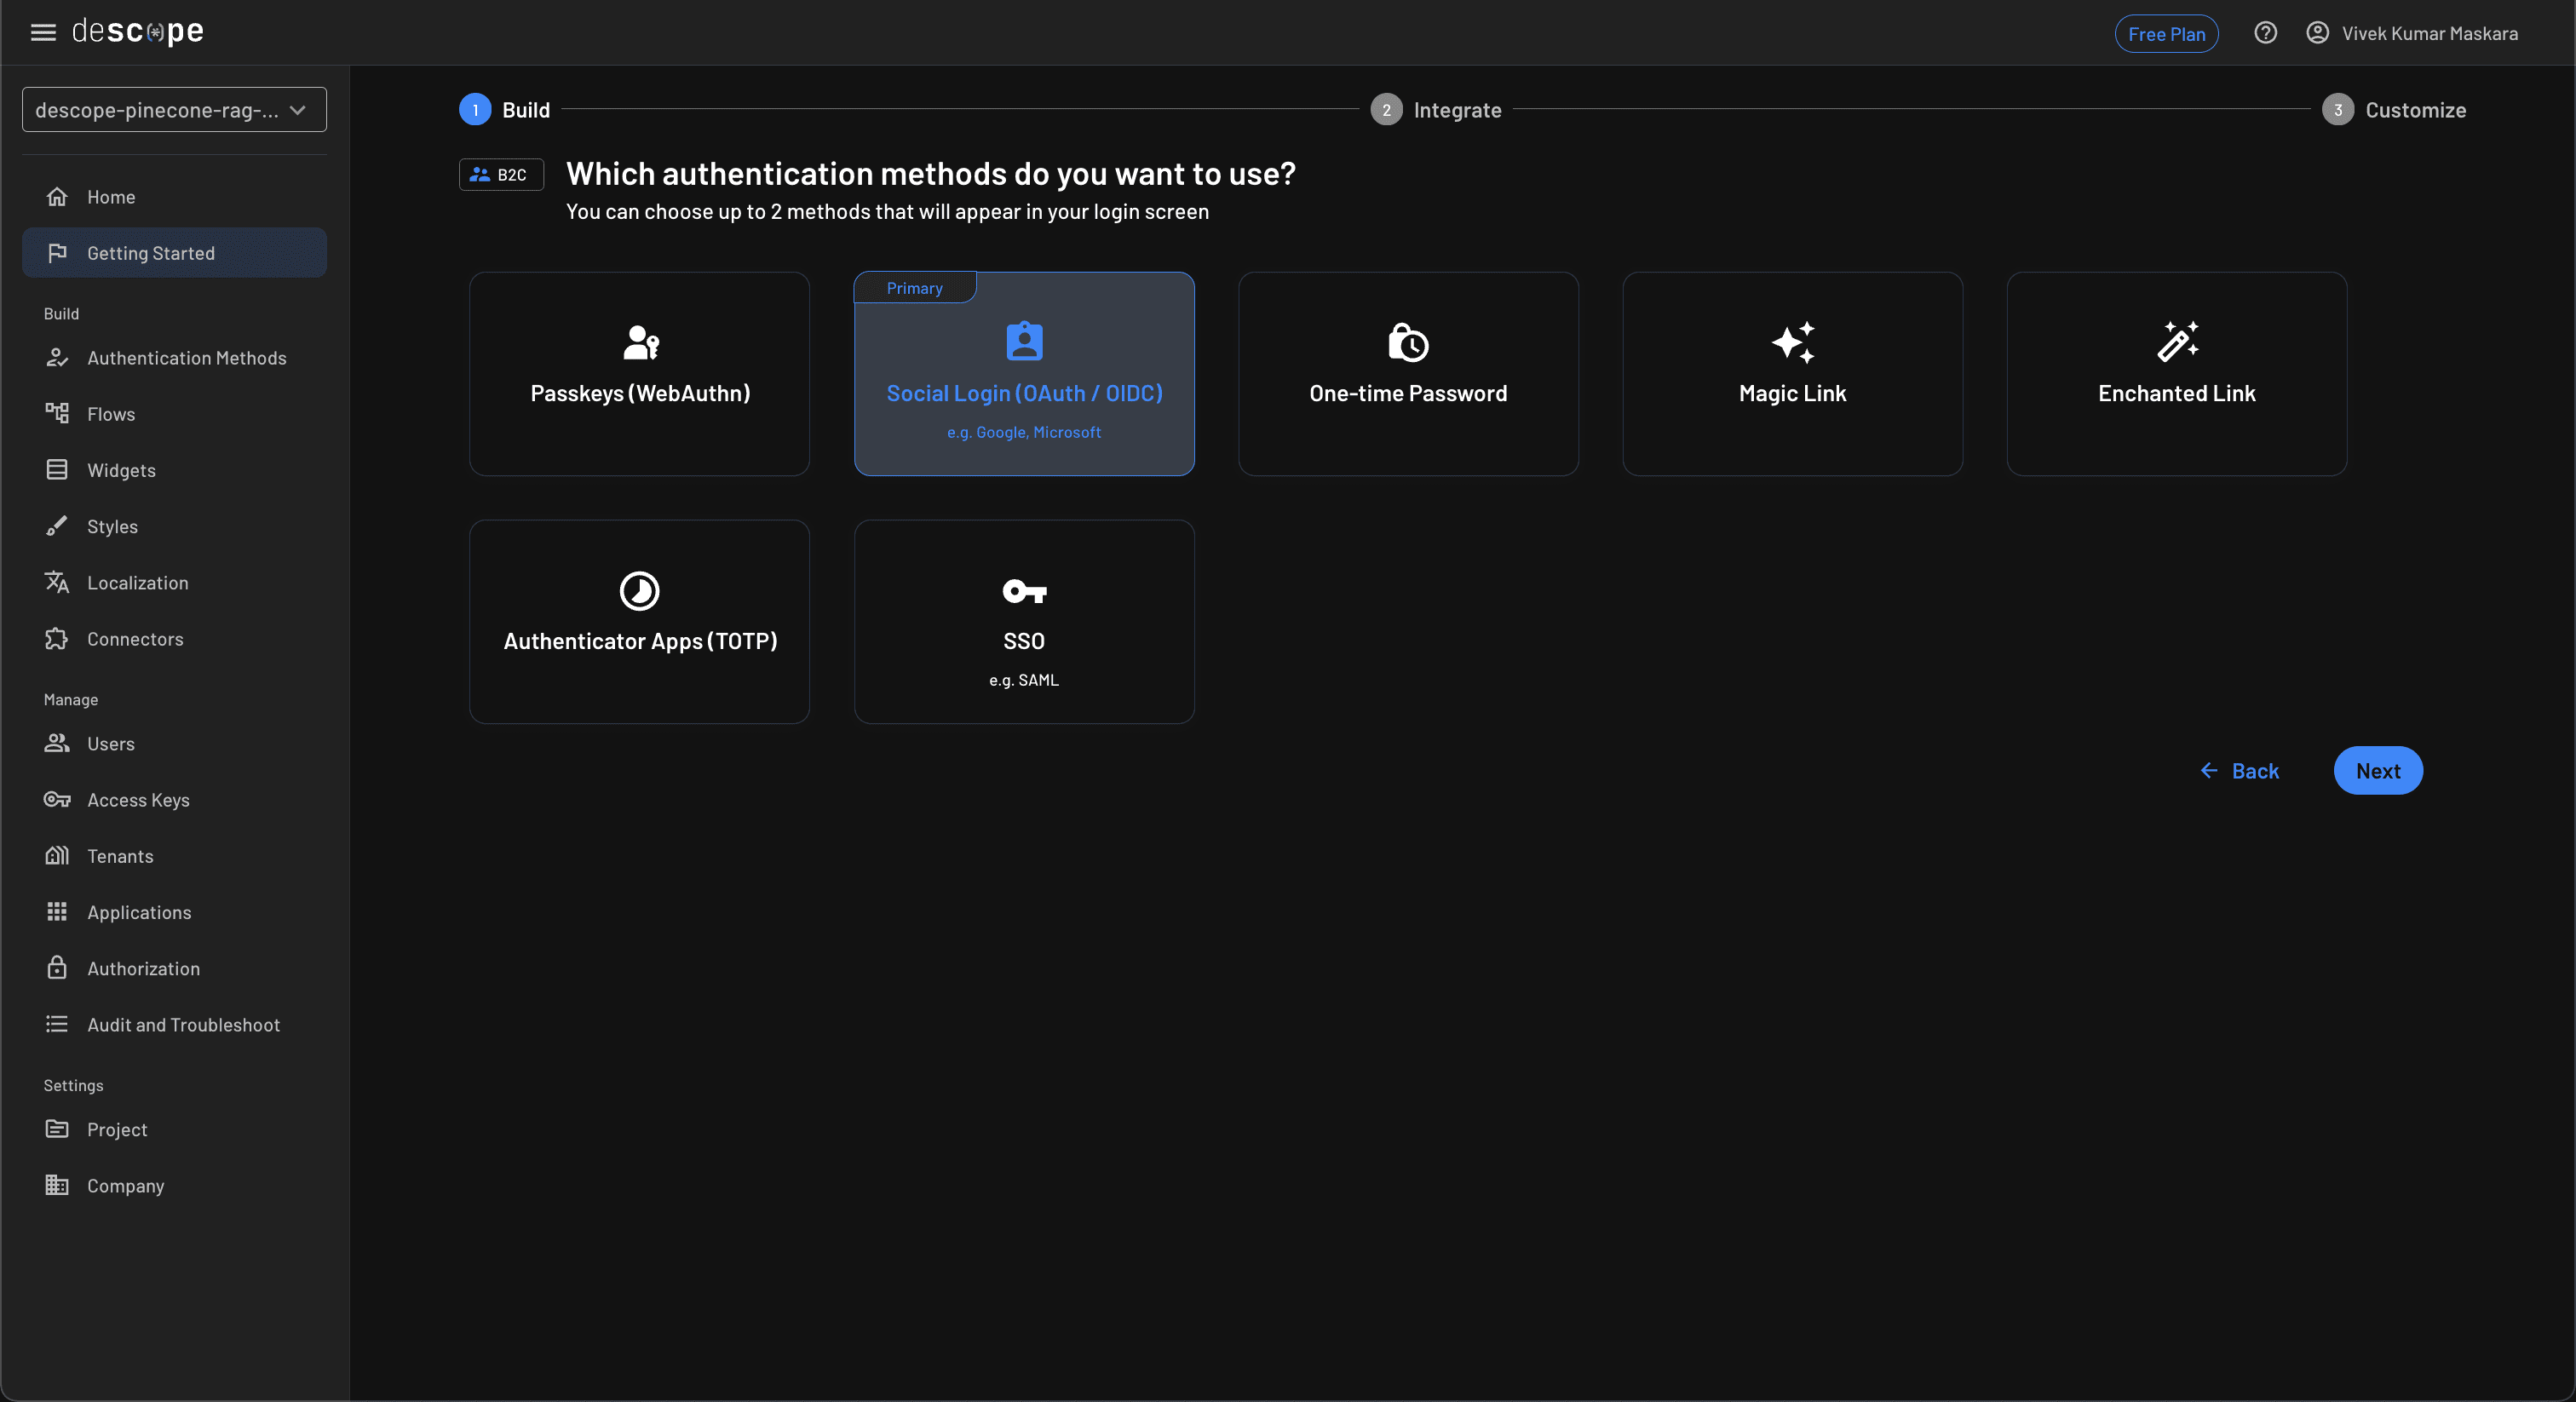
Choose the authentication methods you want to use. In this tutorial, you will use Social Login (OAuth / OIDC) as the authentication method. You can change these settings in the future if you like:
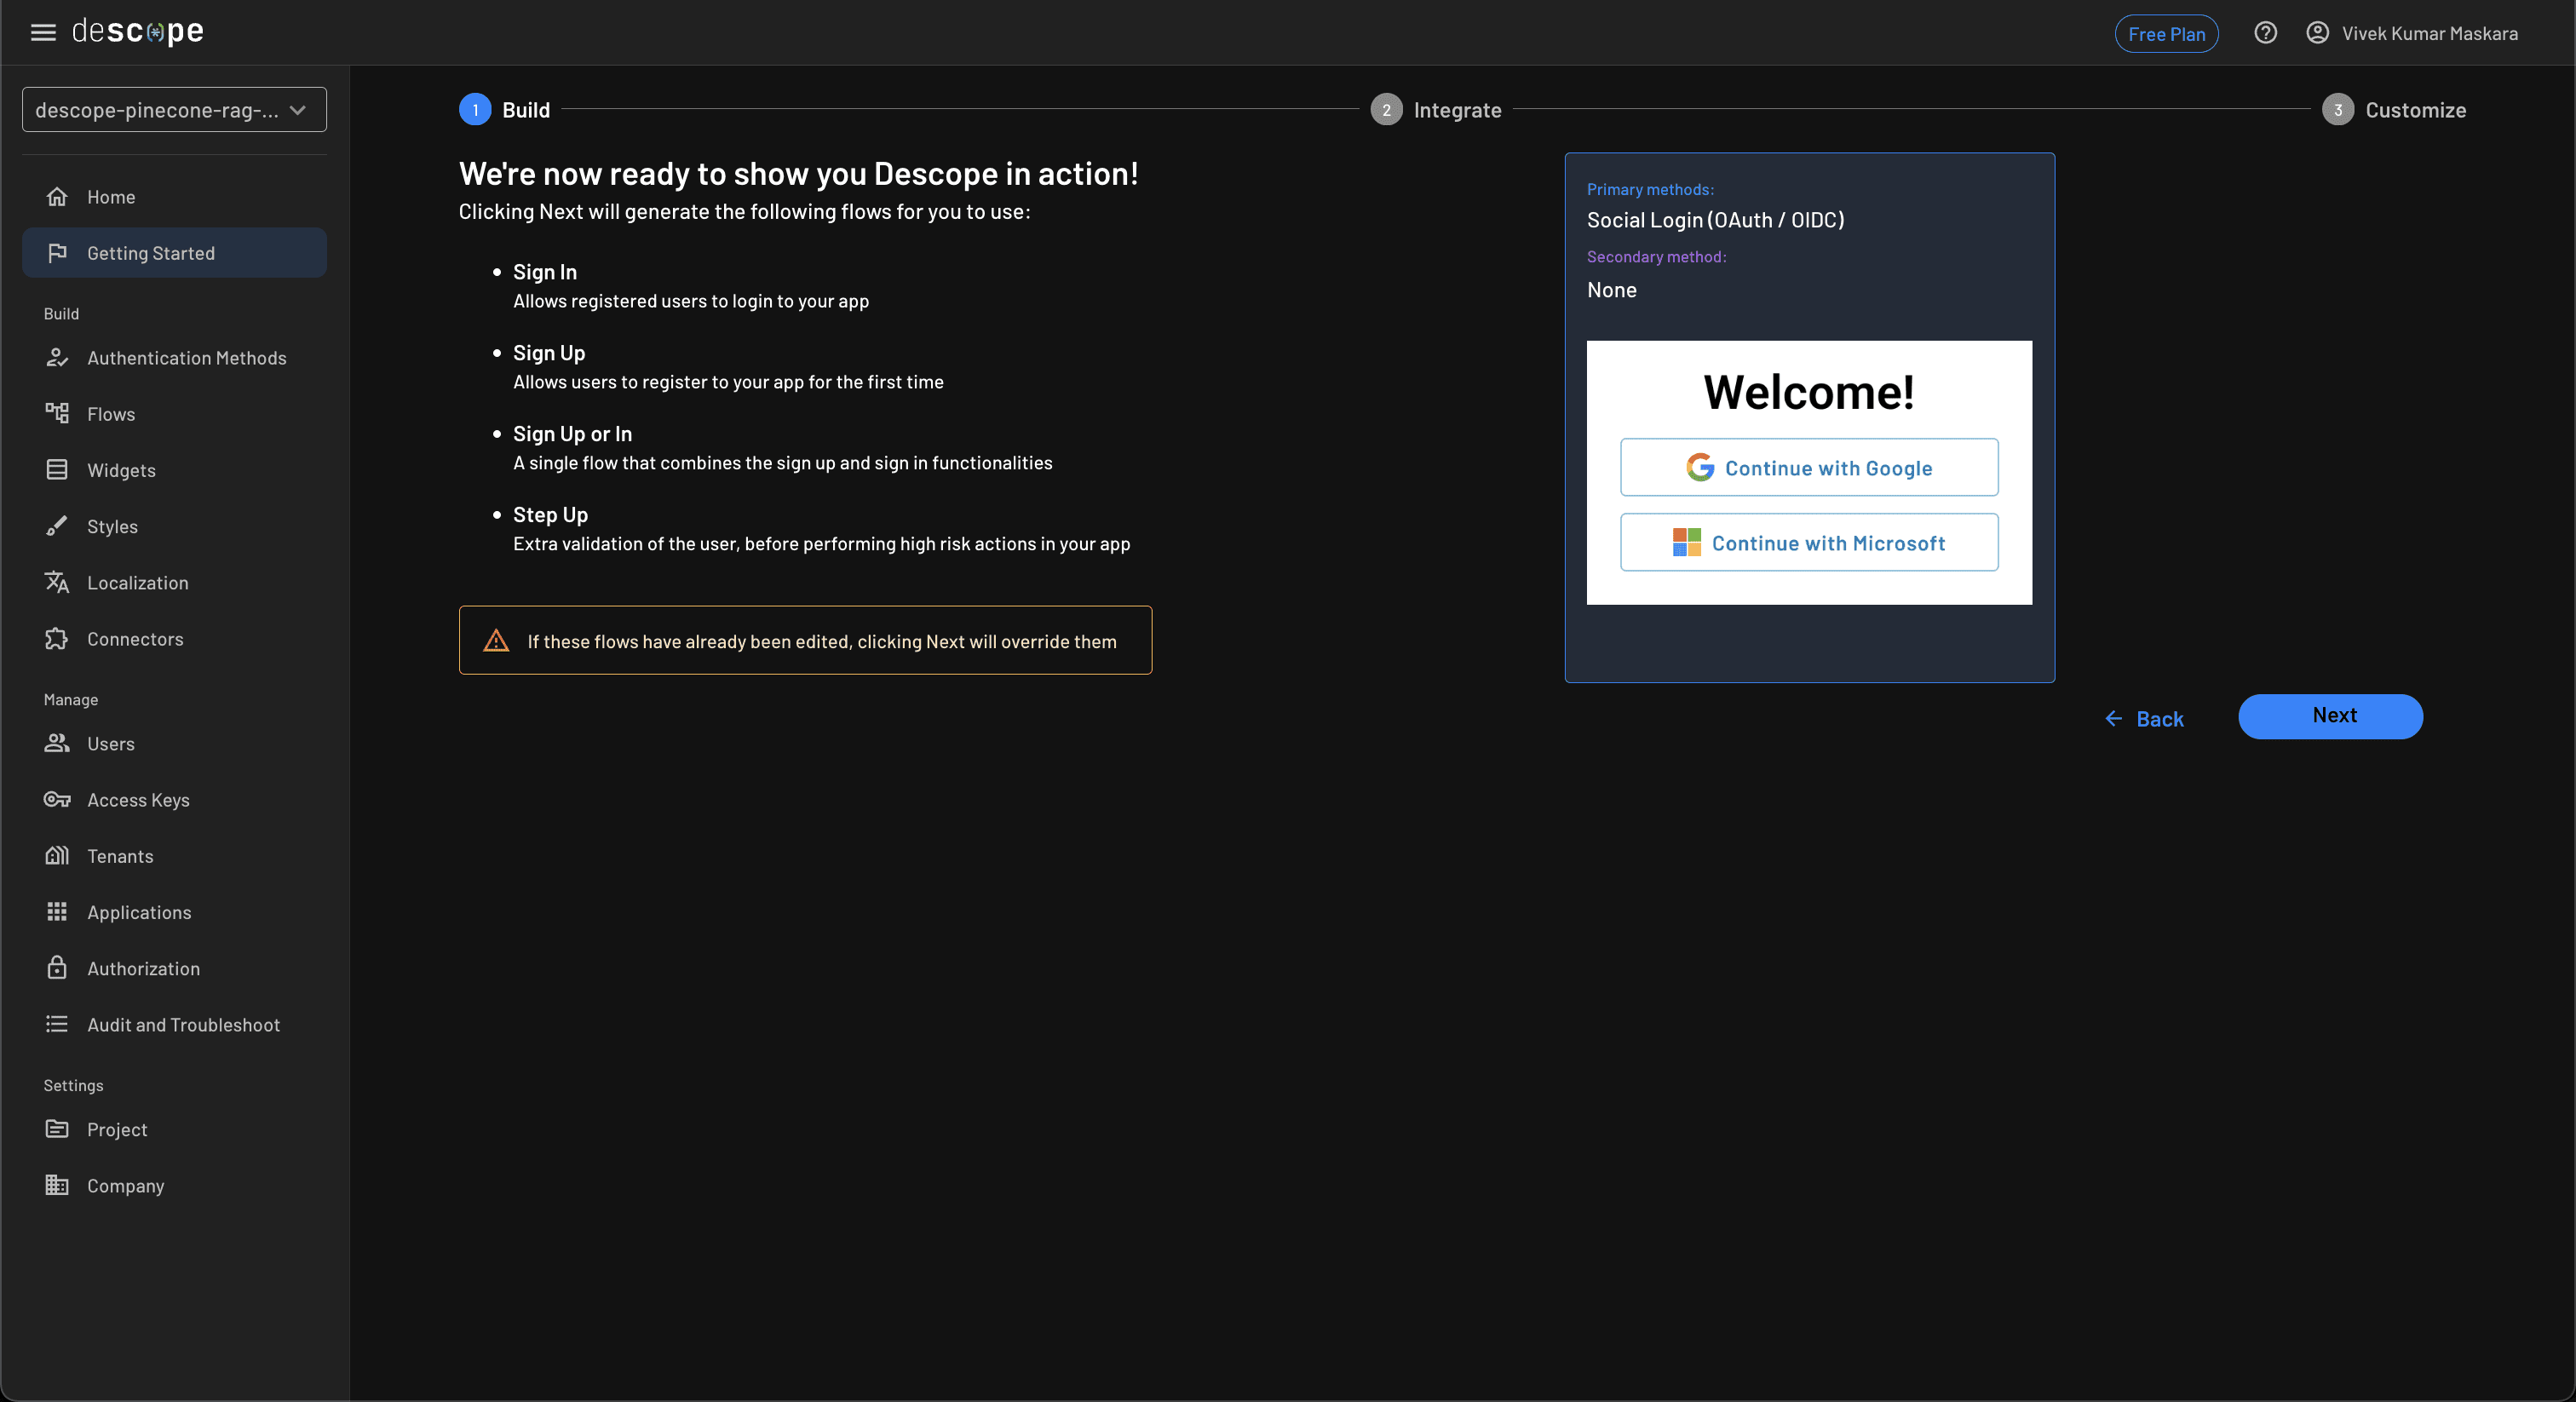
The next step offers you the option of a second authentication method for MFA, but you can skip it for this tutorial by clicking Go ahead without MFA. In the next step, review the selected settings and click Next to generate the chosen authentication flows:
Finally, head over to the Project page and copy the Project ID from it. You need the project ID to initialize the Descope SDK while integrating it with your Next.js app.
Updating the App Router
Start by wrapping your app layout component with the Descope AuthProvider by updating the RootLayout in the src/app/layout.tsx file with the following code snippet:
// import Descope AuthProvider
import { AuthProvider } from '@descope/nextjs-sdk';

export default function RootLayout({
  children,
}: {
  children: React.ReactNode;
}) {
  return (
    <AuthProvider projectId={process.env.NEXT_PUBLIC_DESCOPE_PROJECT_ID as string}>
      <html lang="en">
        <body>{children}</body>
      </html>
    </AuthProvider>
  );
}
Please make sure to add the NEXT_PUBLIC_DESCOPE_PROJECT_ID environment variable to the .env file using the project ID you obtained in the previous step as its value.
Using the Descope component to render the auth flow
The Descope SDK for NextJS provides the Descope component, which can render the authentication flows. The component accepts the flowId parameter and uses it to render the desired flow. The flowId value should match the ID for one of the flows defined in your Descope project.
Update the src/app/page.tsx file with the following code snippet:
"use client";

import React, { useEffect, useRef, useState, FormEvent } from "react";
import { Context } from "@/components/Context";
import Header from "@/components/Header";
import Chat from "@/components/Chat";
import { useChat } from "ai/react";
import { Descope } from '@descope/nextjs-sdk';
import { useSession, useUser } from '@descope/nextjs-sdk/client';

const Page: React.FC = () => {
  const [gotMessages, setGotMessages] = useState(false);
  const [context, setContext] = useState<string[] | null>(null);

  // useUser retrieves the logged in user information
  const { user, isUserLoading } = useUser();
  // useDescope retrieves Descope SDK for further operations related to authentication
  // such as logout

  const { messages, input, handleInputChange, handleSubmit } = useChat({
    sendExtraMessageFields: true,
    body: {
      userId: user?.userId,
    },
    onFinish: async () => {
      setGotMessages(true);
    },
  });

  const prevMessagesLengthRef = useRef(messages.length);

  const handleMessageSubmit = async (e: FormEvent<HTMLFormElement>) => {
    e.preventDefault();
    handleSubmit(e);
    setContext(null);
    setGotMessages(false);
  };


  useEffect(() => {
    const getContext = async () => {
      const response = await fetch("/api/context", {
        method: "POST",
        body: JSON.stringify({
          messages,
          userId: user.userId,
        }),
      });
      const { context } = await response.json();
      setContext(context.map((c: any) => c.id));
    };
    if (gotMessages && messages.length >= prevMessagesLengthRef.current) {
      getContext();
    }

    prevMessagesLengthRef.current = messages.length;
  }, [user, messages, gotMessages]);

  const { isAuthenticated, isSessionLoading } = useSession();

  if (isSessionLoading || isUserLoading) {
    return <p>Loading...</p>;
  }

  if (!isAuthenticated) {
    return (
      <div className="max-w-xl mx-auto">
        <Descope
          debug={false}
          flowId="sign-up-or-in"
          onSuccess={() => console.log('Logged in!')}
          onError={(error) =>
            console.log('Could not logged in!', error)
          }
          redirectAfterSuccess="/"
        />
      </div>
    );
  }

  return (
    <div className="flex flex-col justify-between h-screen bg-gray-800 p-2 mx-auto max-w-full">
      <Header className="my-5" />
      <div className="flex w-full flex-grow overflow-hidden relative">
        <Chat
          input={input}
          handleInputChange={handleInputChange}
          handleMessageSubmit={handleMessageSubmit}
          messages={messages}
        />
        <div className="absolute transform translate-x-full transition-transform duration-500 ease-in-out right-0 w-2/3 h-full bg-gray-700 overflow-y-auto lg:static lg:translate-x-0 lg:w-2/5 lg:mx-2 rounded-lg">
          <Context className="" selected={context} />
        </div>
        <button
          type="button"
          className="absolute left-20 transform -translate-x-12 bg-gray-800 text-white rounded-l py-2 px-4 lg:hidden"
          onClick={(e) => {
            e.currentTarget.parentElement
              ?.querySelector(".transform")
              ?.classList.toggle("translate-x-full");
          }}
        >
          ☰
        </button>
      </div>
    </div>
  );
};

export default Page;
The preceding code snippet does the following:
It uses the
useSessionhook to fetch the current authentication status.If the user is not authenticated, it renders the
Descopecomponent.If the user is already authenticated, it renders the chatbot component.
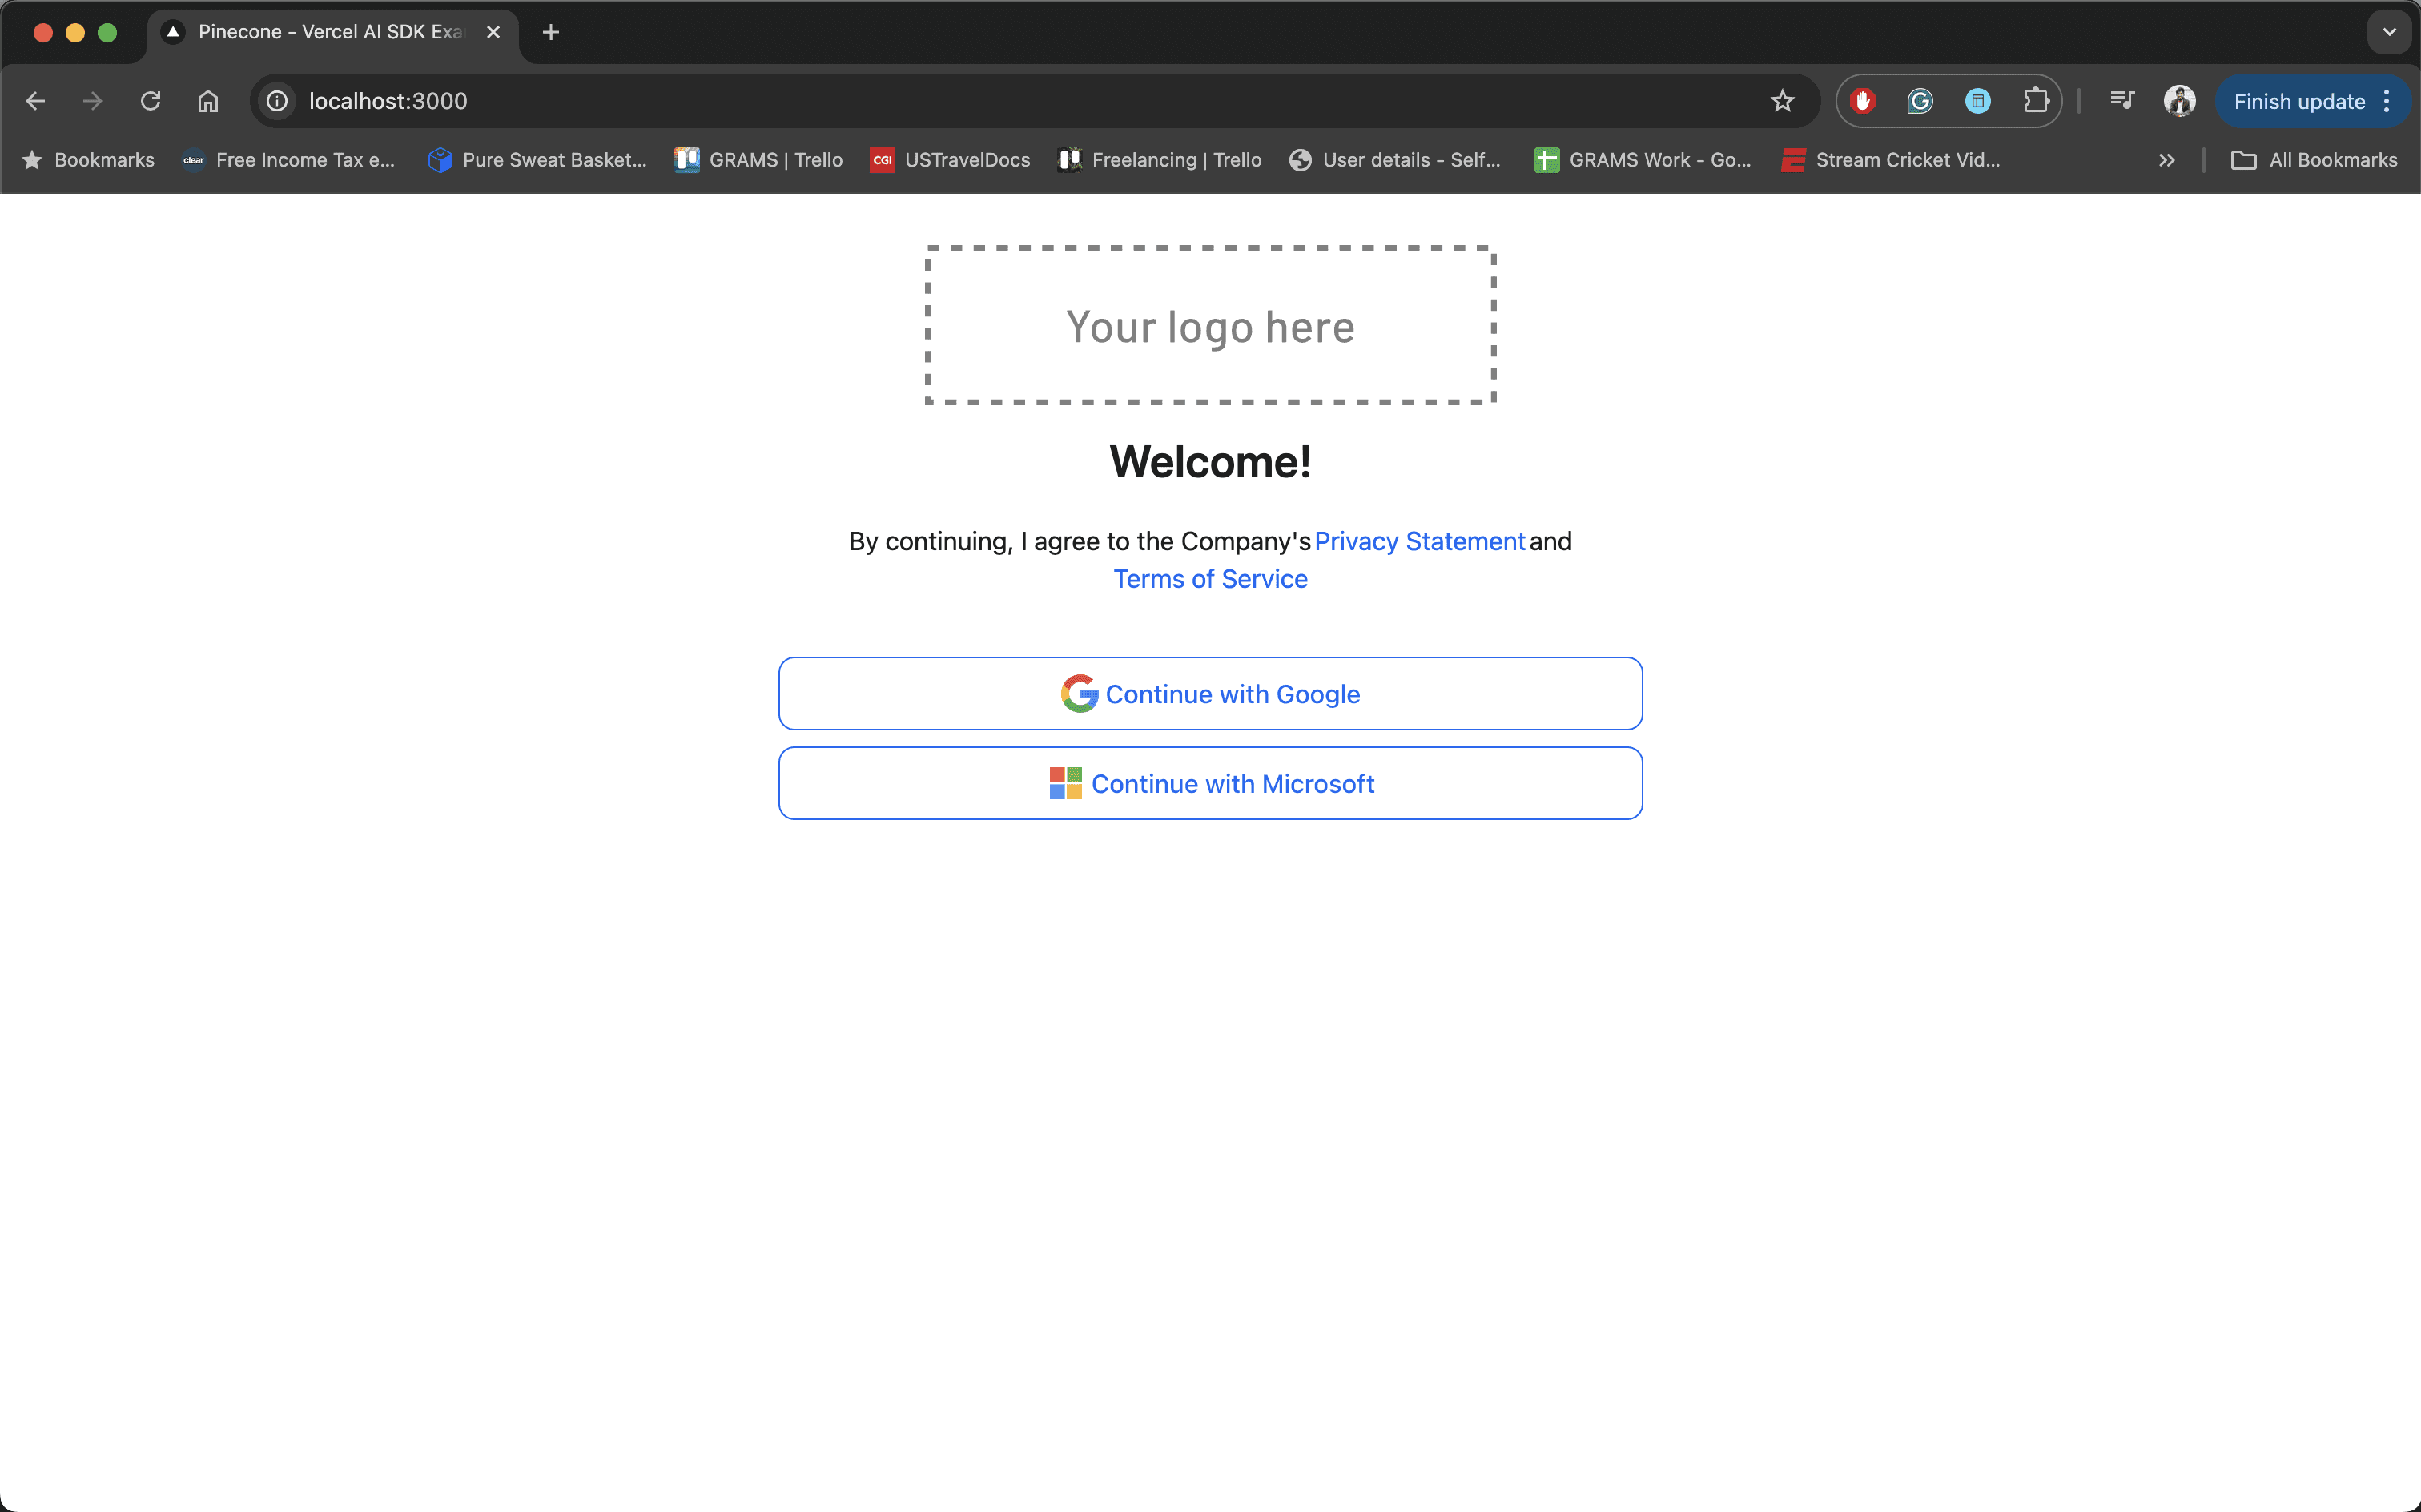
At this point, you can run the application to see the Descope authentication in action. The application redirects you to the OAuth login page for authentication:
Associating user identities during ingestion
In this section, you will update the metadata of Pinecone vector index records to include user identity. By associating the records with user identity, you can enforce authorization later by utilizing post-query filtering.
Updating the API service
Update the embedDocument method in src/app/api/crawl/seed.ts as follows to persist userId in the metadata object:
async function embedDocument(doc: Document, userId: string): Promise<PineconeRecord> {
  try {
    // Generate OpenAI embeddings for the document content
    const embedding = await getEmbeddings(doc.pageContent);

    // Create a hash of the document content
    const hash = md5(doc.pageContent);

    // Return the vector embedding object
    return {
      id: hash, // The ID of the vector is the hash of the document content
      values: embedding, // The vector values are the OpenAI embeddings
      metadata: { // The metadata includes details about the document
        chunk: doc.pageContent, // The chunk of text that the vector represents
        text: doc. metadata.text as string, // The text of the document
        url: doc. metadata.url as string, // The URL where the document was found
        hash: doc. metadata.hash as string, // The hash of the document content
        // Add: userId field to the metadata object
        userId: userId // The user ID of the user who seeded the document
      }
    } as PineconeRecord;
  } catch (error) {
    console.log("Error embedding document: ", error)
    throw error
  }
}
You also need to make changes in a few other places to pass the userId field to this function:
Update the
seedfunction insrc/app/api/crawl/seed.tsto start accepting theuserIdparameter and pass it to theembedDocumentfunction when it is invoked. You can refer to the function signature and embed document invocation to understand the required changes.Update the
POSTroute insrc/app/api/crawl/route.tsto parseuserIdfrom the JSON payload and pass it to theseedfunction when it is invoked. Use the updated file on GitHub for reference.Update the
crawlDocumentmethod insrc/app/components/Context/utils.tsto start accepting theuserIdparameter and use it in thePOSTrequest body. Refer to the file on GitHub to view the updated function.
Updating the frontend
The Context component in the starter code contains hardcoded URLs that you can click to crawl. Clicking a URL invokes the crawlDocument function, which uses the /api/crawl API to crawl the web page. Update src/app/components/Context/index.tsx with the following code snippet to add an input field to this component for indexing any web URL and update the crawlDocument method call to pass the userId parameter that you added already:
import React, { ChangeEvent, useEffect, useState } from "react";
import UrlButton from "./UrlButton";
import { Card, ICard } from "./Card";
import { clearIndex, crawlDocument } from "./utils";

import { Button } from "./Button";
import { useUser } from "@descope/nextjs-sdk/client";
interface ContextProps {
  className: string;
  selected: string[] | null;
}

export const Context: React.FC<ContextProps> = ({ className, selected }) => {
  const [entries, setEntries] = useState([]);
  const [cards, setCards] = useState<ICard[]>([]);

  const { user, isUserLoading } = useUser();
  const [documentUrl, setDocumentUrl] = useState("");

  const [splittingMethod, setSplittingMethod] = useState("markdown");
  const [chunkSize, setChunkSize] = useState(256);
  const [overlap, setOverlap] = useState(1);

  // Scroll to the selected card
  useEffect(() => {
    const element = selected && document.getElementById(selected[0]);
    element?.scrollIntoView({ behavior: "smooth" });
  }, [selected]);

  const DropdownLabel: React.FC<
    React.PropsWithChildren<{ htmlFor: string }>
  > = ({ htmlFor, children }) => (
    <label htmlFor={htmlFor} className="text-white p-2 font-bold">
      {children}
    </label>
  );

  const buttons = entries.map((entry, key) => (
    <div className="" key={`${key}-${entry.loading}`}>
      <UrlButton
        entry={entry}
        onClick={() =>
          crawlDocument(
            entry.url,
            user?.userId || "",
            setEntries,
            setCards,
            splittingMethod,
            chunkSize,
            overlap
          )
        }
      />
    </div>
  ));

  return (
    <div
      className={`flex flex-col border-2 overflow-y-auto rounded-lg border-gray-500 w-full ${className}`}
    >
      <div className="flex flex-wrap w-full">{buttons}</div>

      <div className="flex flex-col items-start sticky top-0 w-full">
        <div className="text-left w-full flex flex-col rounded-b-lg bg-gray-600 p-3 subpixel-antialiased">
          <DropdownLabel htmlFor="splittingMethod">
            Splitting Method:
          </DropdownLabel>
          <div className="relative w-full">
            <select
              id="splittingMethod"
              value={splittingMethod}
              className="p-2 bg-gray-700 rounded text-white w-full appearance-none hover:cursor-pointer"
              onChange={(e) => setSplittingMethod(e.target.value)}
            >
              <option value="recursive">Recursive Text Splitting</option>
              <option value="markdown">Markdown Splitting</option>
            </select>
          </div>
          {splittingMethod === "recursive" && (
            <div className="my-4 flex flex-col">
              <div className="flex flex-col w-full">
                <DropdownLabel htmlFor="chunkSize">
                  Chunk Size: {chunkSize}
                </DropdownLabel>
                <input
                  className="p-2 bg-gray-700 text-white"
                  type="range"
                  id="chunkSize"
                  min={1}
                  max={2048}
                  onChange={(e) => setChunkSize(parseInt(e.target.value))}
                />
              </div>
              <div className="flex flex-col w-full">
                <DropdownLabel htmlFor="overlap">
                  Overlap: {overlap}
                </DropdownLabel>
                <input
                  className="p-2 bg-gray-700 text-white"
                  type="range"
                  id="overlap"
                  min={1}
                  max={200}
                  onChange={(e) => setOverlap(parseInt(e.target.value))}
                />
              </div>
            </div>
          )}

          <DropdownLabel htmlFor="documentUrl">Document URL:</DropdownLabel>

          <input
            className="p-2 bg-gray-700 w-full text-white"
            type="text"
            placeholder="https://example.com"
            value={documentUrl}
            onChange={(e: ChangeEvent<HTMLInputElement>) =>
              setDocumentUrl(e.target.value)
            }
          />
          <Button
            className="w-full my-2 uppercase active:scale-[98%] transition-transform duration-100"
            style={{
              backgroundColor: "#4f6574",
              color: "white",
            }}
            onClick={async () => {
              crawlDocument(
                documentUrl,
                user?.userId || "",
                setEntries,
                setCards,
                splittingMethod,
                chunkSize,
                overlap
              )
      // Fetch user <> document relations. We will define this function later in the tutorial.
              await fetchRelations();
            }
            }
          >
            Index Document
          </Button>
          <Button
            className="w-full my-2 uppercase active:scale-[98%] transition-transform duration-100"
            style={{
              backgroundColor: "#4f6574",
              color: "white",
            }}
            onClick={() => clearIndex(setEntries, setCards)}
          >
            Clear Index
          </Button>
        </div>
      </div>
      <div className="flex flex-wrap w-full">
        {cards &&
          cards.map((card, key) => (
            <Card key={key} card={card} selected={selected} />
          ))}
      </div>
    </div>
  );
};
The code snippet makes the following changes:
Adds a text input field to let the user enter a URL to be crawled.
Passes the
userIdfield to thecrawlDocumentfunction call.
These changes ensure that the userId field is persisted in the metadata of every vector index record. In later sections, you will use this to enforce access control.
Using directory service to manage user-document relationships
The Descope directory service lets you set permissions that evolve in real time, enabling you to implement ReBAC in the application. For example, you can associate a URL with the user who requested that web page to be crawled. This information can be used to retrieve URLs that the logged-in user has engaged with in the past. These URLs can be displayed on the dashboard instead of hardcoded URLs. The following section focuses on the implementation steps, and you can refer to the Descope guide for details about how schema and relations work.
Defining a schema
A schema defines the type of entities and possible relationships that you want to support. For example, you can create a schema for documents and define relationships for different access levels, such as owner and viewer. You now use the Descope management APIs to create a document schema that defines owner and viewer relationships.
Create a scripts/schema.json file to define the schema structure:
{
  "version": "1.0",
  "namespaces": [
    {
      "name": "document",
      "relationDefinitions": [
        {
          "name": "owner",
          "type": "string",
          "description": "The owner of the document"
        },
        {
          "name": "viewer",
          "type": "string",
          "description": "Users who can view the document"
        }
      ]
    }
  ]
}
Next, create a scripts/createSchema.js script that uses the DescopeClient client to create the schema:
import DescopeClient from '@descope/node-sdk';
import fs from 'fs';
import dotenv from 'dotenv';

// Load environment variables from .env file
dotenv.config({
    path: "../.env"
});

const descopeClient = DescopeClient({
    projectId: process.env.NEXT_PUBLIC_DESCOPE_PROJECT_ID,
    managementKey: process.env.DESCOPE_MANAGEMENT_KEY
});

async function createSchema() {
    try {
        //  baseUrl="<URL>" // When initializing the Descope clientyou can also configure the baseUrl ex: https://auth.company.com  - this is useful when you utilize CNAME within your Descope project.

        const file = fs.readFileSync("schema.json", 'utf8'); // Read the file
        const schema = JSON.parse(file); // Parse the file into a schema object
        const upgrade = false; // Don't delete existing parts of the schema that are not specified in the inputted yaml file

        const response = await descopeClient.management.authz.saveSchema(schema, upgrade);

        console.log("Schema saved successfully: " + JSON.stringify(response));
    } catch (error) {
        // handle the error
        console.log("failed to initialize: " + error)
    }
}

await createSchema()=
Add DESCOPE_MANAGEMENT_KEY environment variable to the .env file. You can create a management key from the Descope Company Settings page.
The createSchema.js script uses fs and @descope/node-sdk dependencies. Create a scripts/package.json file to define these dependencies:
{
    "name": "descope-scripts",
    "version": "0.1.0",
    "private": true,
    "type": "module",
    "dependencies": {
        "@descope/node-sdk": "^1.6.8",
        "dotenv": "^16.4.5",
        "fs": "^0.0.1-security"
    }
}
Navigate to the scripts directory and install the module dependencies by executing the following command:
yarn install

# or using NPM
npm install
Finally, create the schema by executing the createSchema.js script as follows:
node createSchema.jsAfter creating the schema, you get the following success message:
Schema saved successfully: {"code":200,"ok":true,"response":{"size":0,"timeout":0},"data":{}}Creating a user-document relationship
A Descope relationship enables you to create links between specific entities based on your defined schema. Once a schema has been defined, you can use it to create relations between resources and targets, such as documents and users. Define a relationship between the user and the URL to be crawled by adding the createRelation method in the src/app/api/crawl/seed.ts file:
// import Descope NodeJS SDK
import DescopeClient from '@descope/node-sdk';

async function createRelation(userId: string, docUrl: string) {
  try {
    const descopeClient = DescopeClient({
      projectId: process.env.NEXT_PUBLIC_DESCOPE_PROJECT_ID as string,
      managementKey: process.env.DESCOPE_MANAGEMENT_KEY as string
    });

    const relations = [{
      resource: docUrl,
      relationDefinition: 'owner',
      namespace: 'document',
      target: userId,
    }];

    await descopeClient.management.authz.createRelations(relations);
  } catch (error) {
    console.log("failed to initialize: " + error)
  }
}
Notice that the code snippet sets the user as the owner of the document while creating the relationship. You can extend this method to create additional relationships based on your application’s needs. For example, instead of creating a user-document relationship, you might want to create a role-document relationship to enable document sharing across users of a particular role.
Next, call this method from the seed function to establish a relationship whenever a new web page is crawled:
async function seed(url: string,
  userId: string,
  ...)
    ...

    //create a relation between the user and the document
    await createRelation(userId, url);
}
Querying user-document relationships
The frontend Context component displays a list of URLs that the user has previously crawled. You can use Descope management APIs to fetch all relationships for a particular userId and use the results to set the URL entries.
Create a src/app/api/docs/route.ts file to define a new endpoint that fetches the user relationships:
import DescopeClient from '@descope/node-sdk';
import { NextResponse } from 'next/server';

export const runtime = 'edge'

export async function POST(req: Request) {
  try {
    const { userId } = await req.json()
    const relations = await getRelations(userId);
    return NextResponse.json({ success: true, relations })
  } catch (e) {
    console.log("failed to fetch relations: " + e)
    return NextResponse.json({ success: false, error: "Failed fetching relations" })
  }
}

async function getRelations(userId: string) {
  try {
    const descopeClient = DescopeClient({
      projectId: process.env.NEXT_PUBLIC_DESCOPE_PROJECT_ID as string,
      managementKey: process.env.DESCOPE_MANAGEMENT_KEY as string
    });

    const relations = await descopeClient.management.authz.targetsRelations([userId]);

    return relations;
  } catch (error) {
    console.log("failed to initialize: " + error)
  }
}
The API uses the management.authz.targetsRelations API to query relationships for a user and returns the result as a JSON object. You can do the following to optimize the performance of these permission checks:
Implement in-memory caching: Implement an in-memory caching mechanism to store user-document relations, reducing the need to repeatedly query Descope management APIs for this information. For better persistence, you could also consider using remote caching options, such as Redis.
Utilize efficient data structures: Use efficient data structures like hash maps or sets to store user-document relationships as they offer faster lookup times than traditional lists or arrays.
Setting context URL buttons
You need to integrate the /api/docs function defined in the previous section with your frontend to show user-linked web URLs as context buttons. To do so, define a new utils.ts function to call the /api/docs API. Add the following code snippet in the src/app/components/Context/utils.ts file:
export async function getRelations(userId: string) {
  const response = await fetch("/api/docs", {
    method: "POST",
    headers: { "Content-Type": "application/json" },
    body: JSON.stringify({ userId }),
  });

  const { relations } = await response.json();

  return relations;
}
Next, add a useEffect hook in the src/app/components/Context/index.tsx component to fetch user relationships and set the URL buttons:
// update import
import { clearIndex, crawlDocument, getRelations } from "./utils";

useEffect(() => {
  fetchRelations();
}, [user, isUserLoading]);

const fetchRelations = async () => {
  if (user && !isUserLoading) {
    const relations = await getRelations(user.userId);

    if (relations) {
      const urls = relations.data.filter((relation: any) => relation.resource && relation.resource.startsWith("http"))
        .map((relation: any) => ({
          url: relation.resource,
          title: relation.resource,
          seeded: false,
          loading: false,
        }));

      setEntries(urls);
    }
  }
}
The preceding code snippet calls the getRelations method defined earlier and uses its output to set the context buttons.
Filtering query results
To enforce access control, the LLM should use only the context from documents that the logged-in user owns. Notice that the /api/context API fetches the context from Pinecone, which is later used when querying information via the LLM. In the previous section, you associated userId with Pinecone vector index records. You can use this metadata to filter the retrieved context. To achieve this, update the getMatchesFromEmbeddings function in src/app/utils/pinecone.ts to the following:
export type Metadata = {
  // add userId attribute to Metadata
  userId: string,
}


const getMatchesFromEmbeddings = async (userId: string, embeddings: number[], topK: number, namespace: string): Promise<ScoredPineconeRecord<Metadata>[]> => {
  ...
  try {
    // Query the index with the defined request
    const queryResult = await pineconeNamespace.query({
      vector: embeddings,
      topK,
      includeMetadata: true,
    })

    // Filter out the matches based on the user ID
    let matches = queryResult.matches || []
    matches = matches.filter(m => m.metadata && m.metadata.userId === userId)

    return matches
  } catch (e) {
    ...
  }
}
You also need to update a few other files to enable the getMatchesFromEmbeddings method to receive the userId:
Update the
getContextmethod in thesrc/app/utils/context.tsfile to start accepting theuserIdparameter and pass it to thegetMatchesFromEmbeddingsfunction call. Refer to the file on GitHub to view the updated function.Update the usage of the
getContextmethod insrc/app/api/context/route.tsto pass theuserIdfield. Refer to the file on GitHub to view the updated function.Update the usage of the
getContextmethod insrc/app/api/chat/route.tsto pass theuserIdfield. Refer to the file on GitHub to view the updated function.
Testing the RAG application
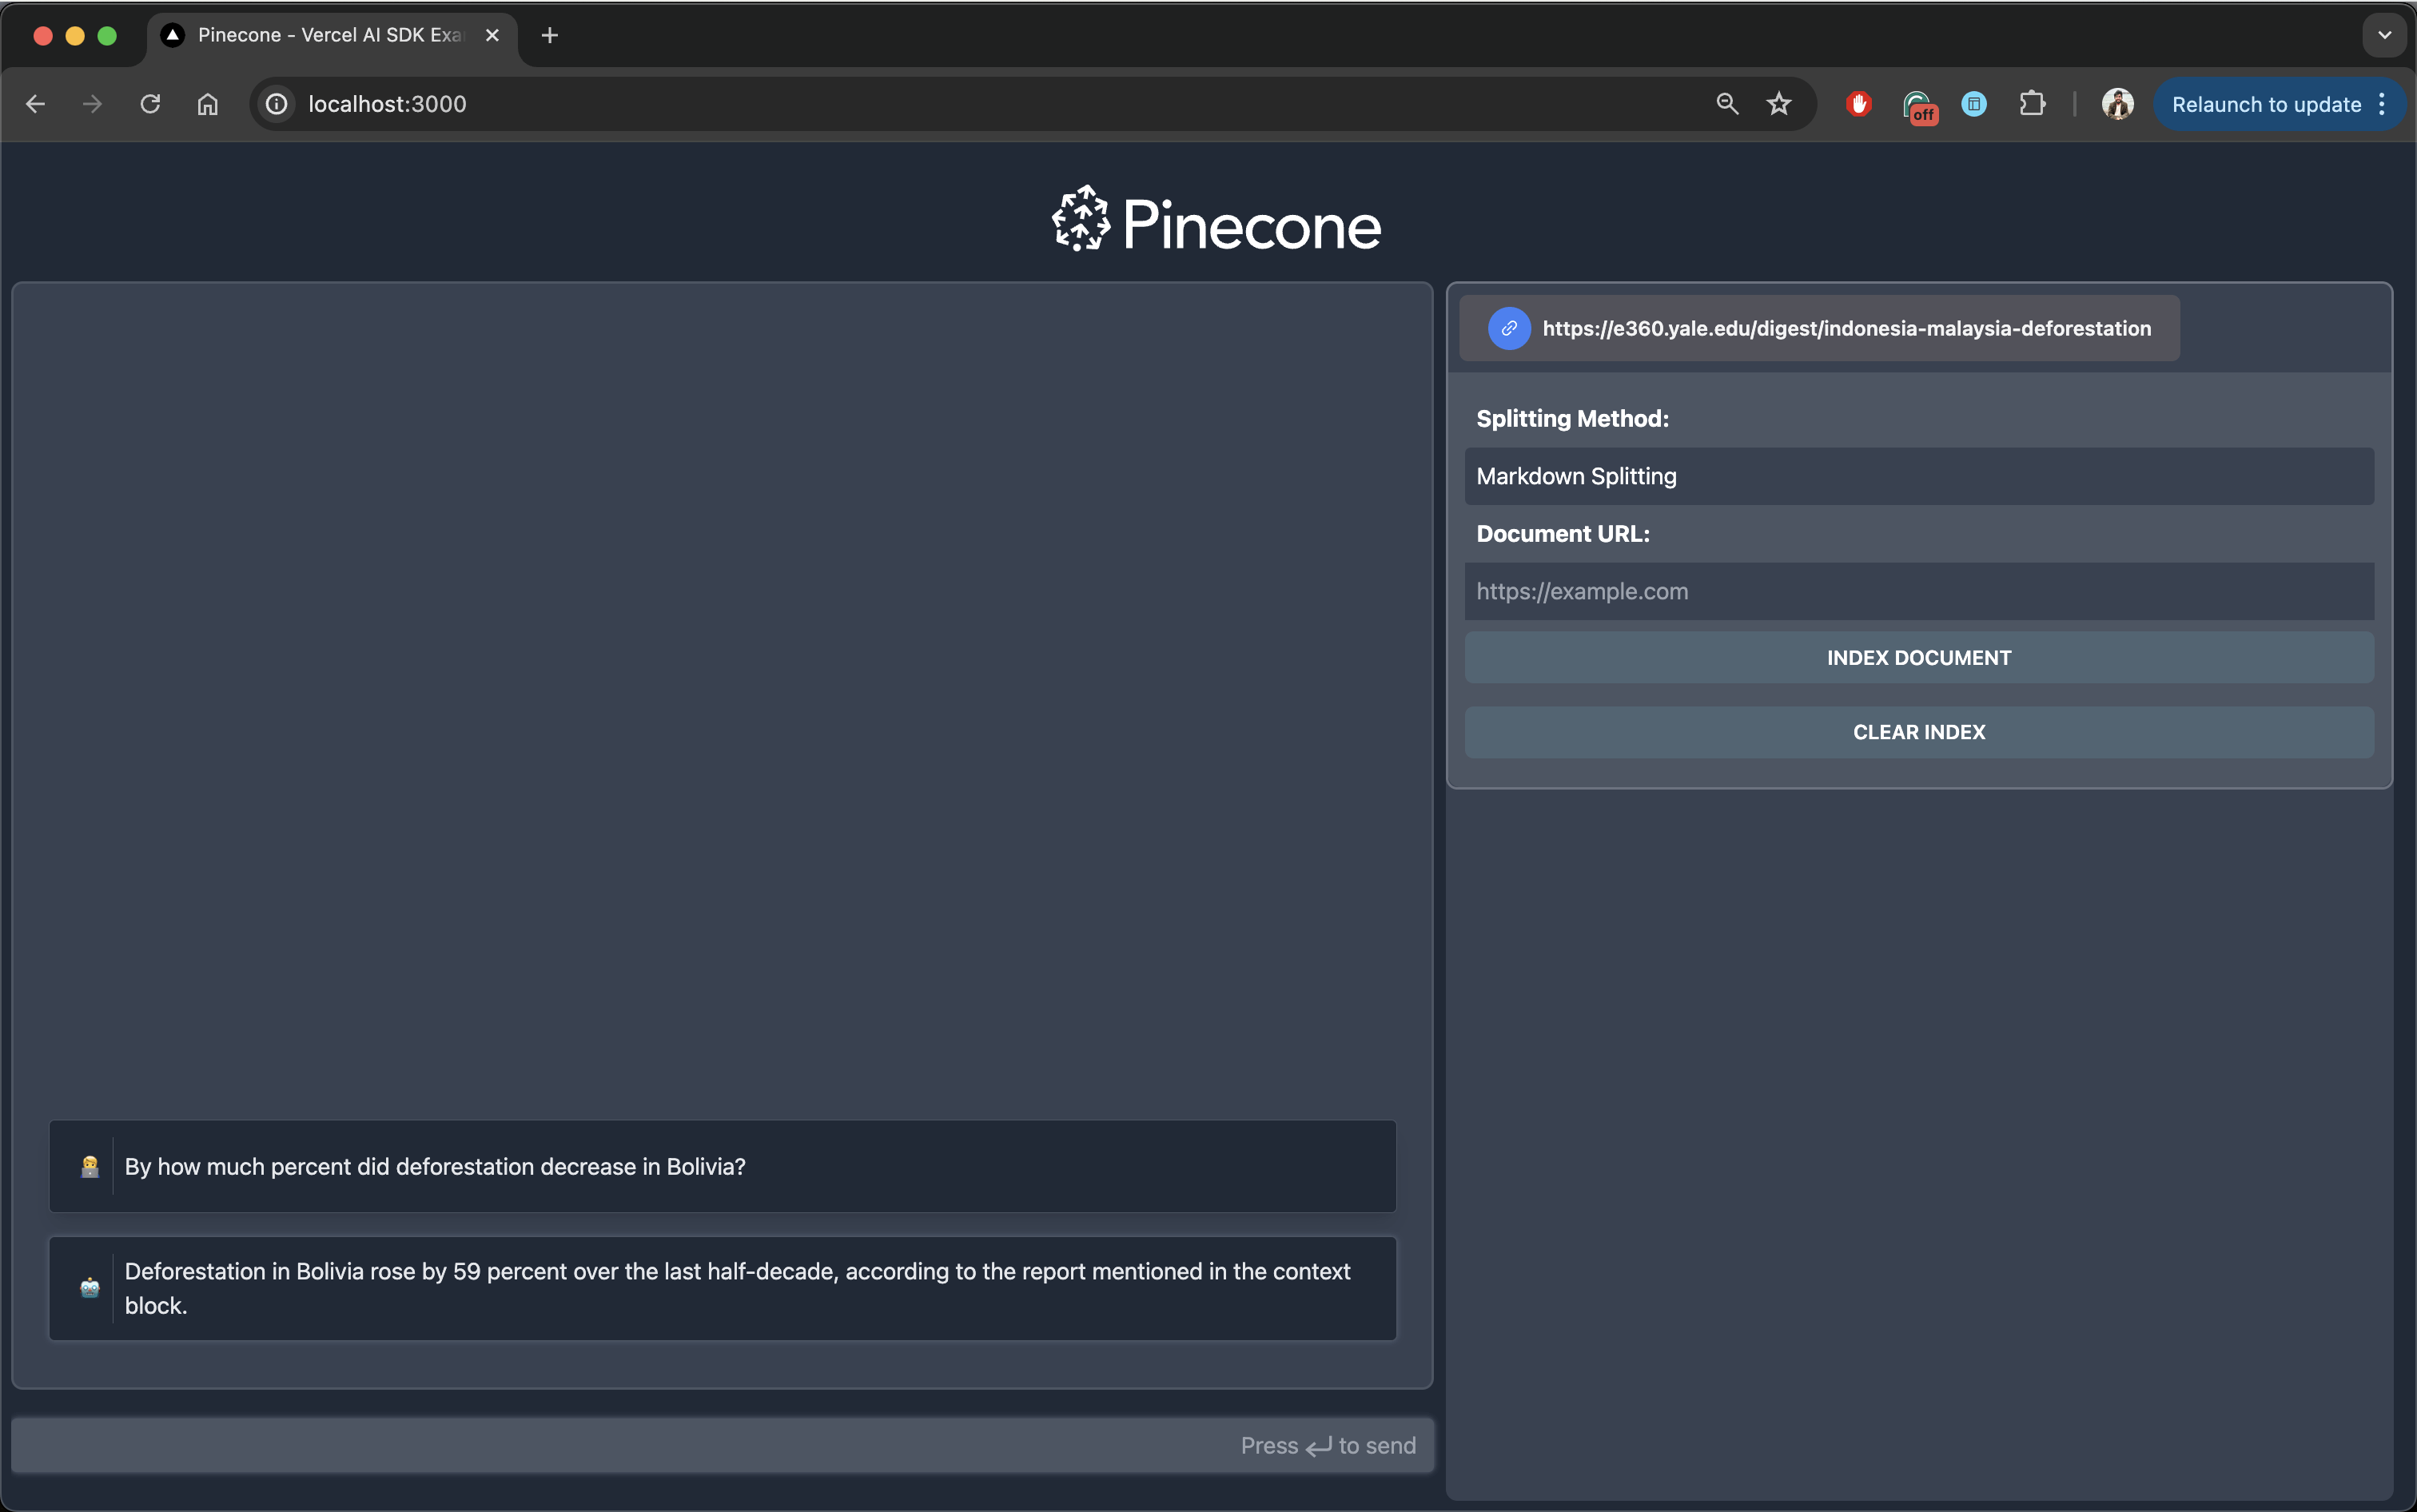
To test the application, log in as user A and index the Yale Environment 360 page on Indonesian and Malaysian deforestation. After performing the indexing, try asking a specific question based on the crawled document. For example, you could ask the following:
By how much percent did deforestation decrease in Bolivia?The LLM would respond with the correct percentage, as mentioned on the web page:
Also, notice that the crawled document appears in the right section of the page. The documents are fetched from Descope based on user-document relationships.
Next, clear the app cookies and log in as user B. Try asking the same question to the LLM again. You will notice that the LLM is no longer able to return an accurate response:
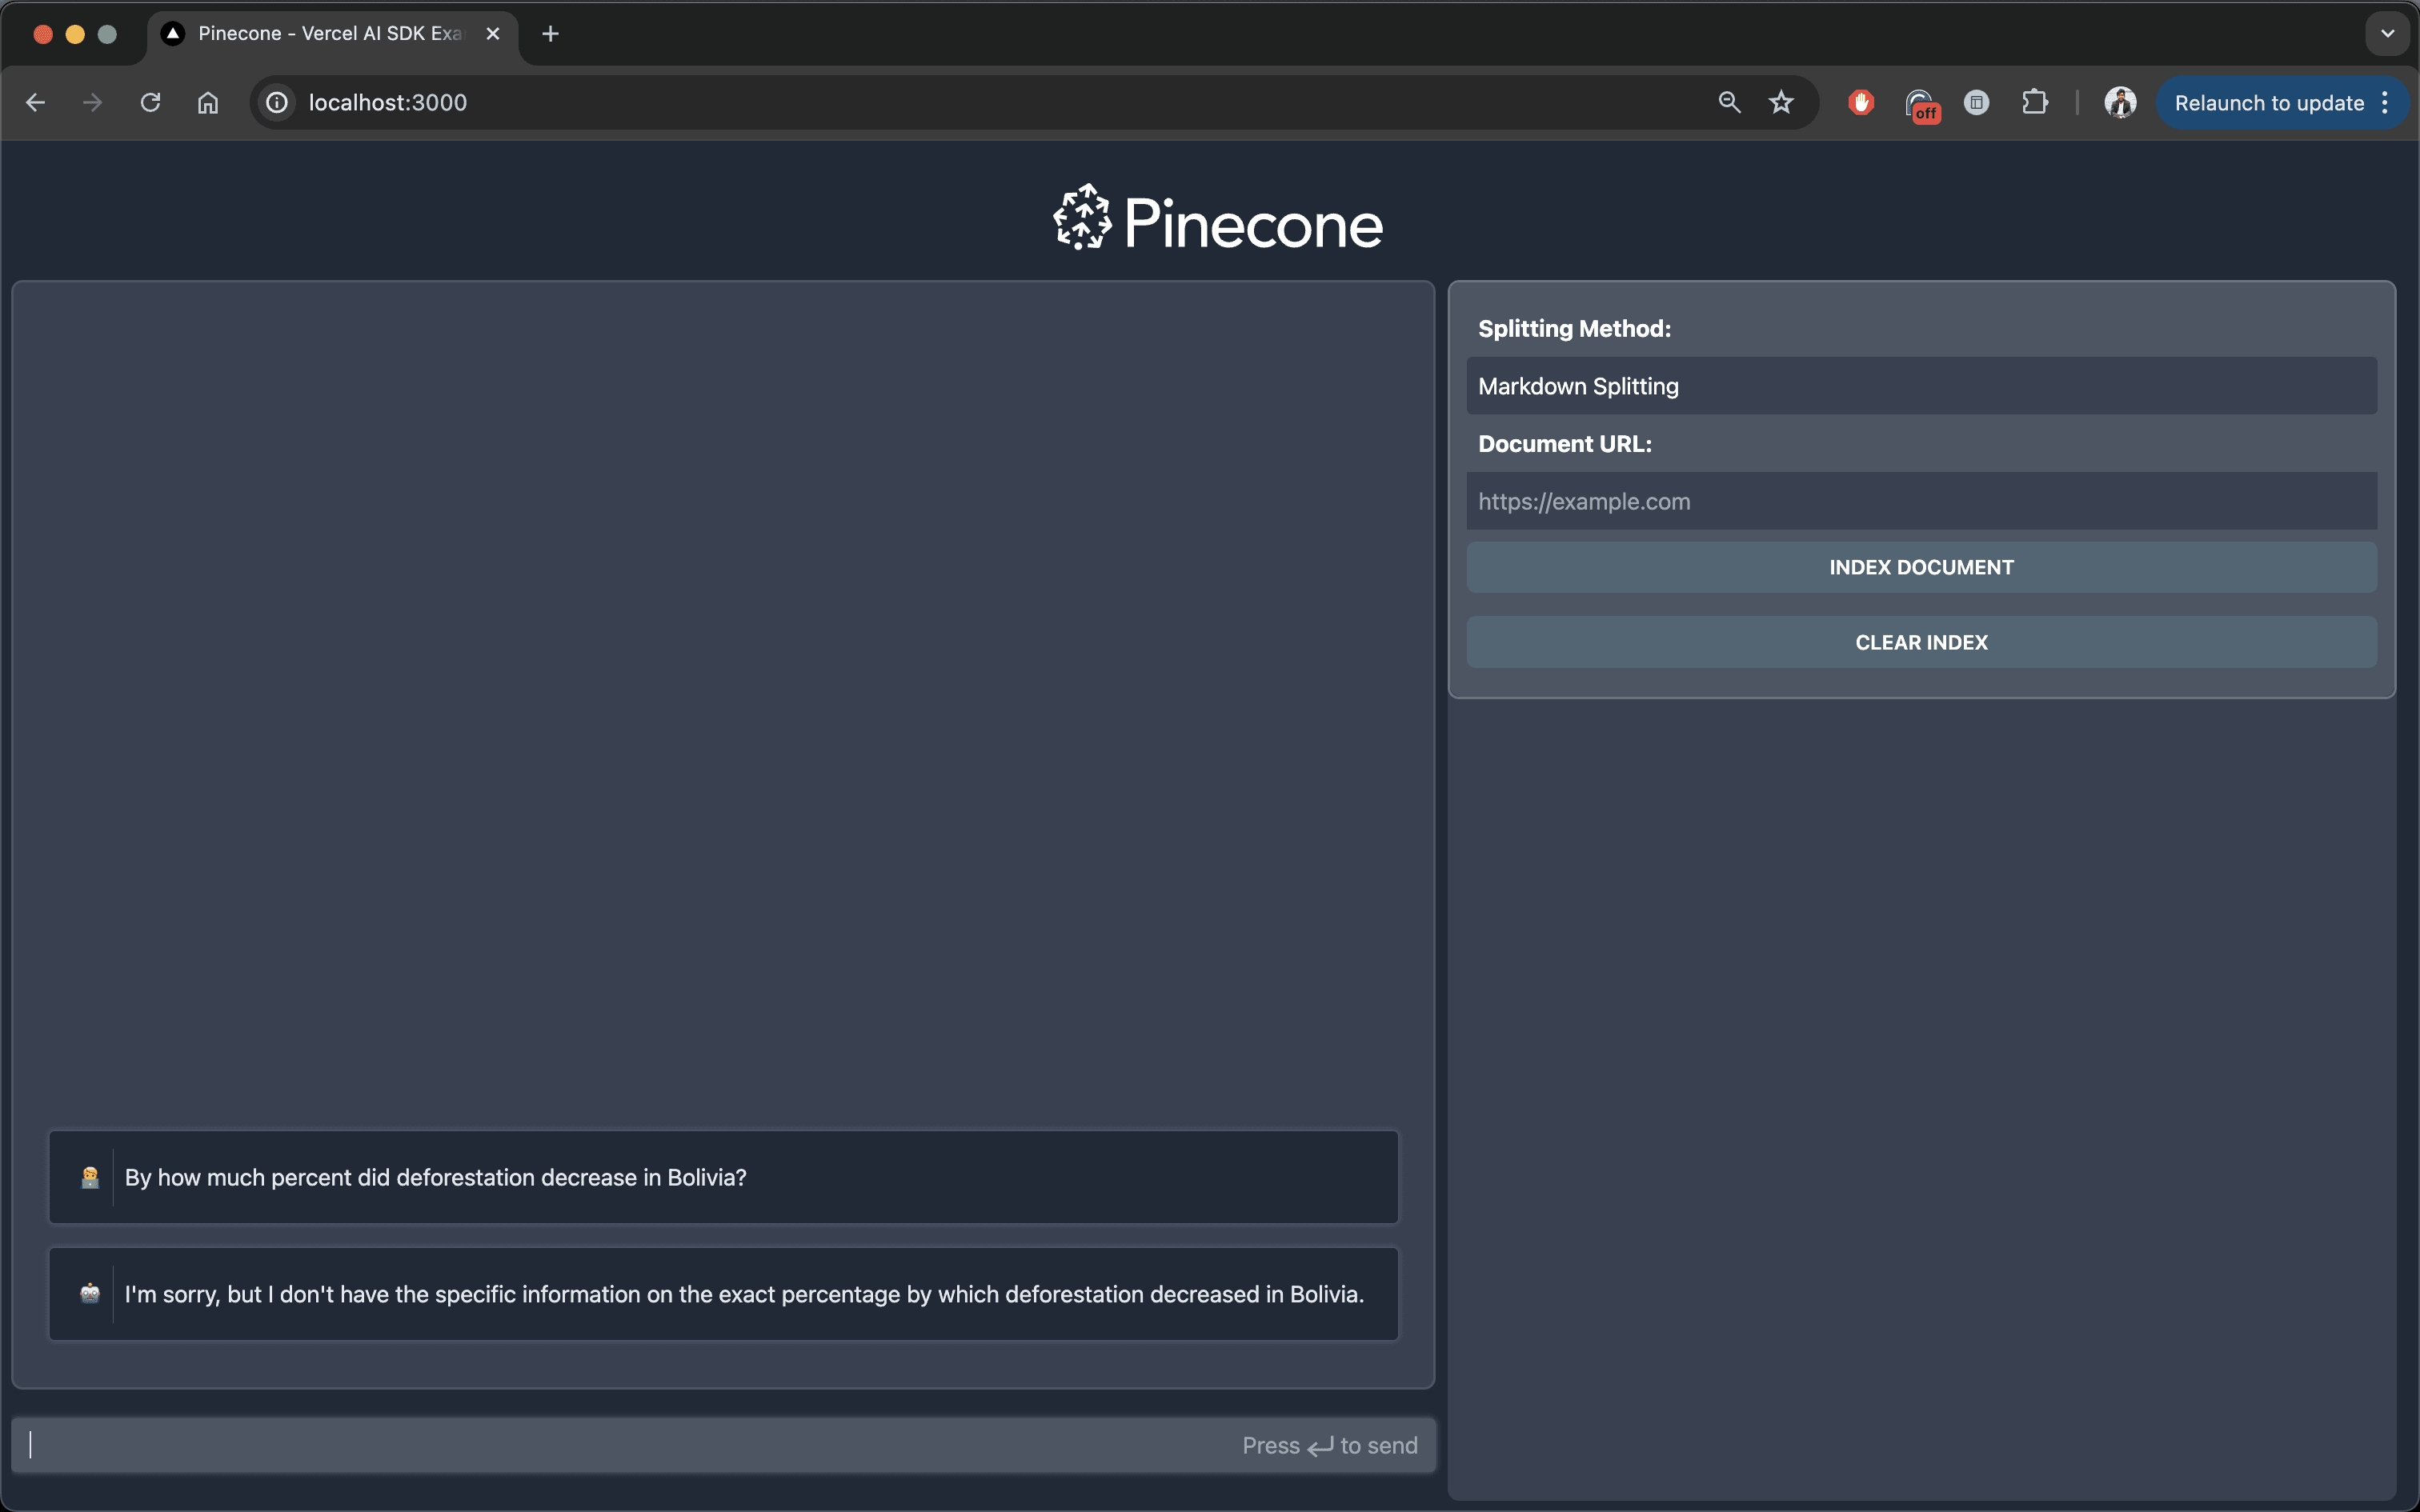
In this case, the LLM wasn’t able to retrieve the context from the previously crawled document as user B isn’t authorized to access it.
Conclusion
RAG enhances language models by combining traditional data retrieval with generative capabilities to produce rich and contextually accurate responses. Implementing robust access control in RAG applications helps ensure data security and privacy, allowing only authorized users to access and utilize specific information.
In this article, you learned how to implement authentication and authorization in a Pinecone-based RAG app using Descope. You can find this tutorial’s complete source code on GitHub.
Sign up for a Free Forever Descope account and request a demo to learn more.