
Table of Contents
Setting up Zendesk SSO is a great way to simplify logins for both your customers and support agents. Instead of managing separate credentials, users sign in once and get access to everything they need. For example, SSO can help agents securely access ticket data while giving customers a smoother support experience—all without the password fatigue.
In this guide, we’ll walk you through how to set up Zendesk SSO with Descope and also add Multi-Factor Authentication (MFA) for specific users based on their roles and permissions.
How to set up Zendesk SSO with Descope
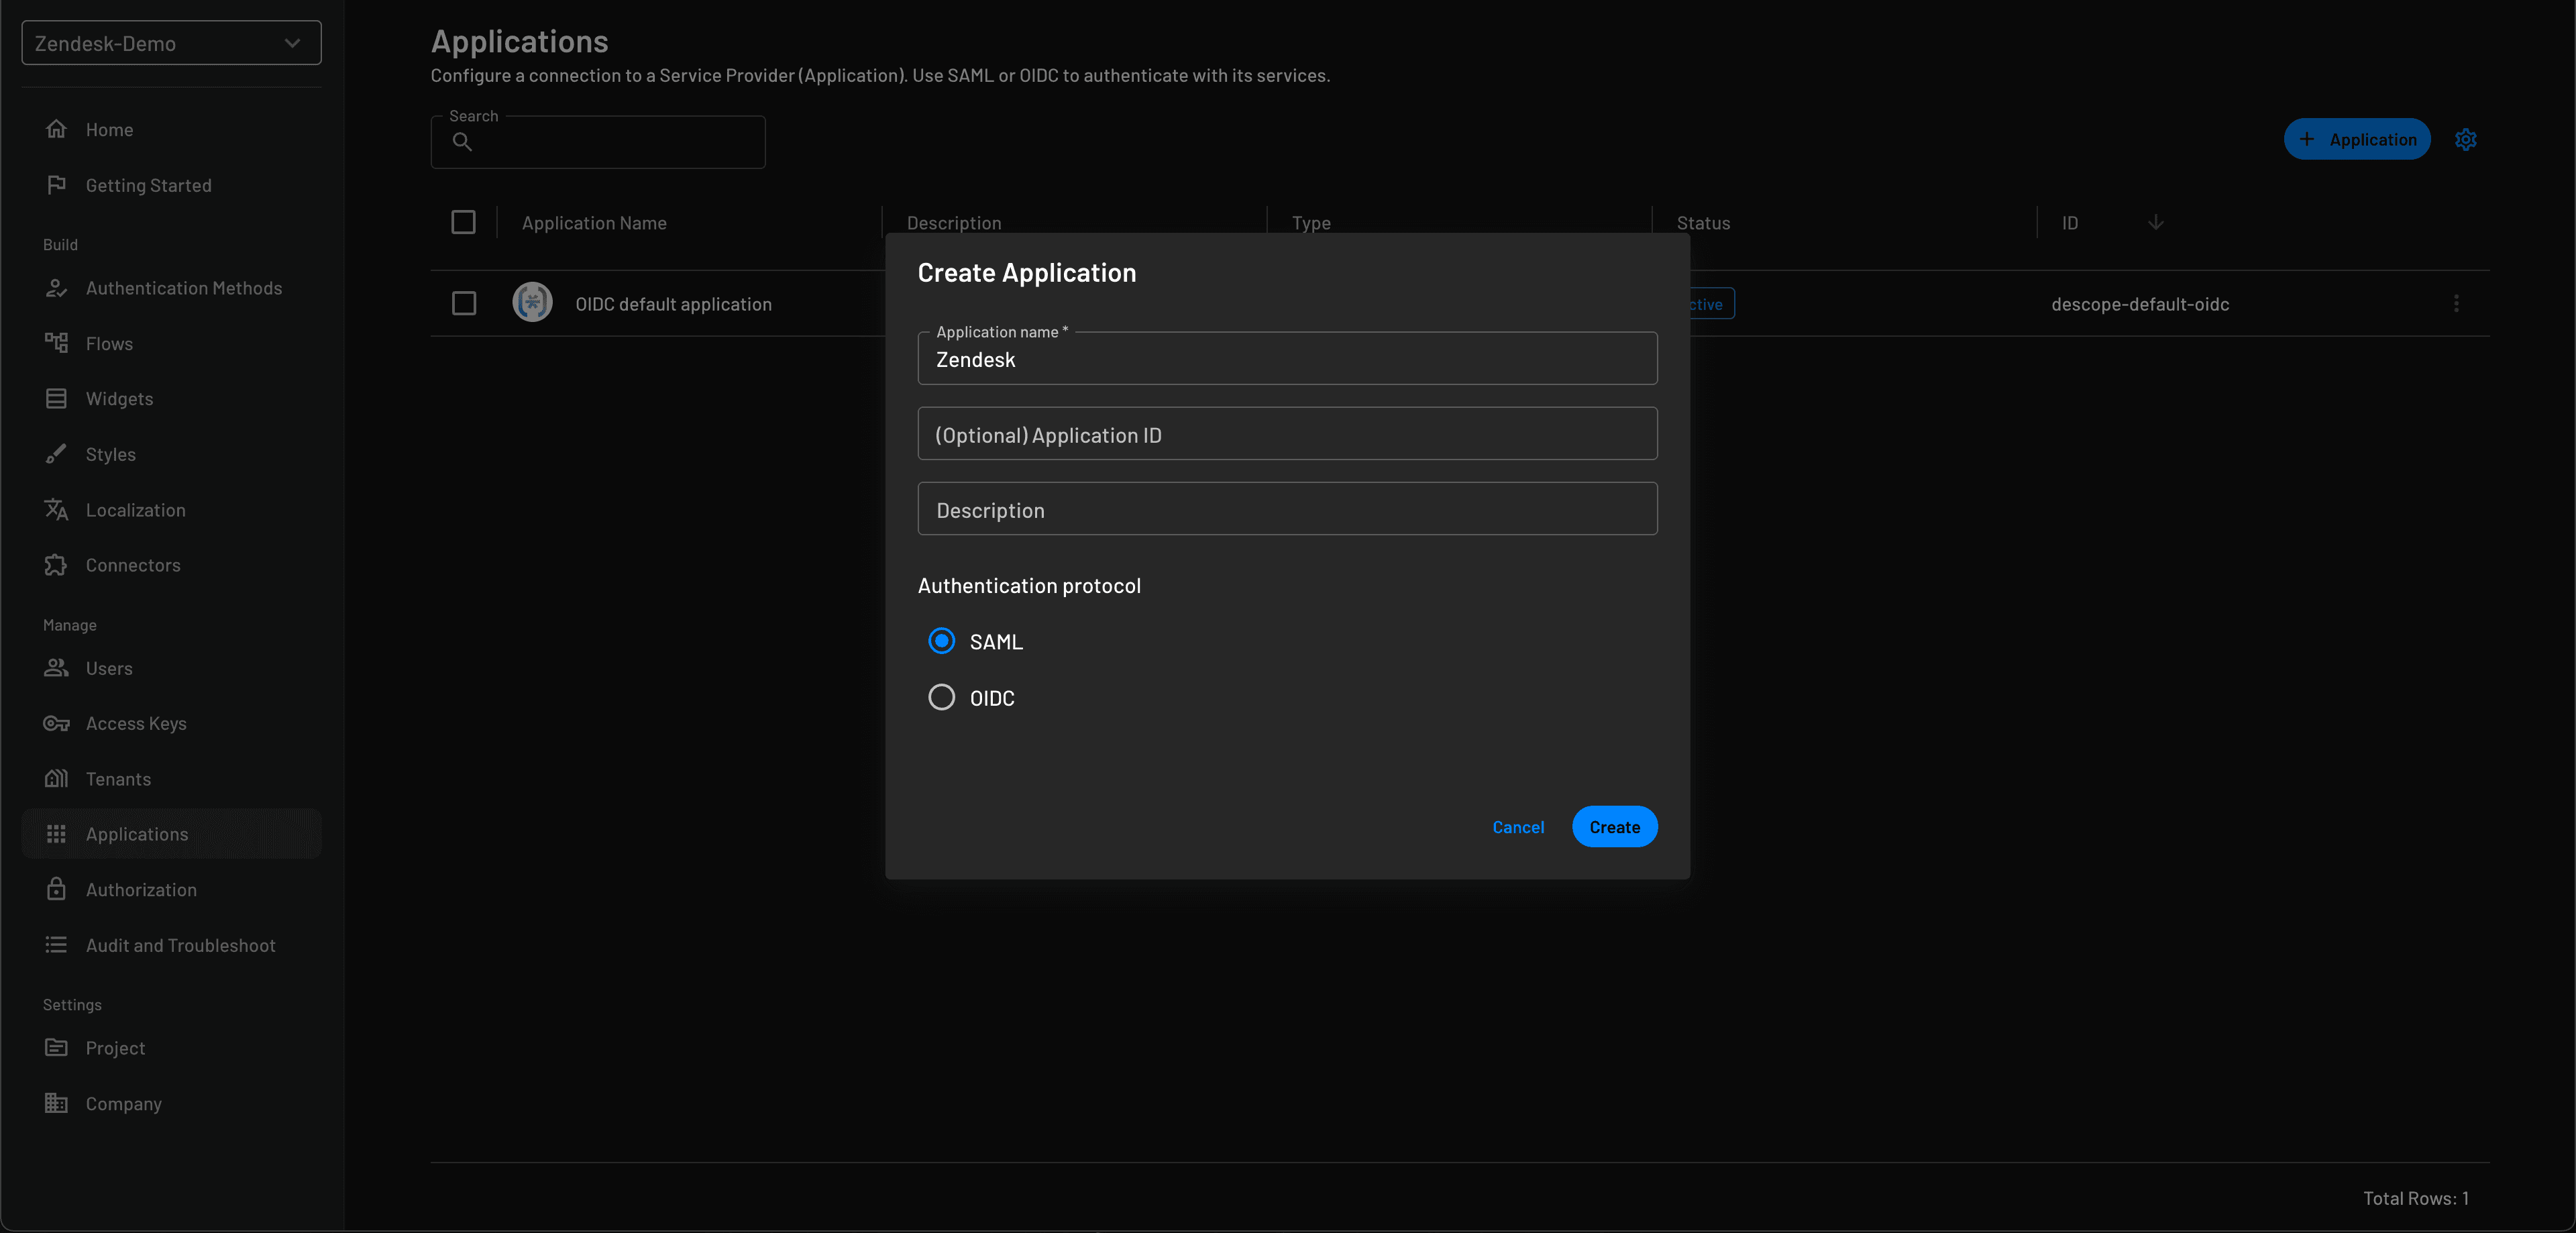
The first step in adding Zendesk SSO with Descope is creating a new application in the Descope Console. To do this, navigate to Applications and press the Create button in the top right. To connect Zendesk as a Service Provider (SP) to Descope, we will be using SAML as the authentication protocol.
Learn more: How to Configure Descope as an SAML Provider
Configuring the IdP in Zendesk
The next step is to create a Zendesk account for your business. You can use SSO even while you're still on Zendesk’s free trial.
Enter the Admin Center in Zendesk and under the Account tab, navigate to Single-sign on.
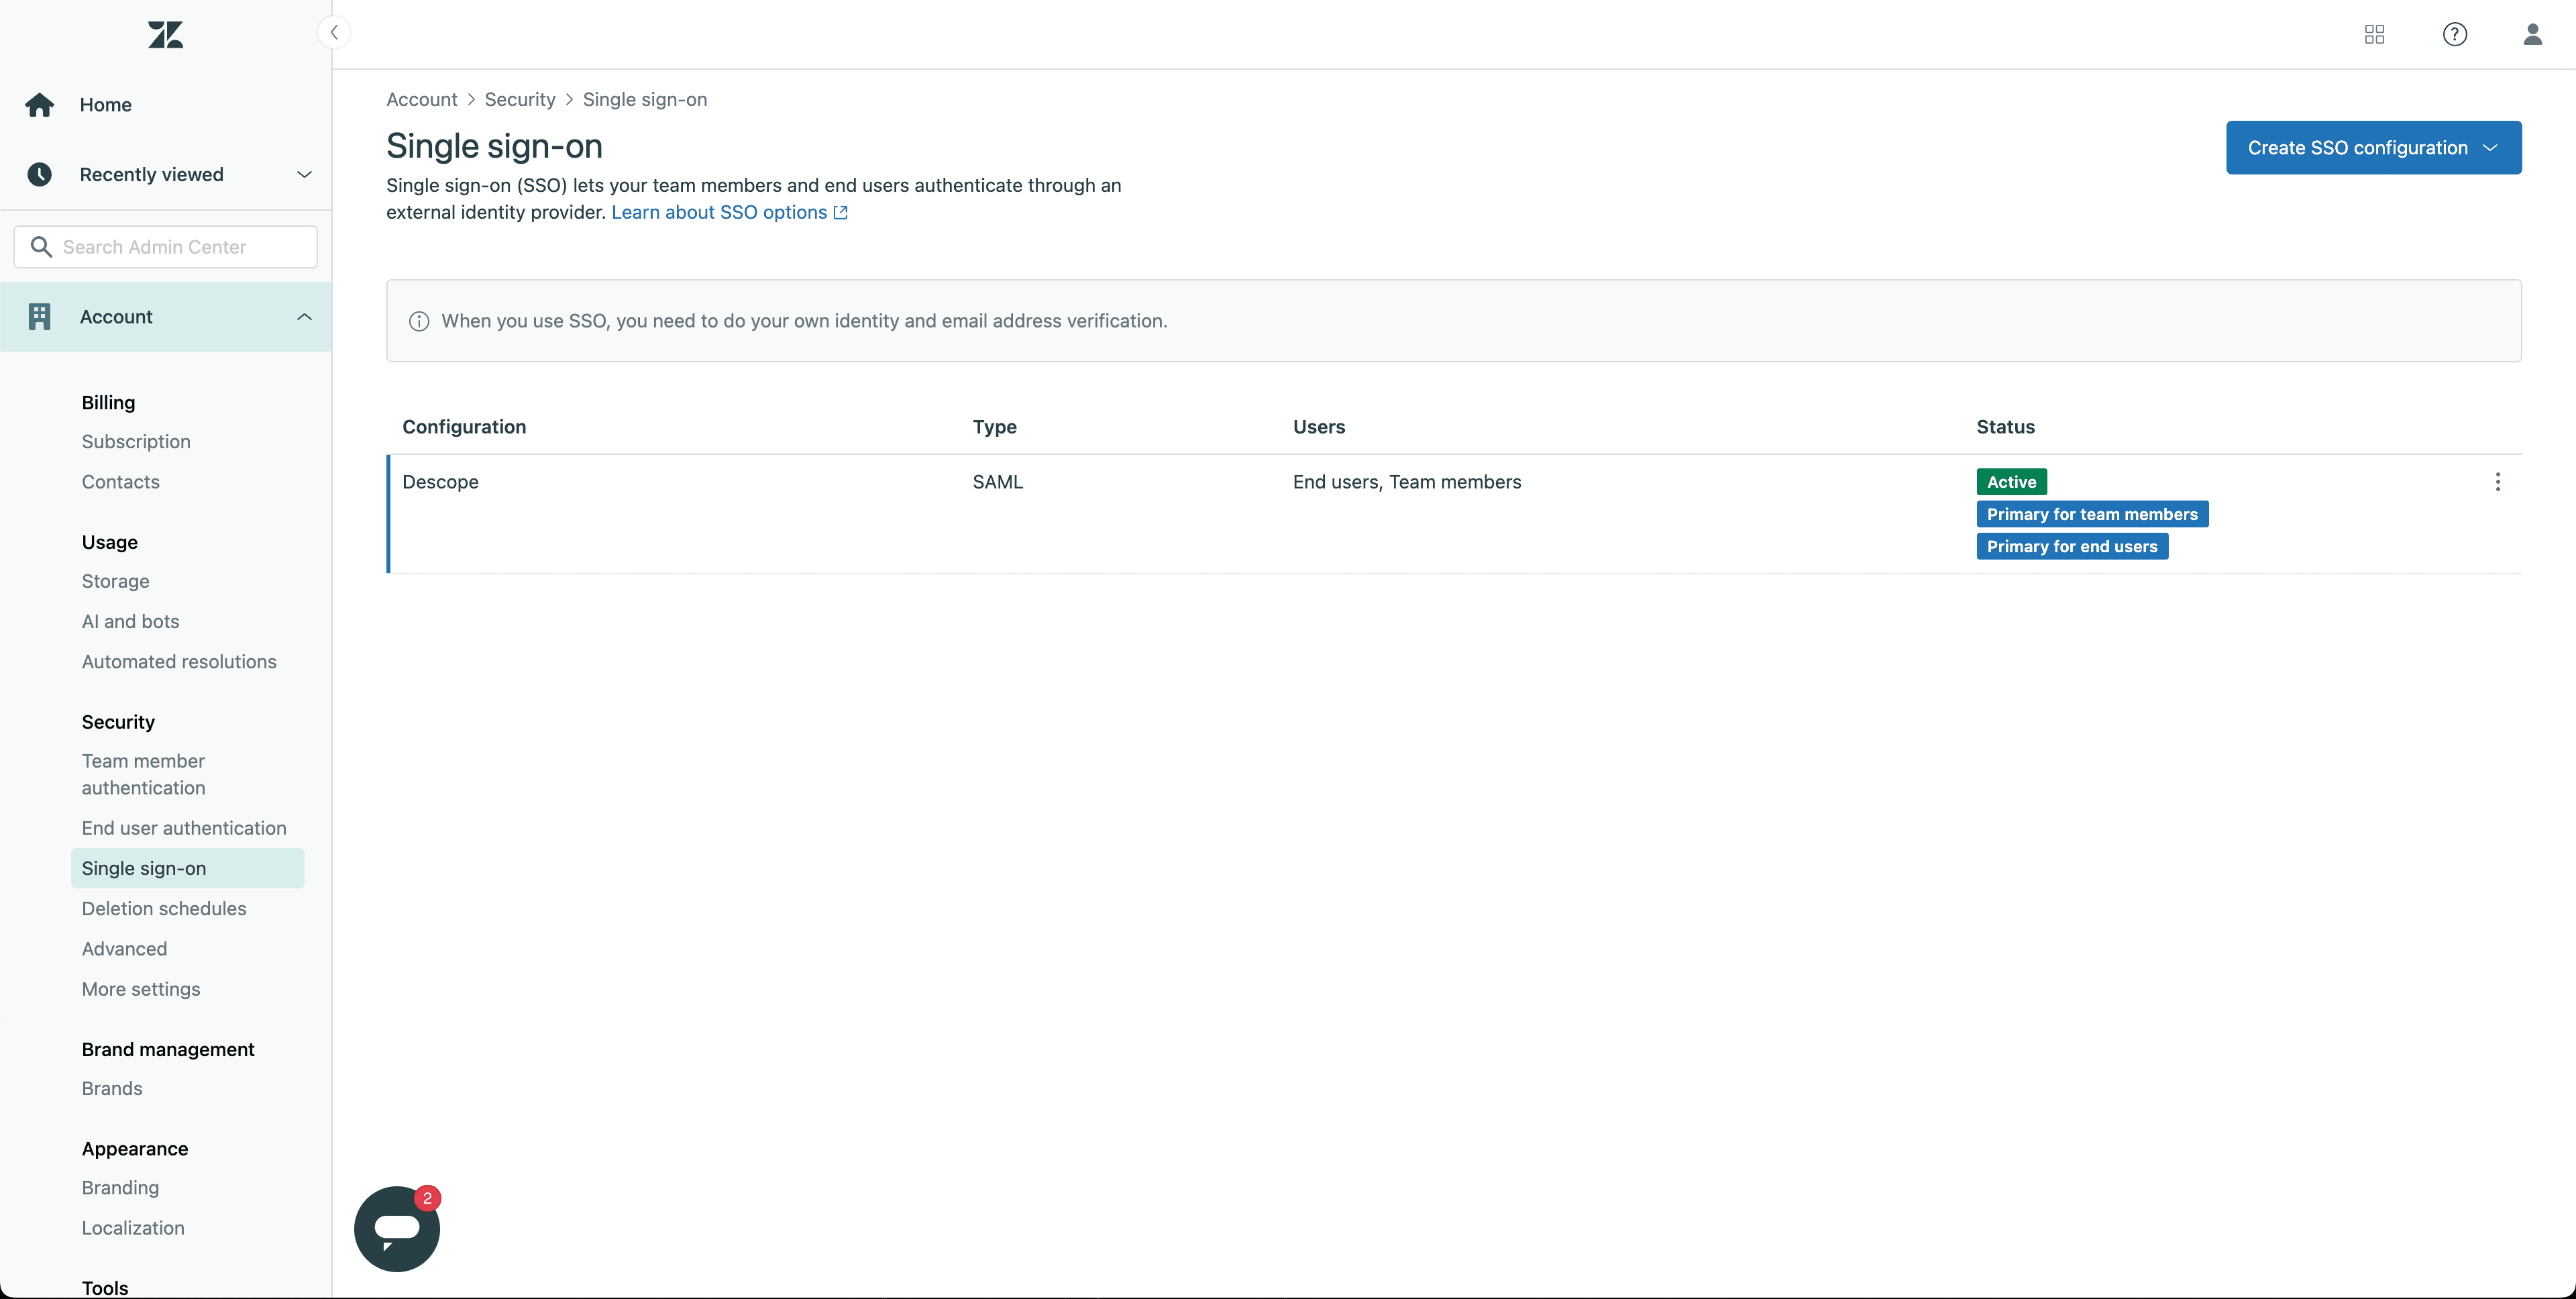
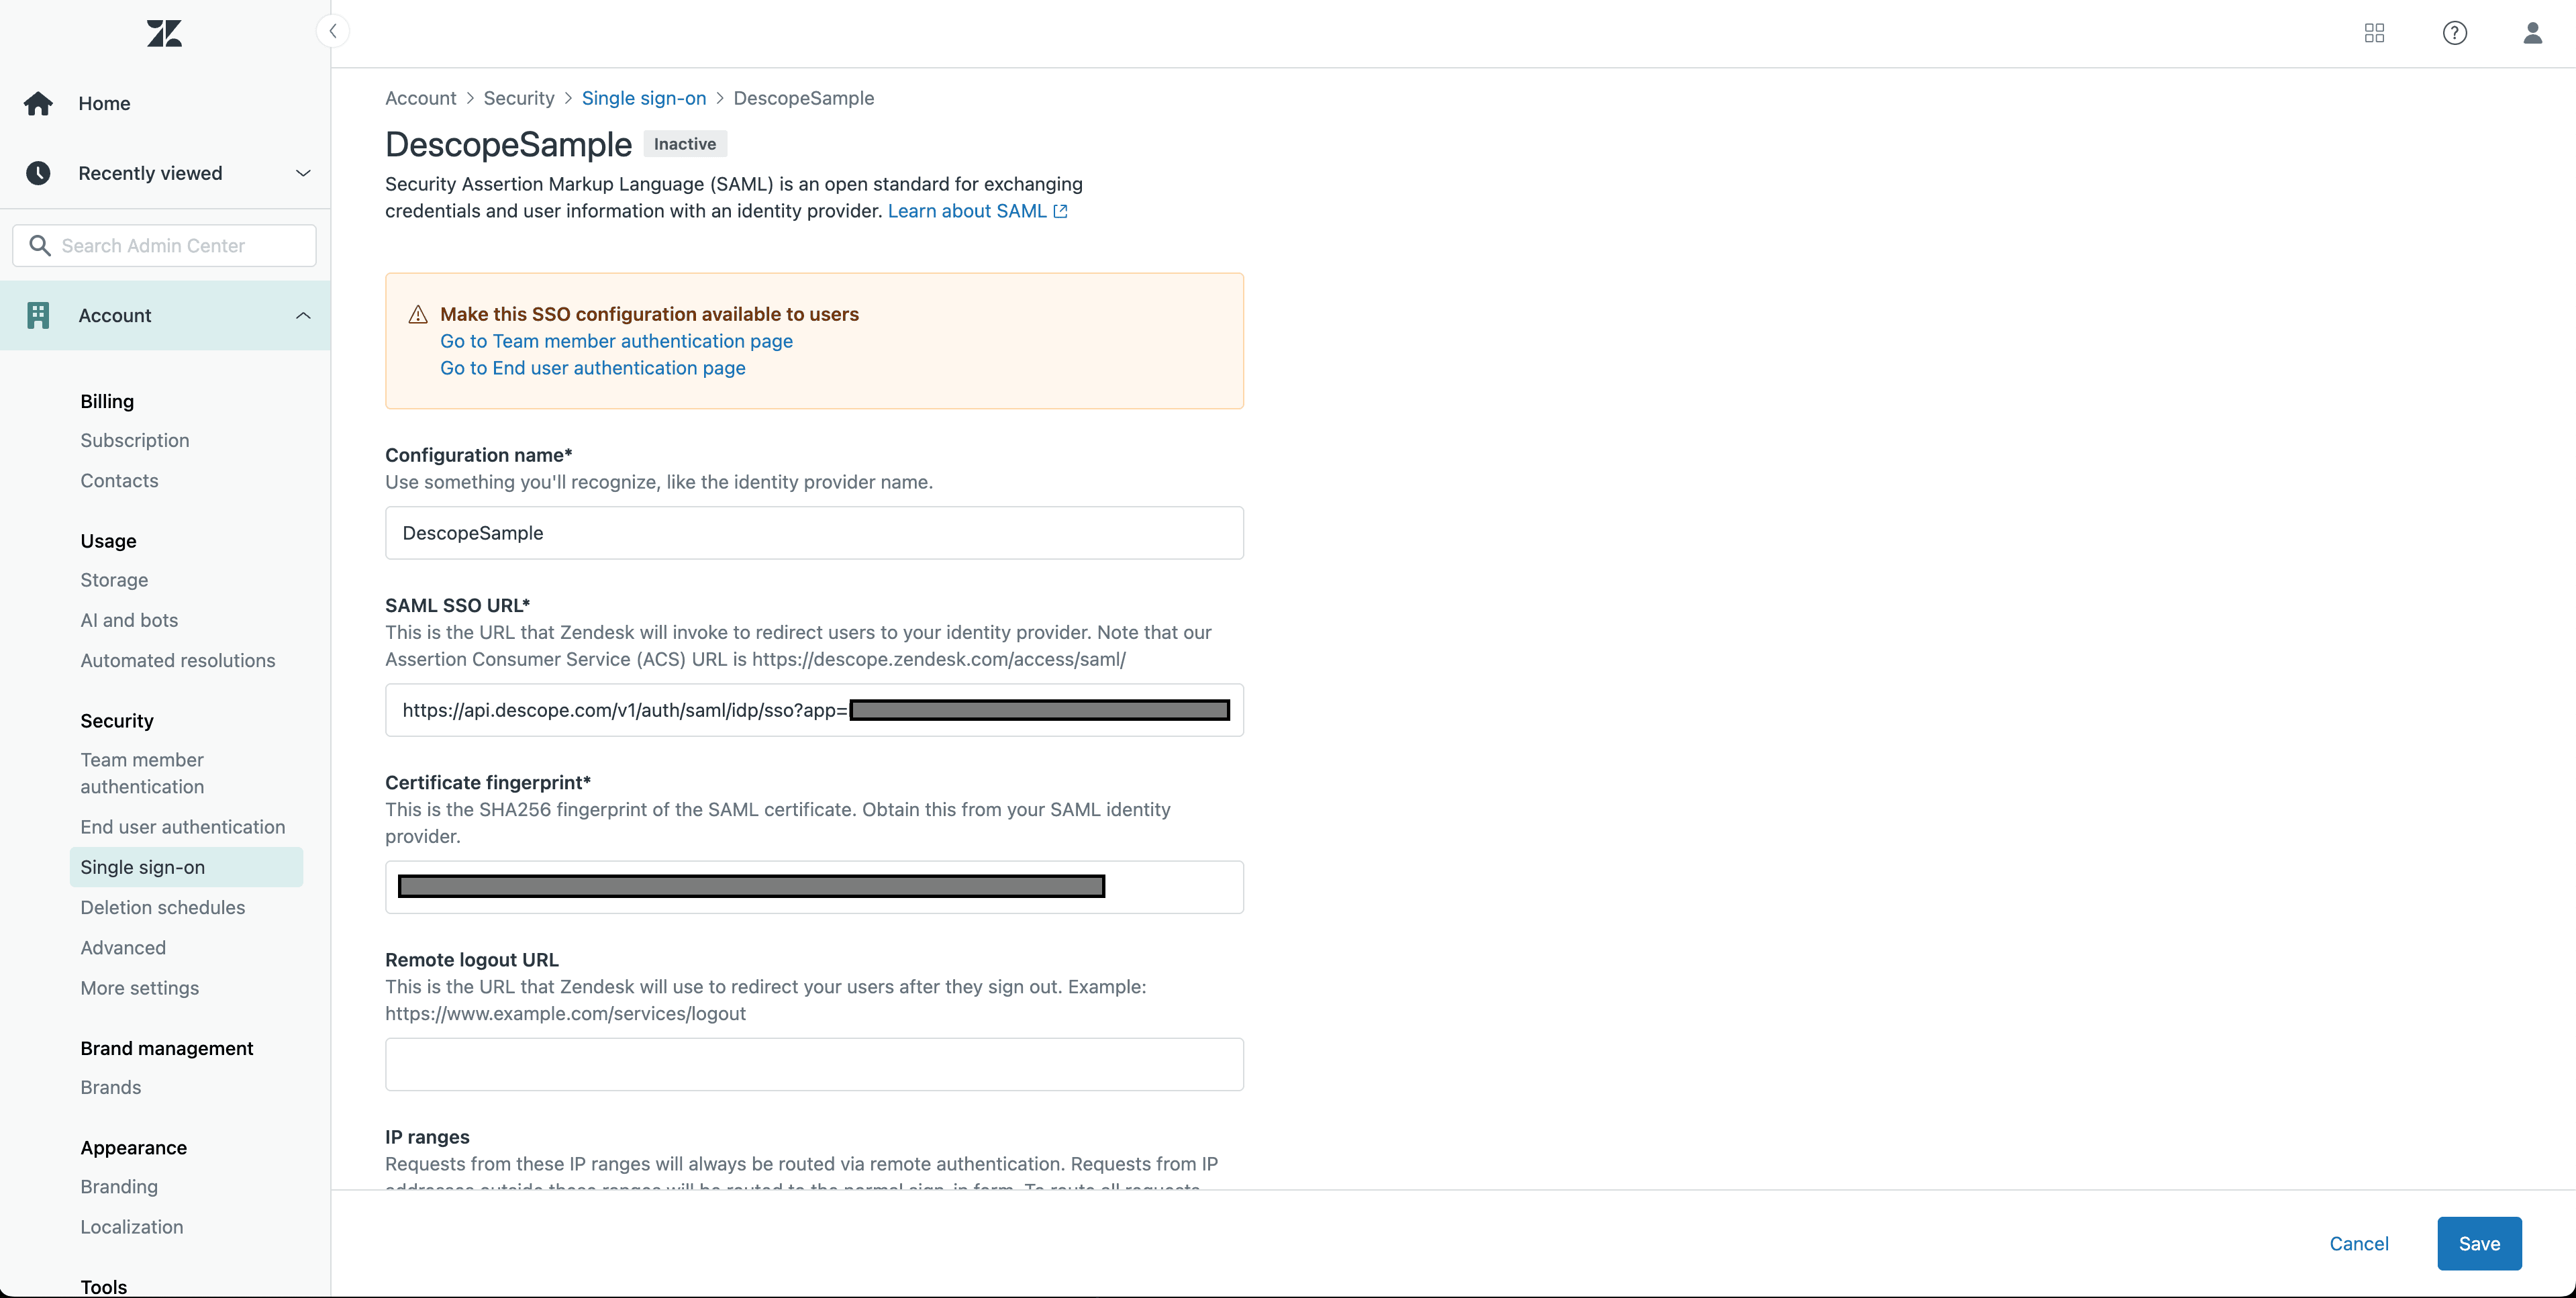
Create a new SAML SSO configuration in the top right and enter the necessary information. This includes:
Configuration name
SAML SSO URL (found when editing the new SAML Application in Descope)
Certificate fingerprint
To get the certificate fingerprint, download the fingerprint hashes from the new application’s settings in the Descope Console as shown in the image below. In the IDP section of the settings, press the download certificate button, then select fingerprint hashes.
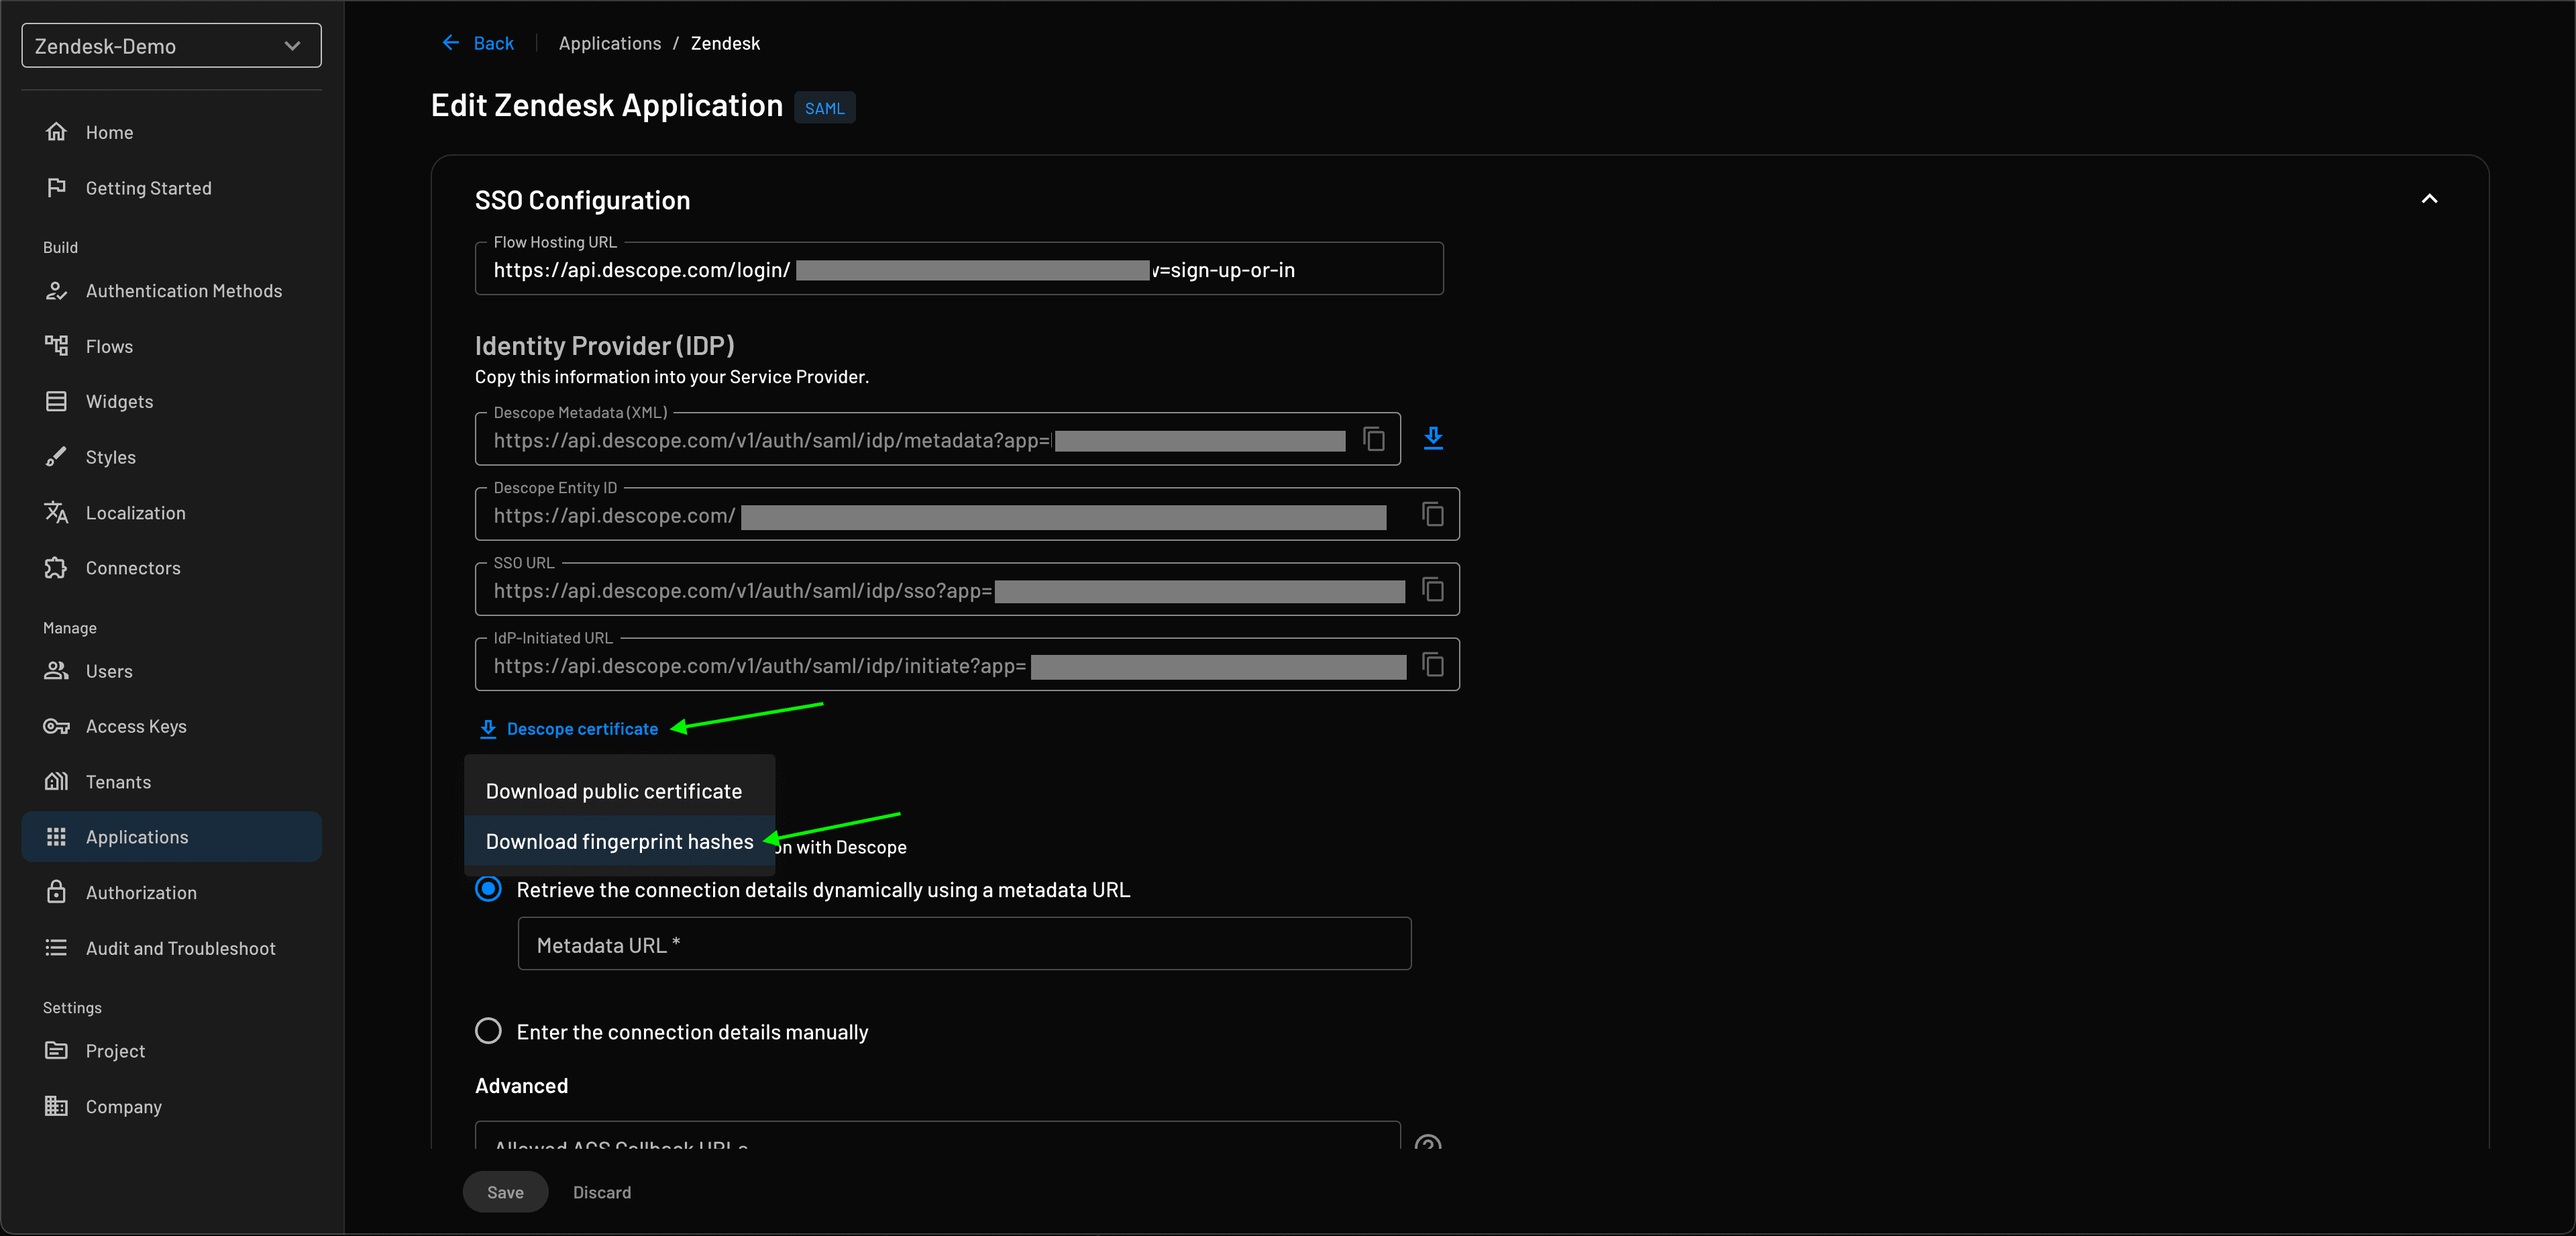
Once downloaded, copy the sha256 fingerprint from the certificate to the new Zendesk SSO configuration. Now you can save the new SSO configuration and activate it.
You can configure SSO for either team members or end users (customers), depending on your needs.
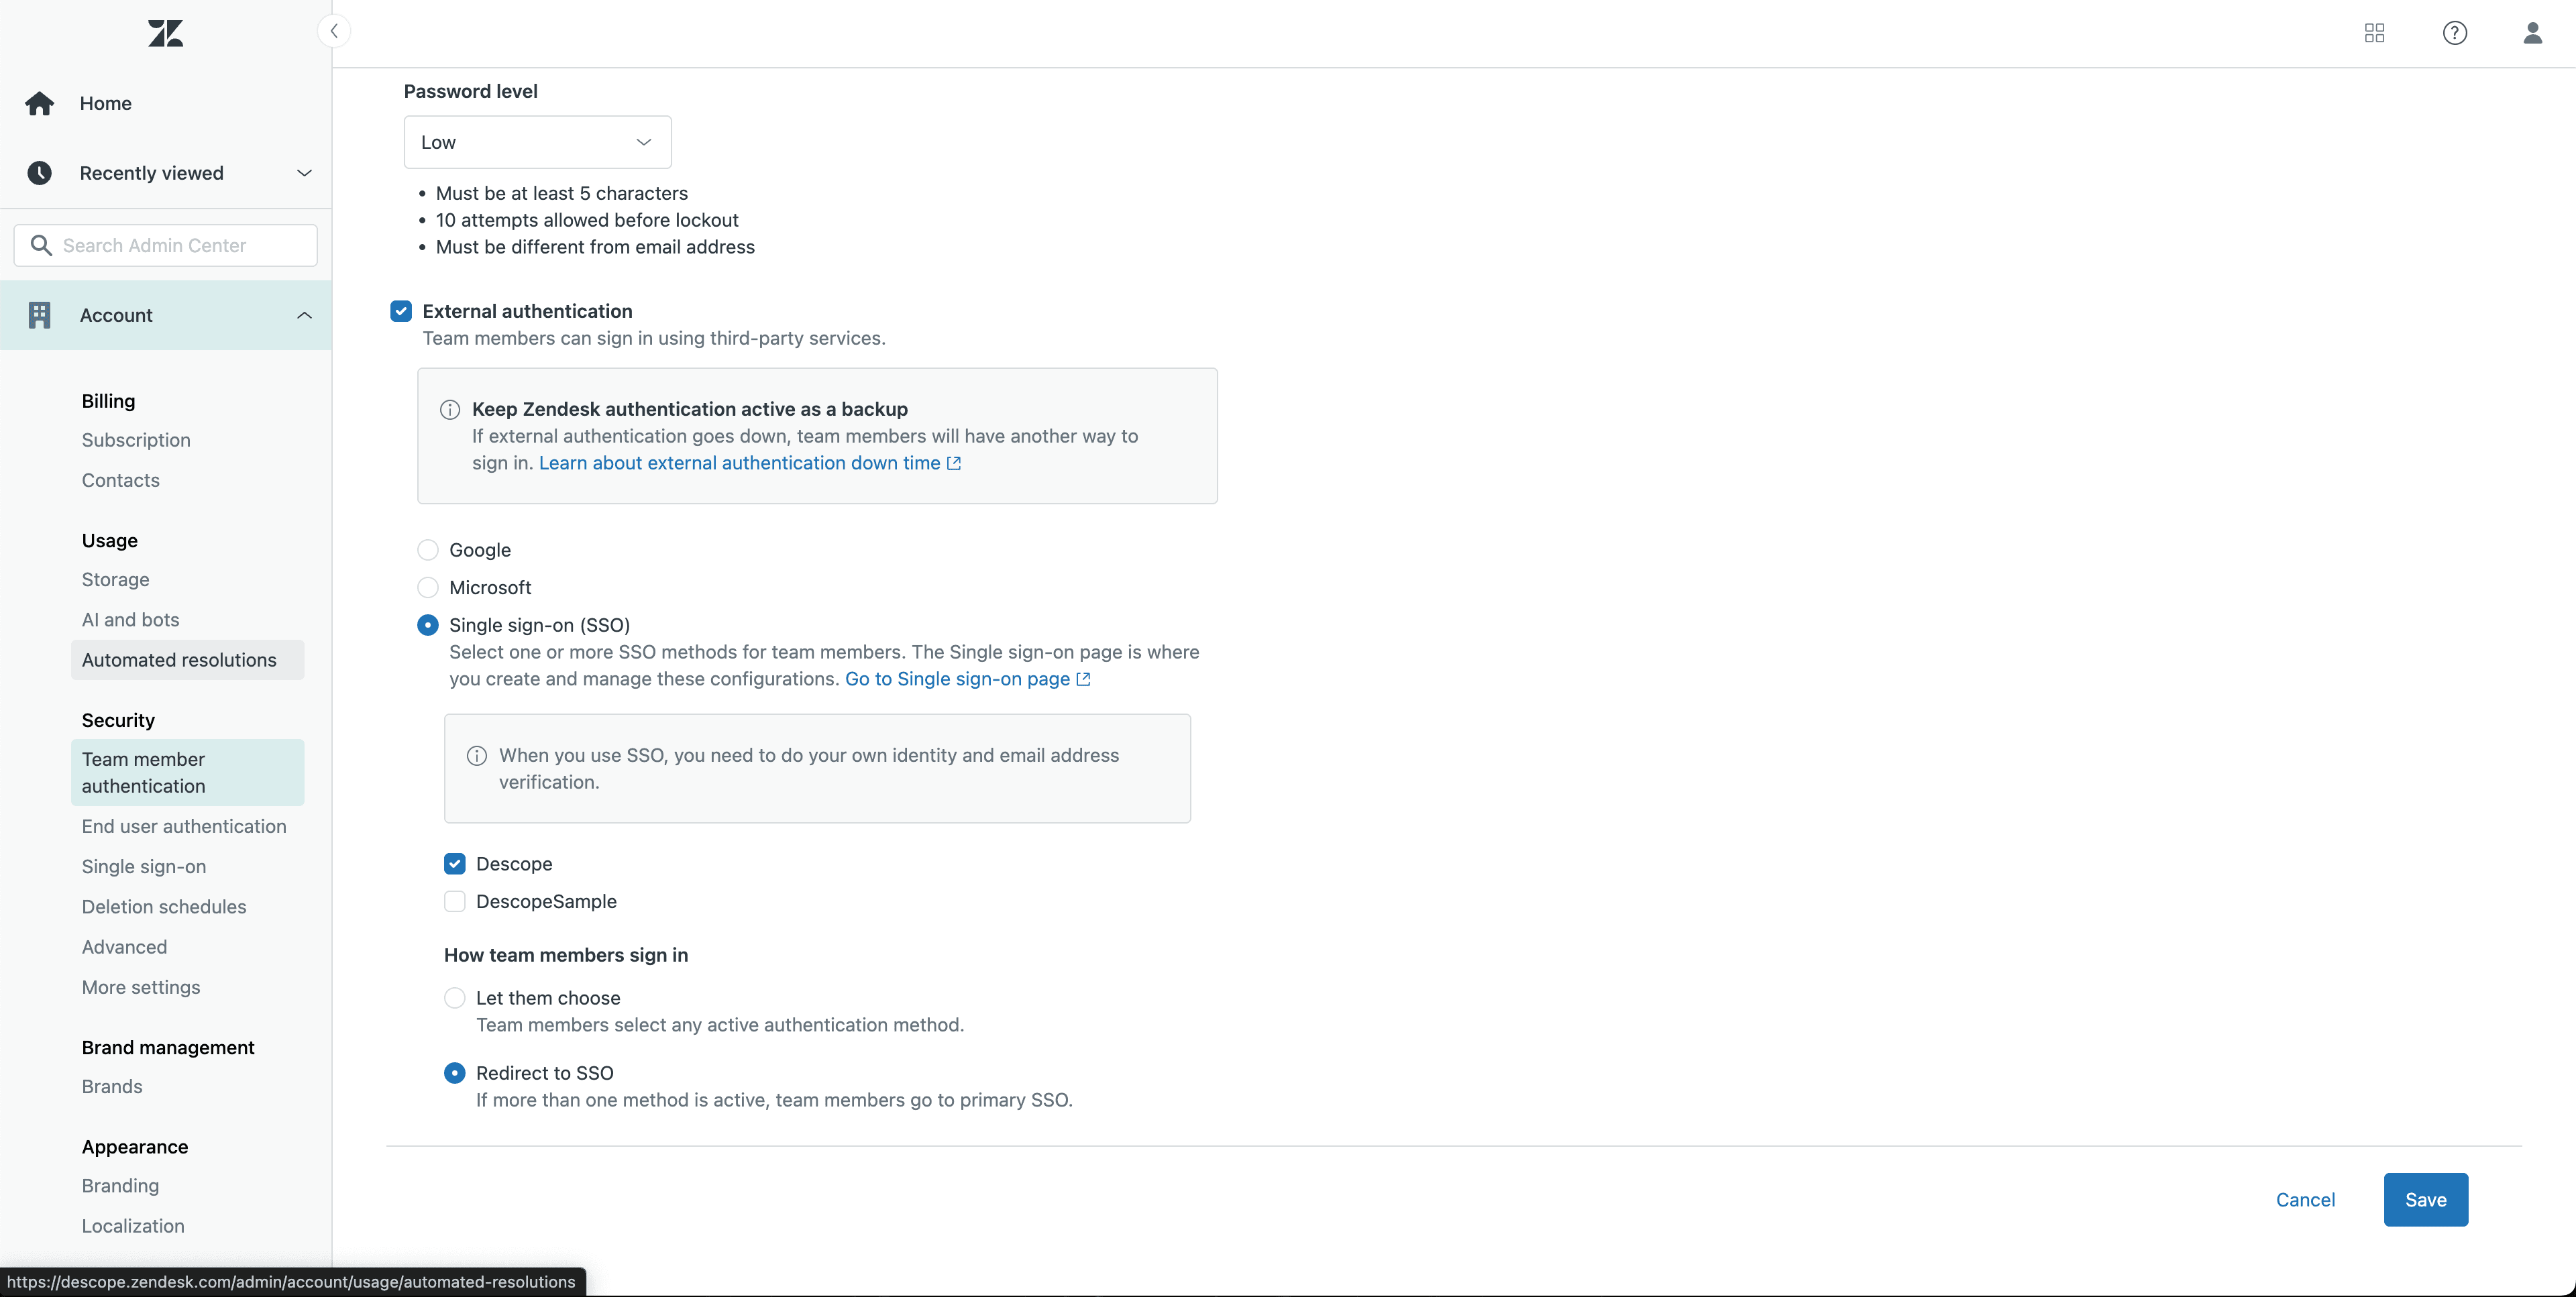
For team members: go to Team member authentication under Account in the Admin Center.
For end users: head to End user authentication instead.
In both cases, enable External authentication, then select SSO and choose the configuration you just created.
SSO is now enabled in Zendesk—but you’ll still need to finish setting up the Descope application.
Configuring the SP in Descope
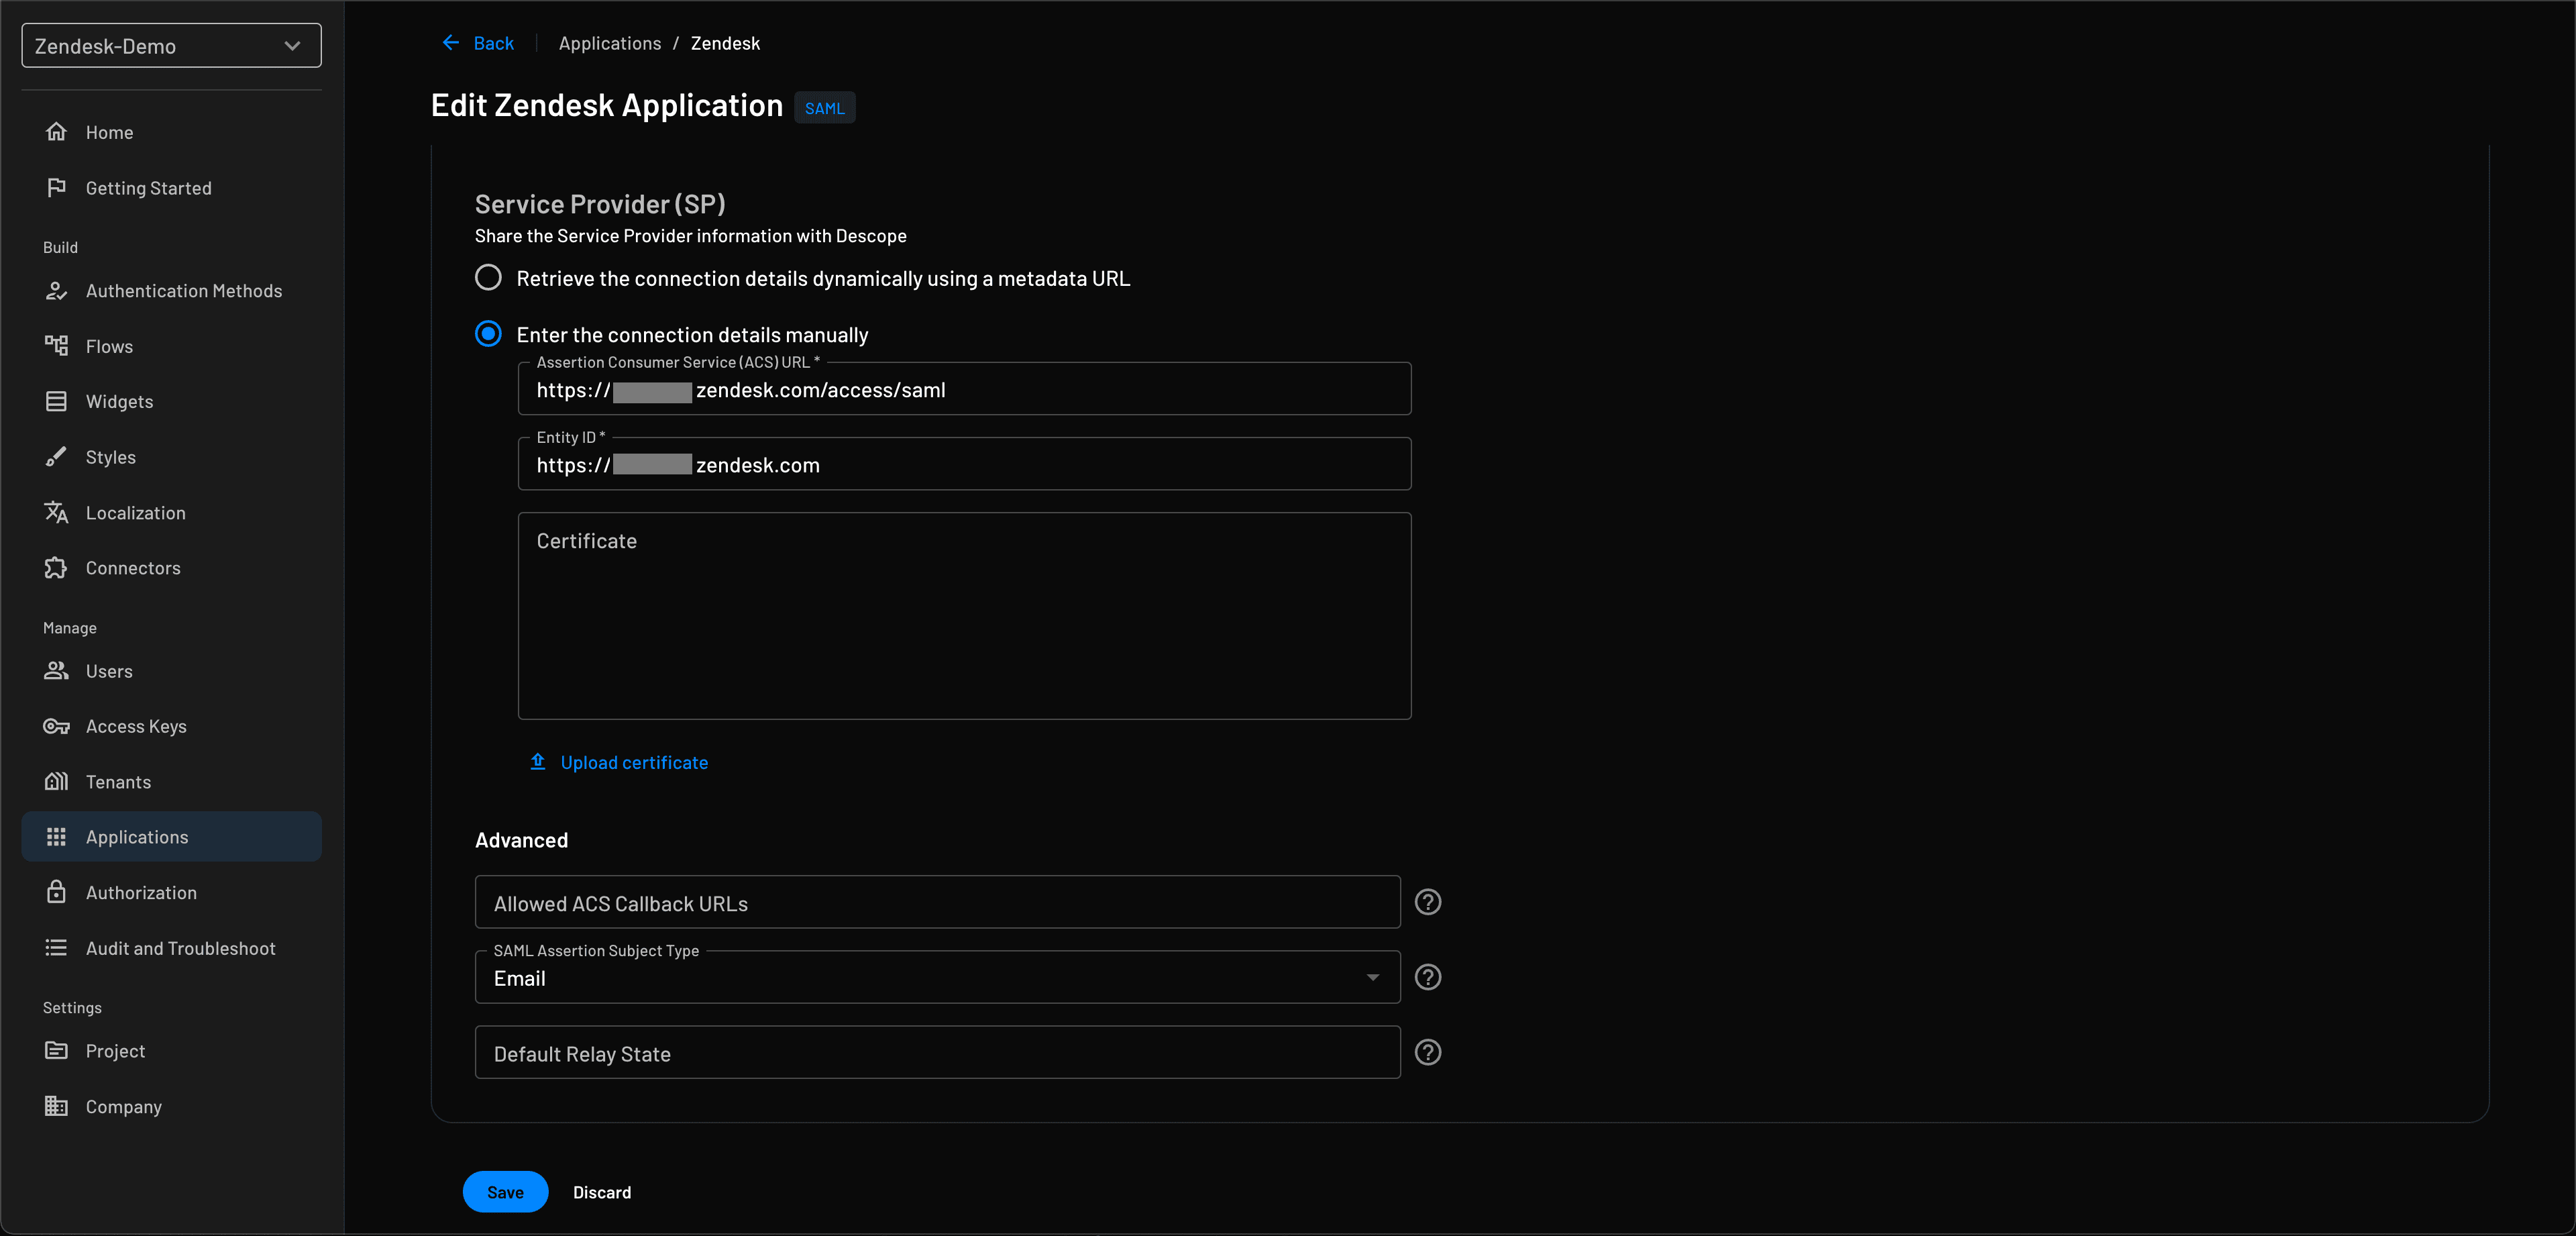
Under Service Provider in the application’s settings, enter the connection details as shown below:
ACS URL (
https://yoursubdomain.zendesk.com/access/saml)Entity ID (
https://yoursubdomain.zendesk.com)
Also, select Email as the SAML Assertion Subject Type. Under SSO Mapping, make sure to map the Descope user attribute User ID to the SP user value NameID.
That’s it—your Zendesk SSO setup with Descope is complete!
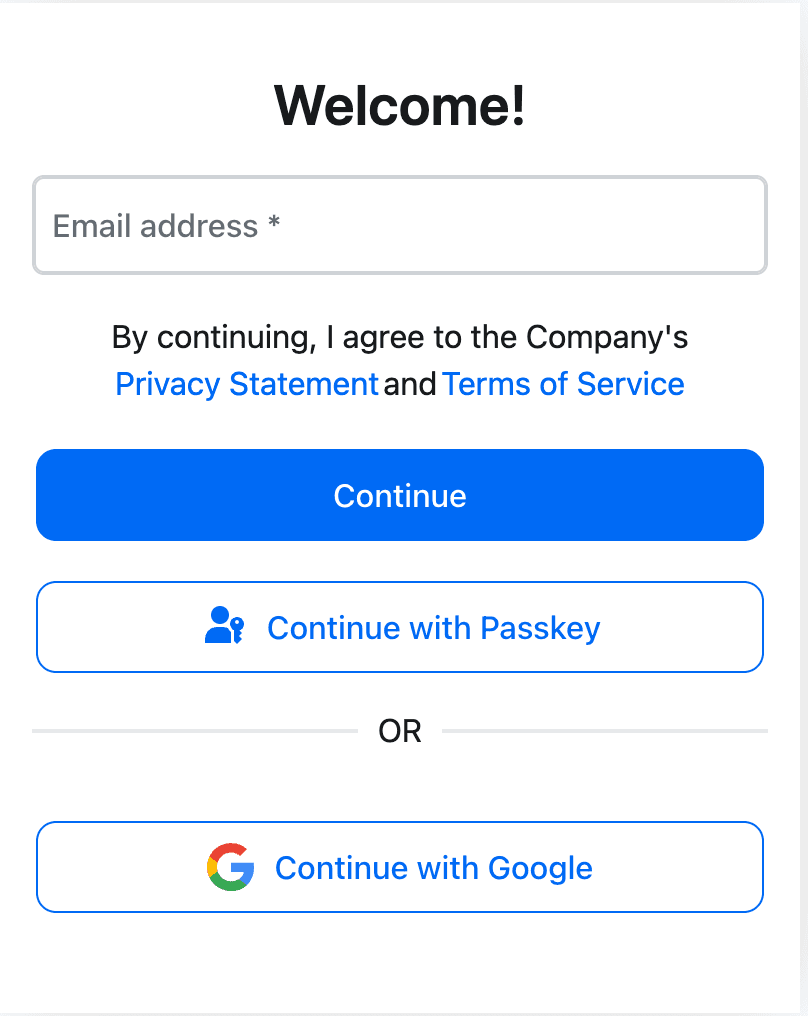
By default, the sign-up-or-in flow that is seen on the Flows page in your Descope Console is used for authentication, but this can be changed by updating the Flow Hosting URL in settings for the application you created.
You can also customize the authentication process in the console to support your preferred login methods. In this setup, we’re using magic links, Google social login, or passkeys as the primary methods and enabling one-time password (OTP) as a secondary method when authenticating new users.
How to configure adaptive MFA based on user roles
Now that SSO is set up in Zendesk, both team members and end users can log in through the same flow. Zendesk automatically routes users to the right place—agents to the help center to respond to tickets and customers to the support portal to submit them.
However, what if you want to add an extra layer of security for agents who handle sensitive data, like billing info? Let’s say you have a group of agents in Zendesk with a “Billing” permission. These agents should be the only ones allowed to access customer billing details—and they should go through MFA before doing so.
With Descope, you can check which groups a user belongs to in Zendesk. If “Billing” is one of them, you can trigger an additional authentication step (like an OTP) every time they log in.
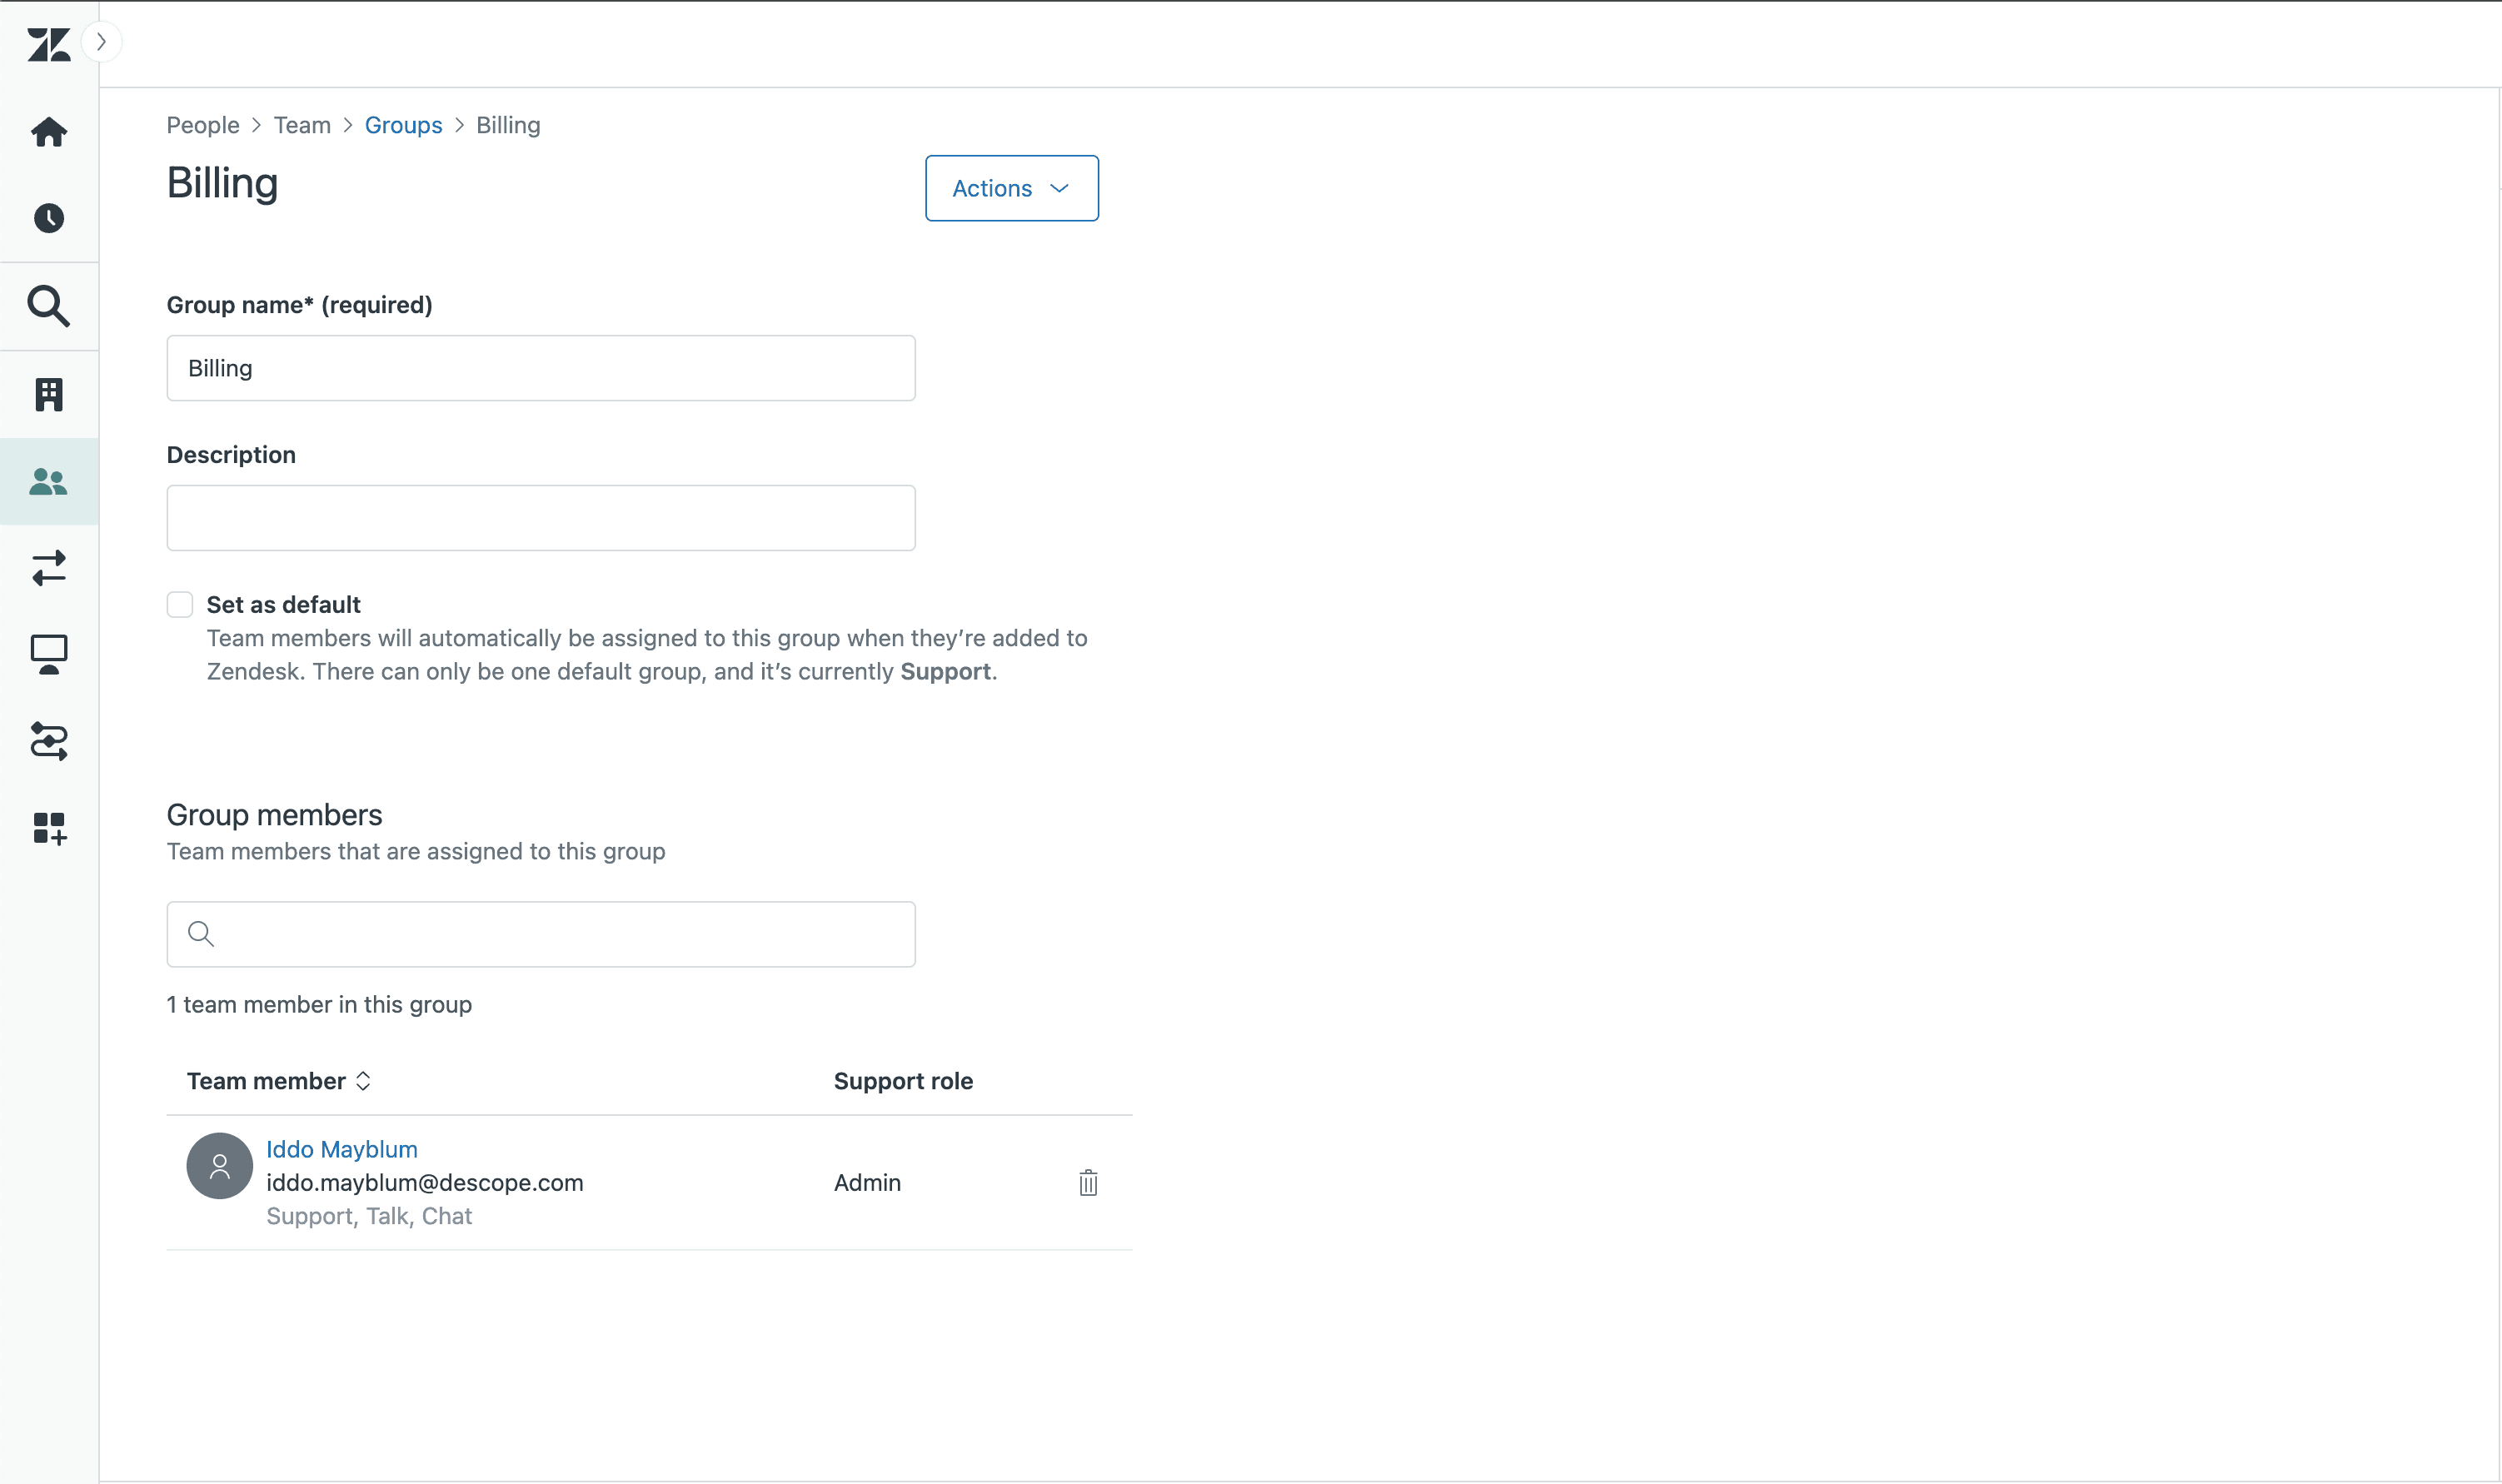
To set this up, first add the appropriate users to a Billing group in Zendesk:
In the Zendesk Admin Center, go to People > Groups.
Create a new group called Billing.
Add agents with higher-level permissions to this group.
You can also use this group to restrict access to billing-related tickets, ensuring only the right agents can view or respond to them.
Next, you’ll need to pass the user’s group information into Descope so it can be checked during login. To do this, you’ll make a request to the Zendesk API using Descope’s Generic HTTP Connector.
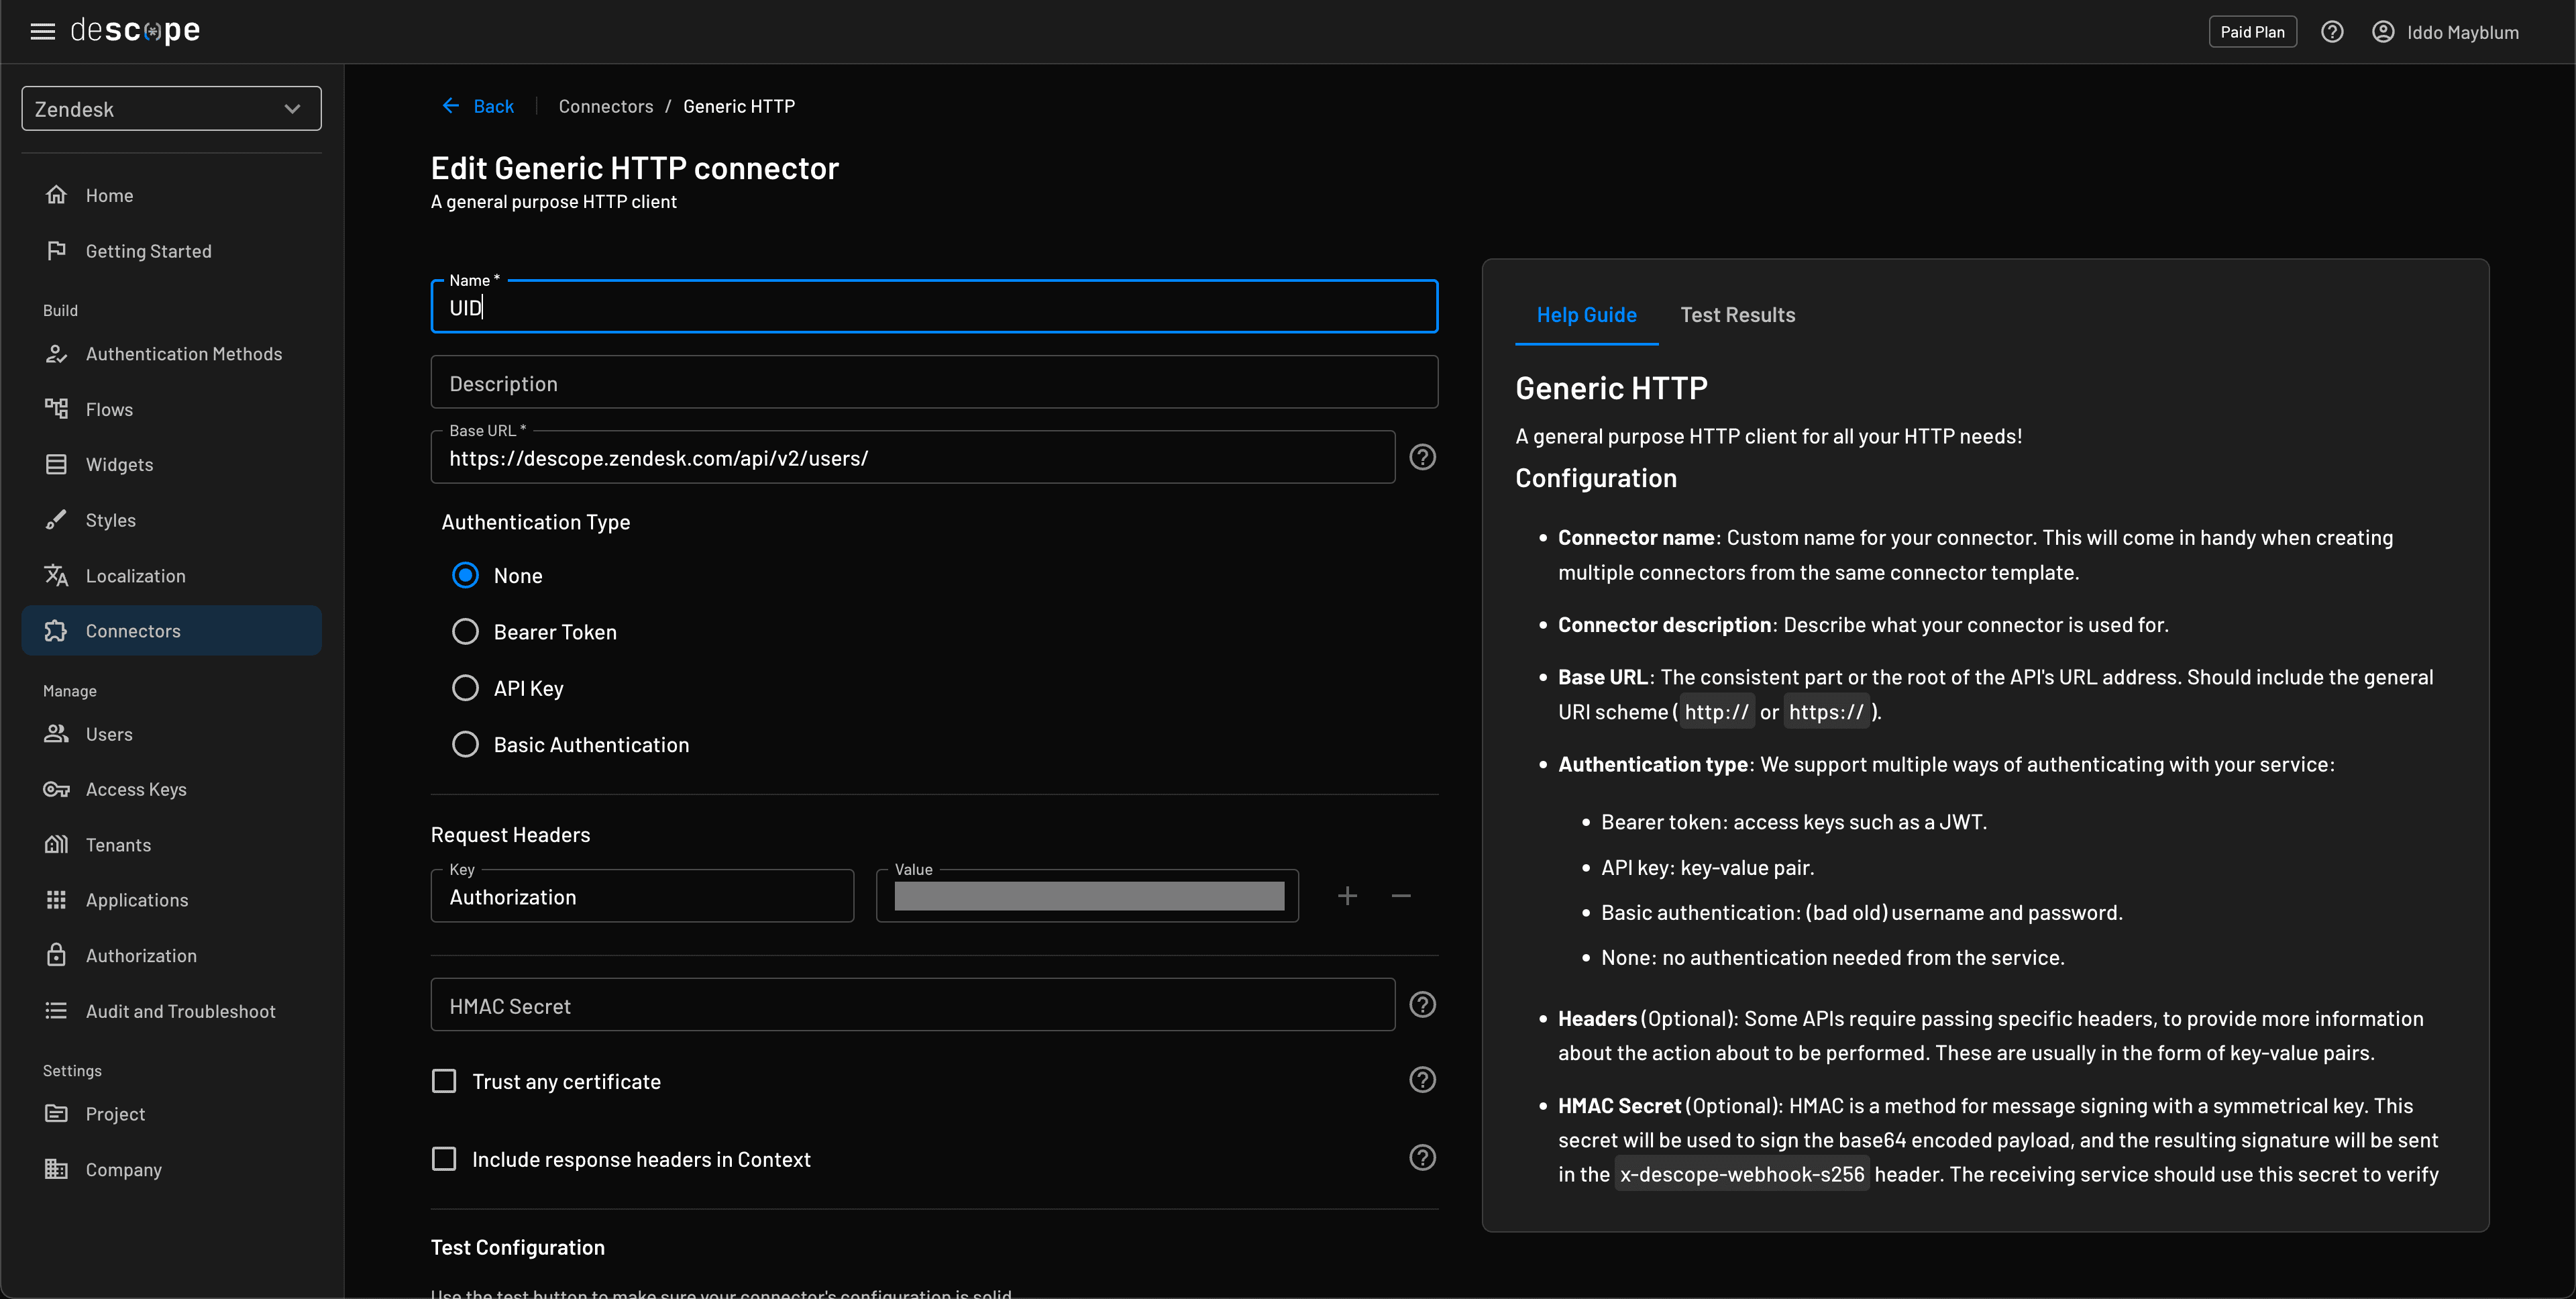
Use your Zendesk subdomain and set up the request with a custom Authorization header. In this example, we’re using an API token, which you can create from the Zendesk Admin Center by navigating to Apps and integrations > Zendesk API.
When using the API token, the Authorization header needs to follow this format:
Authorization: Basic {base-64-encoded token}Use base64 encoding on the your_admin_email/token:your_api_token string then include it as the value to the header as the Basic token.
Now that the connector is configured, you can query the Zendesk API to retrieve the user’s Zendesk ID, which is needed to fetch their group memberships. Use the following endpoint:
https://descope.zendesk.com/api/v2/users/search.json?query=email:{{user.email}}From the JSON response, extract the user ID, then make another request to get the groups the user belongs to:
https://descope.zendesk.com/api/v2/users/{{id}}/groupsThis response will list all the groups the user is a part of. If one of them is Billing, you can use Descope Scriptlets to enforce MFA for those users.
In your flow, you can add a Scriptlets step (click the button in the top-left corner to insert a new action). Scriptlets let you run JS code during the script and access context keys used in the flows.
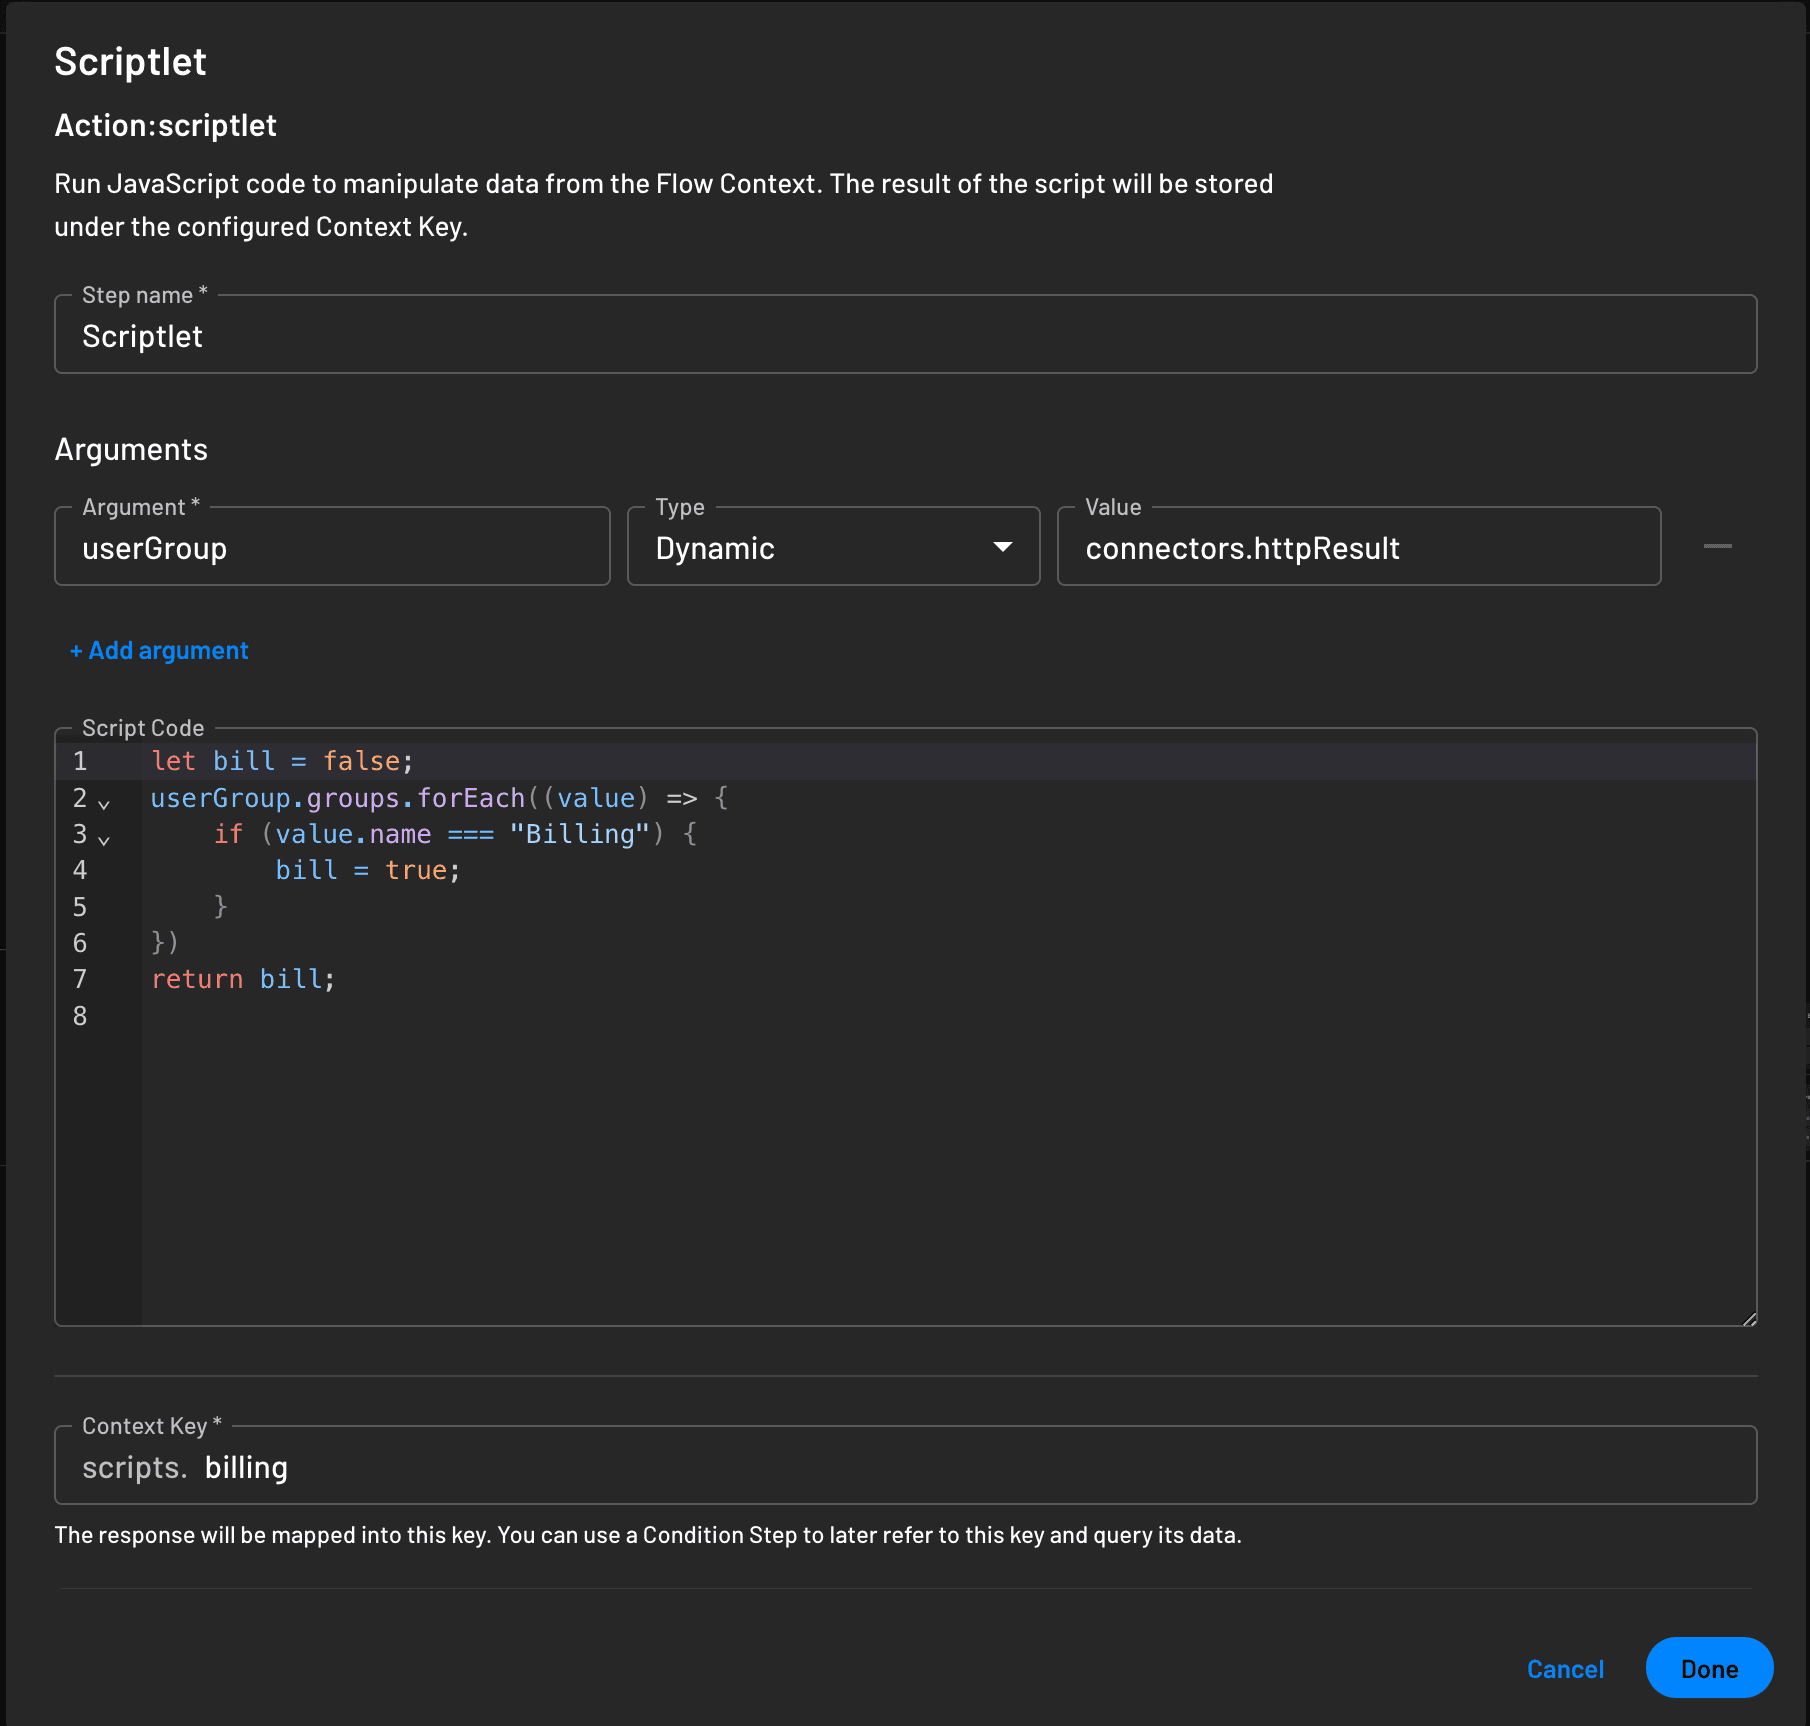
The output of this script, scripts.billing, can be used as a context key in a condition for the flow.
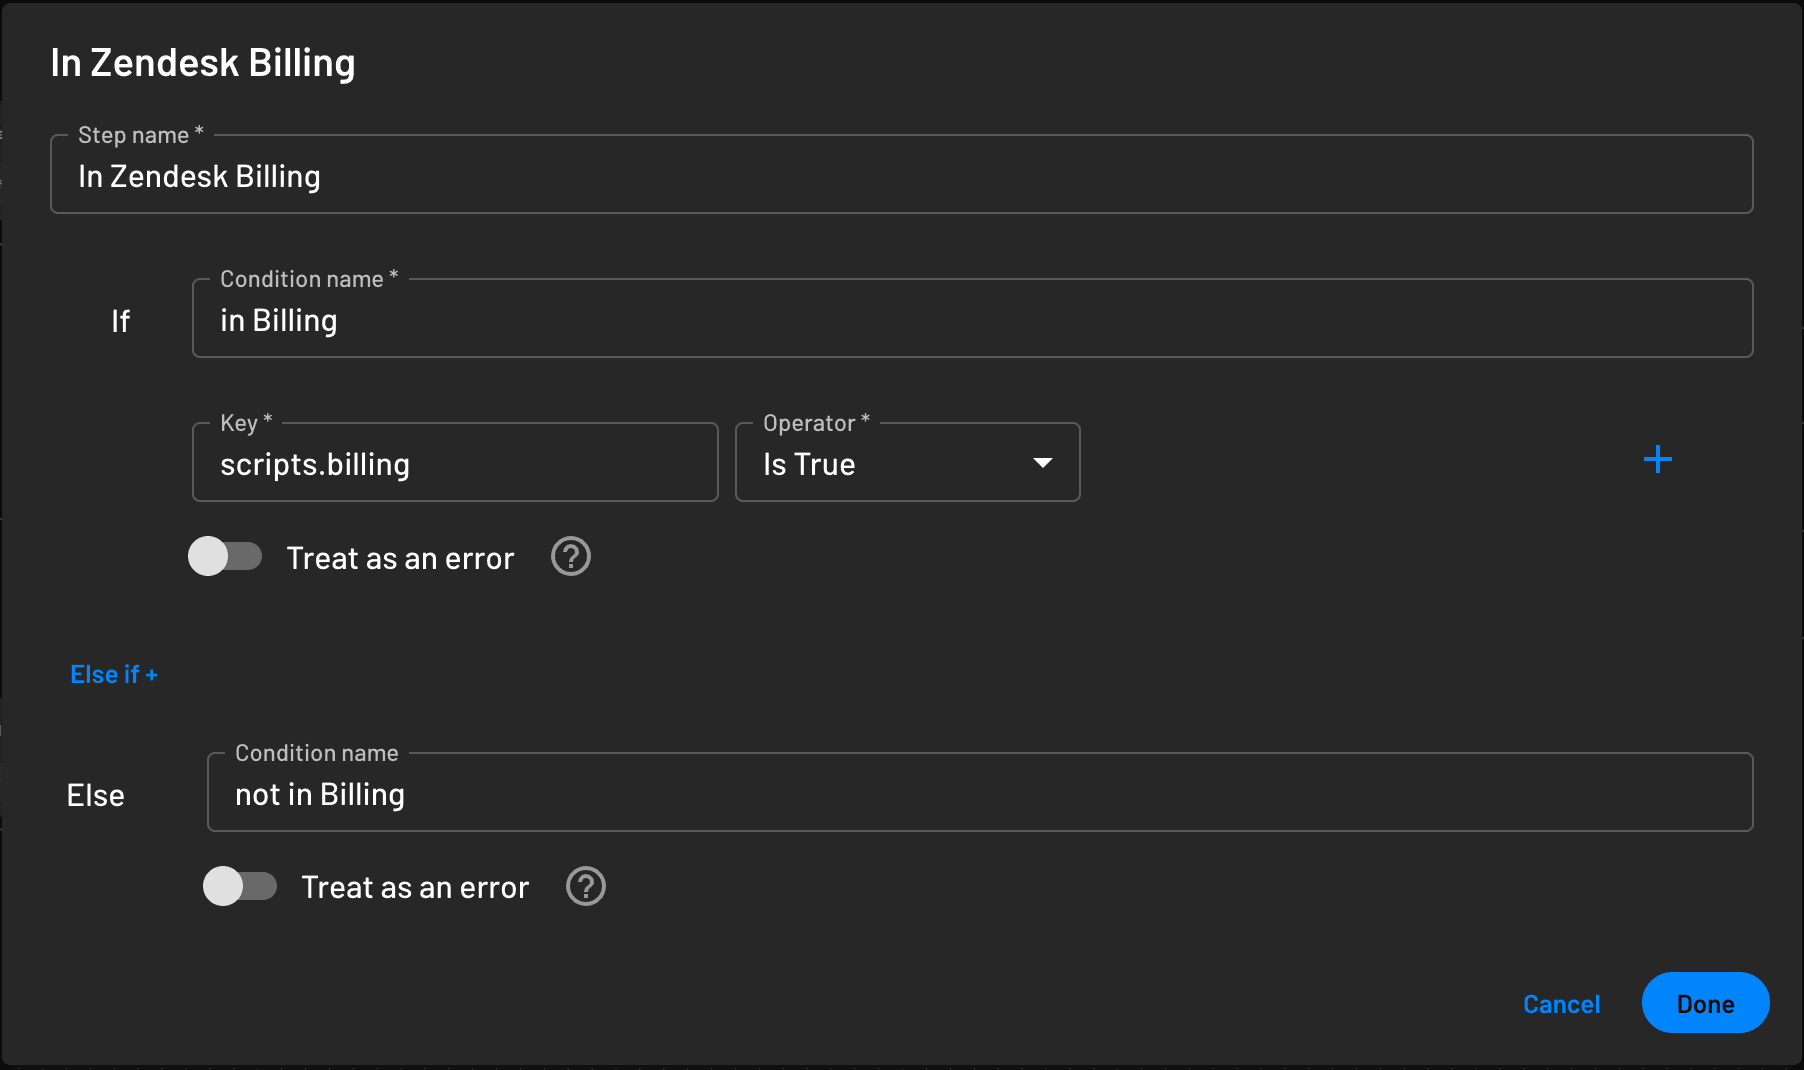
Now, when a user is part of the Billing group in Zendesk, Descope can assign them a Billing role. You can then require MFA only for those agents by checking for that role in your flow conditions.
Even better, this approach isn’t limited to Zendesk groups—you can adapt it to any permission structure or organizational hierarchy your agents are tied to on the platform.
Zendesk SSO that’s simple yet secure
SSO doesn’t just streamline authentication—it also strengthens your security posture. For a ticketing service like Zendesk, SSO ensures that both agents and customers can log in through the same portal, while still being directed to the right experience.
In this guide, you saw how easy it is to use Descope as an SSO provider for Zendesk, and how to level up security by tailoring MFA requirements based on user roles and permissions—like enforcing step-up authentication for billing agents.
Whether you're looking to speed up onboarding, tighten access controls, or build fully customized login flows—Descope makes it easy.
Sign up for a free Descope account to start building or request a demo to see how it fits into your existing stack.