
Table of Contents
Developers are increasingly integrating AI into user-facing applications, both as commercial products and within enterprise use cases. These AI-powered apps are great when the Large Language Models (LLMs) behind them are trained with relevant data—but what if they could connect to external services and real-time data? Enterprises would be better equipped to analyze the latest sales trends, and everyday users could get an accurate response to “Should I wear sunscreen today?”
That's where the Model Context Protocol (MCP) comes in. MCP allows LLMs to connect with external tools and APIs in a standardized way. MCP uses a client-sever model to connect AI applications and external services, eliminating the need to integrate each API-and-app pairing individually. If you’re not familiar with MCP, you can get an introduction in our beginner-friendly article.
In this guide, we’ll show you how to use Descope MCP Auth SDKs to secure a remote MCP server built with Express.js and deploy it on Fly.io to access weather data from the National Weather Service API.
Here are the steps we’ll walk through:
With Descope Inbound Apps and MCP Auth SDKs, we will add MCP-compliant authorization, including OAuth 2.1/2.0 Authorization Code Flow, Authorization Server Metadata (ASM), and Dynamic Client Registration (DCR).
MCP’s official TypeScript SDK will handle the MCP server logic itself.
We will host the system on Fly.io with a Docker image.
Below, you can see a video highlighting the deployed server that will result from following this guide. If you’d like to review the source for this tutorial before getting started, you can access the complete code.
Prerequisites
To follow along, you must first set up a local developer environment:
Create a Free Forever Descope Account
Create a Fly.io Account
Install Node.js (v18+)
Install the Fly.io CLI
Install Docker
Get the remote MCP weather server sample application
You can find the sample remote MCP server in the examples folder within the Descope AI Monorepo. Clone the repo, navigate to the server folder, and install the dependencies using the following commands in the terminal.
For the MCP weather server:
git clone https://github.com/descope/ai.git
cd ai/examples/remote-mcp-server-express-fly
npm install
Set up the weather MCP server
The Weather MCP Server was built with Express.js, and it uses Descope for authentication. It provides two main endpoints:
GET /sse: Establishes an SSE connectionPOST /message: Handles incoming messages
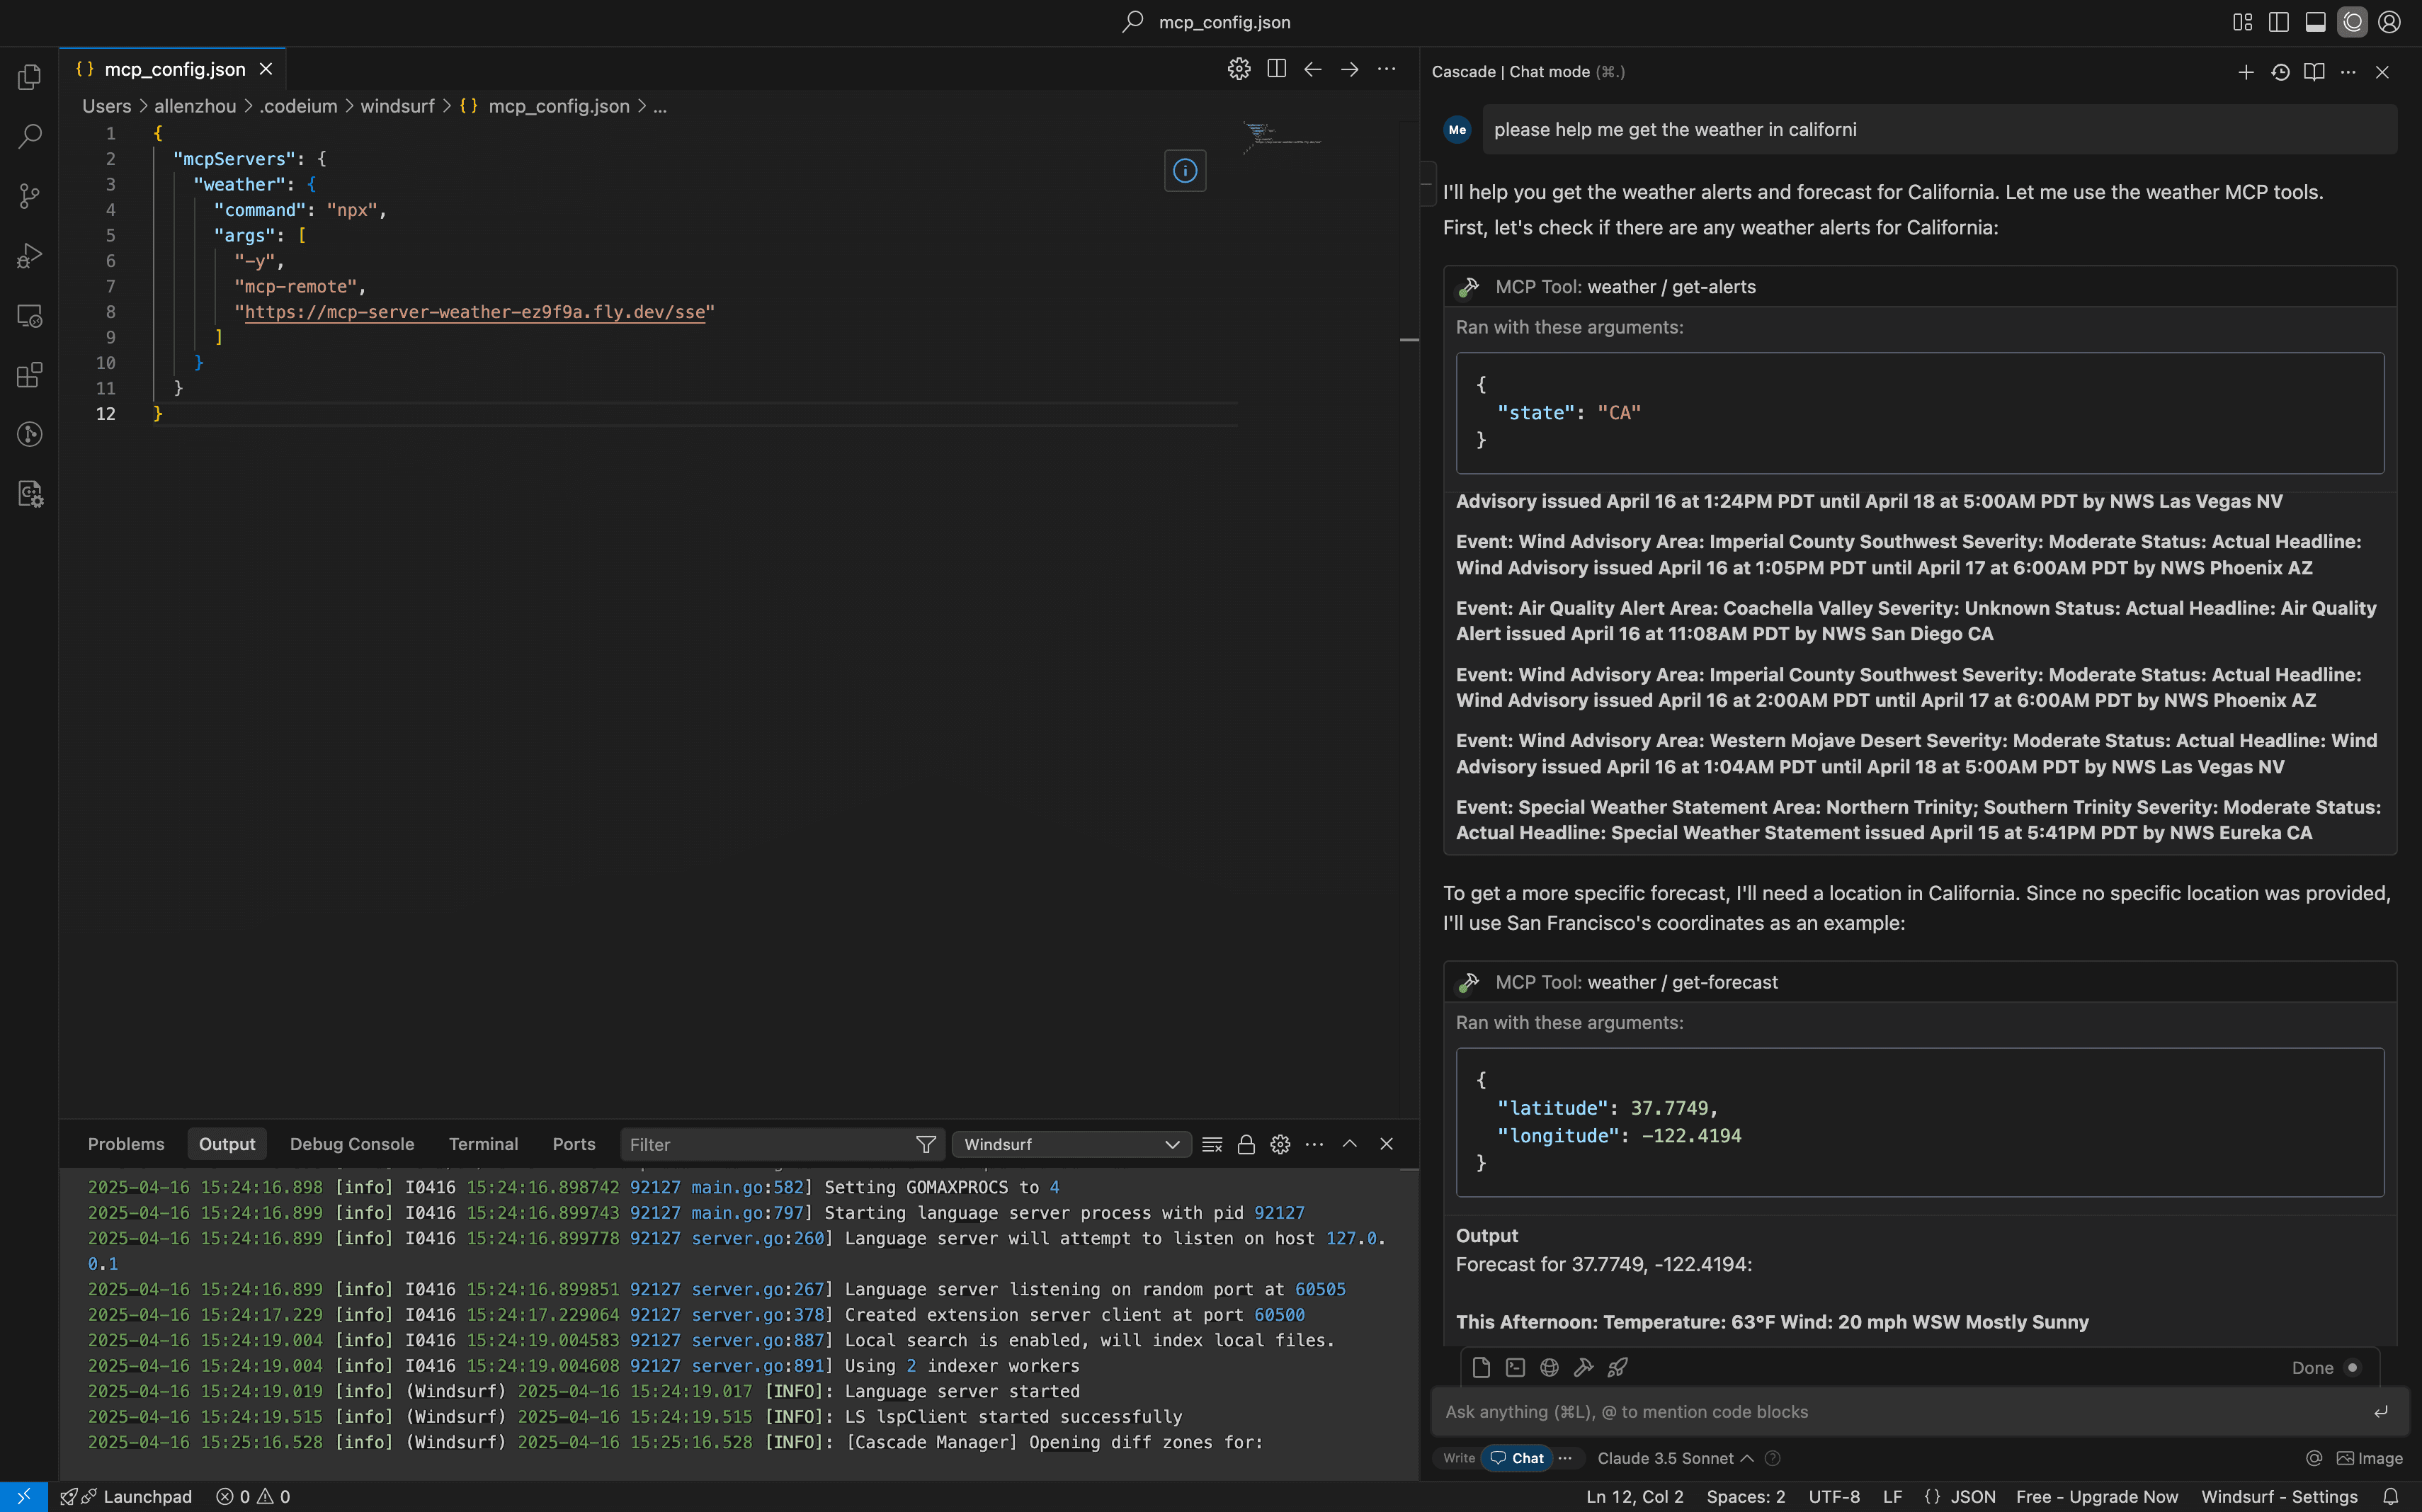
The server implements two primary tools:
get-alerts: Retrieves weather alerts for a specific stateget-forecast: Gets weather forecast for a specific location using latitude and longitude
Initial configuration
First, you'll need to set up your Descope project:
Go to the Descope Dashboard
Create a new project
Note down your Project ID and Management Key
Next, create a .env file in your project root with the following variables:
DESCOPE_PROJECT_ID= # Your Descope project ID
DESCOPE_MANAGEMENT_KEY= # Your Descope management key
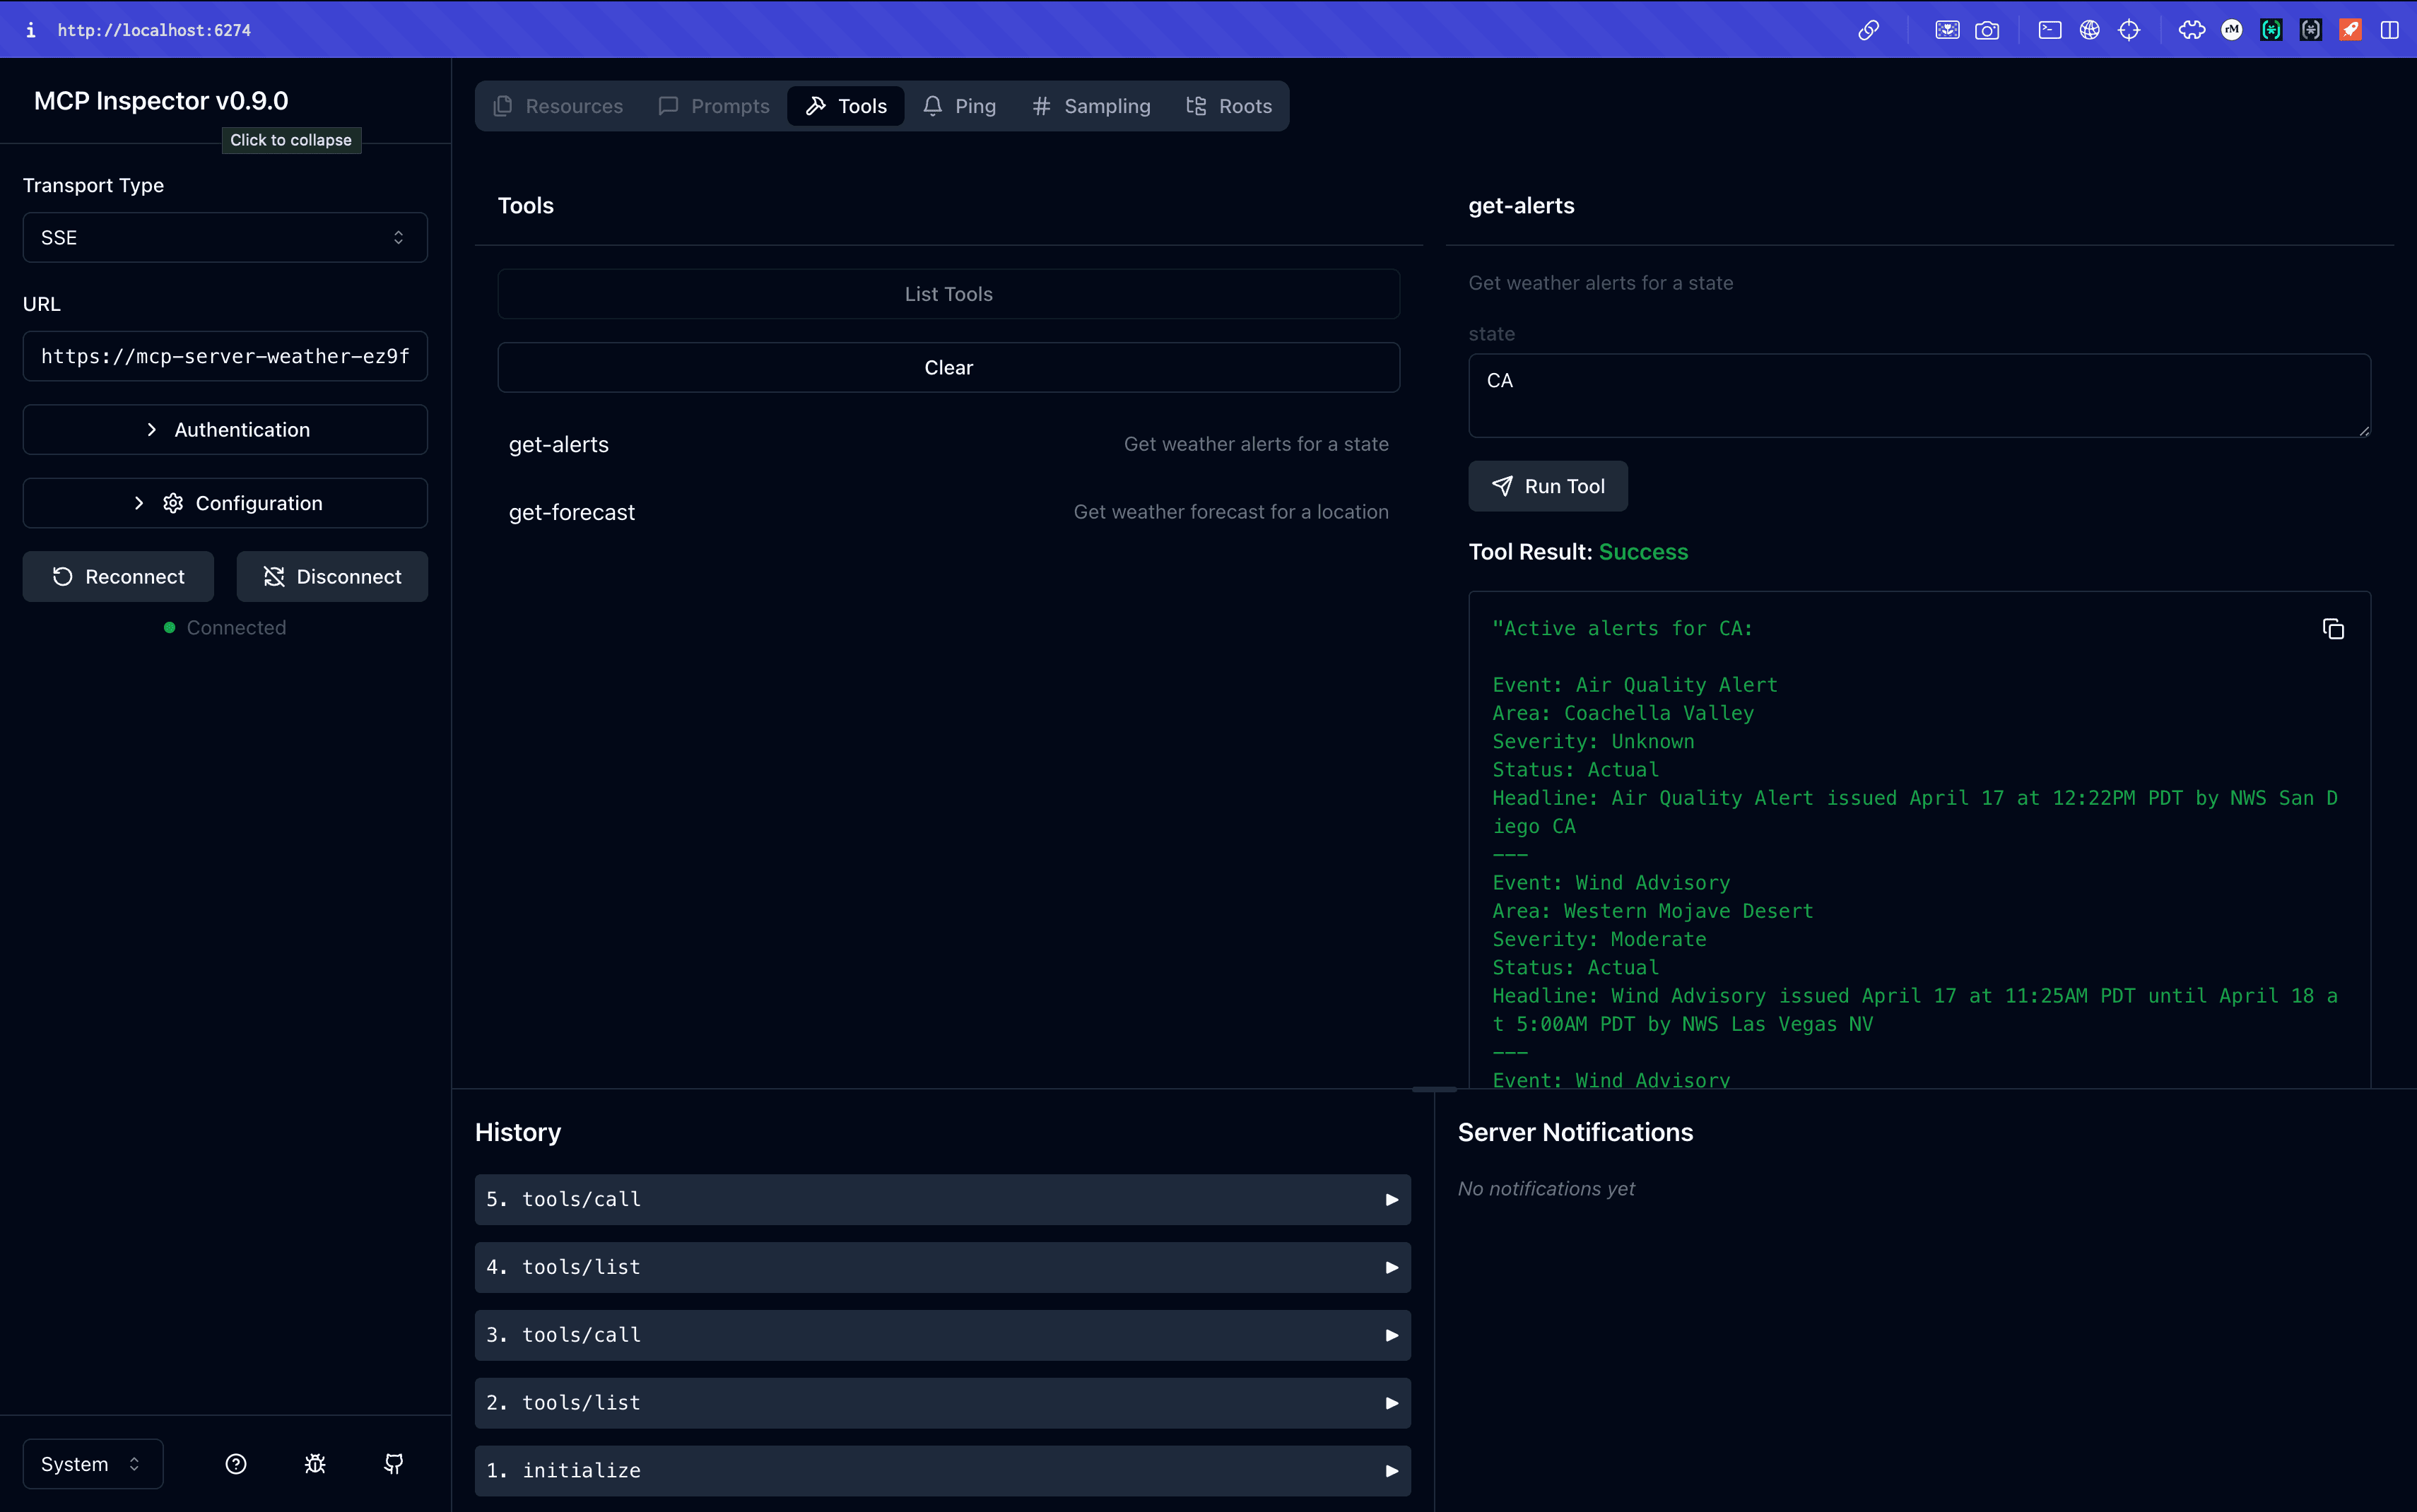
SERVER_URL= # The URL where your server will be hostedNow run the server with npm run dev and test it with an MCP client like MCP Inspector. With Inspector, you’ll be able to easily input your server URL and validate auth flows or tool calls.
Create an MCP server with SSE
For a deeper discussion on MCP server implementation, you can visit the official documentation on the topic, which also uses a weather server for its example. The fundamental difference between the official example and this sample is that Server-Sent Events (SSE) takes the place of Standard I/O, which allows for remote communication instead of local.
By using the MCP TypeScript SDK, the main implementation difference is changing the transport class used and keeping track of the different transports that are active and routing messages from the client. It should look something like this:
let servers: McpServer[] = [];

app.get("/sse", async (req, res) => {
   const transport = new SSEServerTransport("/message", res);
   const { server } = createServer();

   servers.push(server);
   server.server.onclose = () => {
       console.log("SSE connection closed");
       servers = servers.filter((s) => s !== server);
   };
   server.server.onclose = () => {
       clearTimeout(timeout);
       console.log("SSE connection closed");
       servers = servers.filter((s) => s !== server);
   };

   console.log("Received connection");
   await server.connect(transport);
})
This would also look slightly different with the newly released Streamable HTTP transport depending on the needs of the server.
Integrate OAuth with Descope
Now that we have our environment and server set up, we can go ahead and add auth. We’ll be using Descope’s MCP Auth SDK for Express which makes this process super straightforward.
First, let’s install the SDK:
npm install @descope/mcp-expressThen, we’ll need to ensure that we can load our environment variables, for example by using dotenv:
npm install dotenvNow, you can use the SDK:
import "dotenv/config";
import express from "express";
import {
  descopeMcpAuthRouter,
  descopeMcpBearerAuth,
} from "@descope/mcp-express";

const app = express();

app.use(descopeMcpAuthRouter());

app.use(["/sse", "/message"], descopeMcpBearerAuth());

let servers: McpServer[] = [];

app.get("/sse", async (req, res) => {

// rest of server code
The descopeMcpAuthRouter line adds the OAuth 2.0 Authorization Server Metadata. As required by the MCP Auth spec, descopeMcpBearerAuth protects the MCP routes by validating the bearer token and returning errors like 401s. It also attaches the scopes, expiration, and other validated auth info to the auth key of the request for later access.
Advanced configurations regarding required scopes, public key use, Dynamic Client Registration, and more can be handled via the DescopeMcpProvider object, with more information in our SDK docs.
That’s it! Now, when the user tries to connect to an MCP server without a valid token, the server will return a 401 unauthorized error. Then, the MCP client application will find the hosted Authorization Server Metadata, which includes all the OAuth endpoints required, including the Dynamic Client Registration handler.
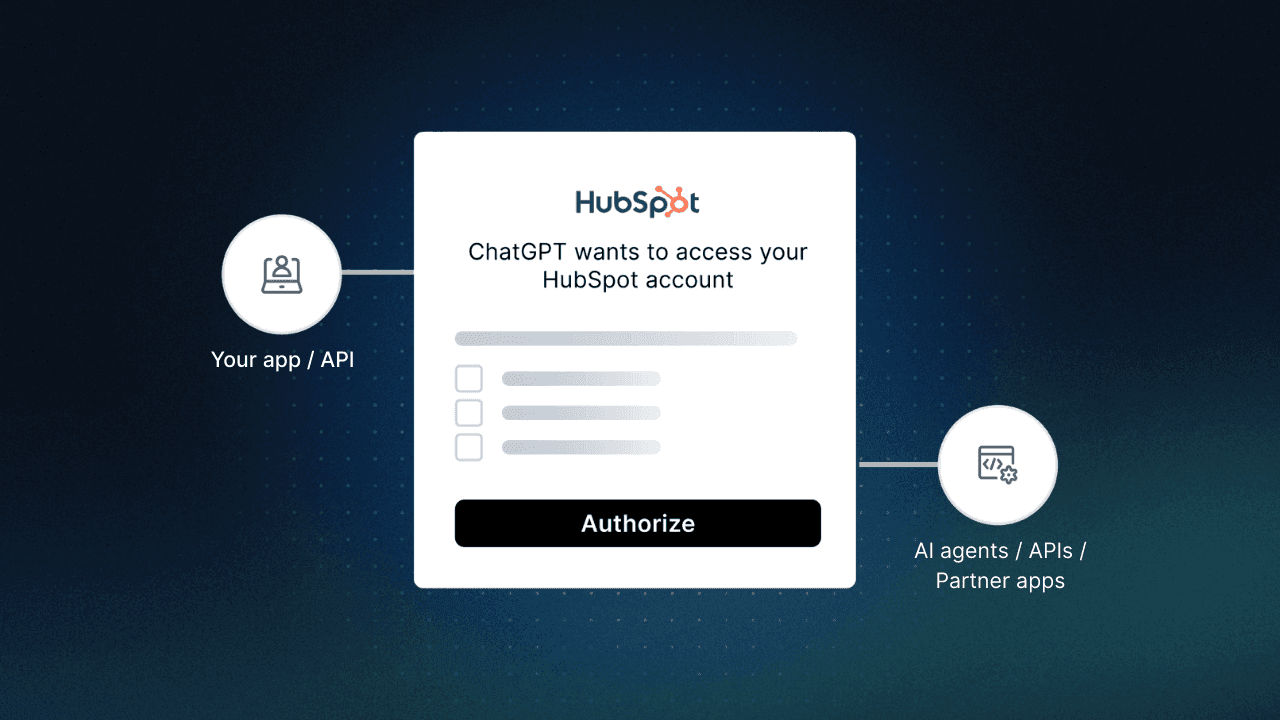
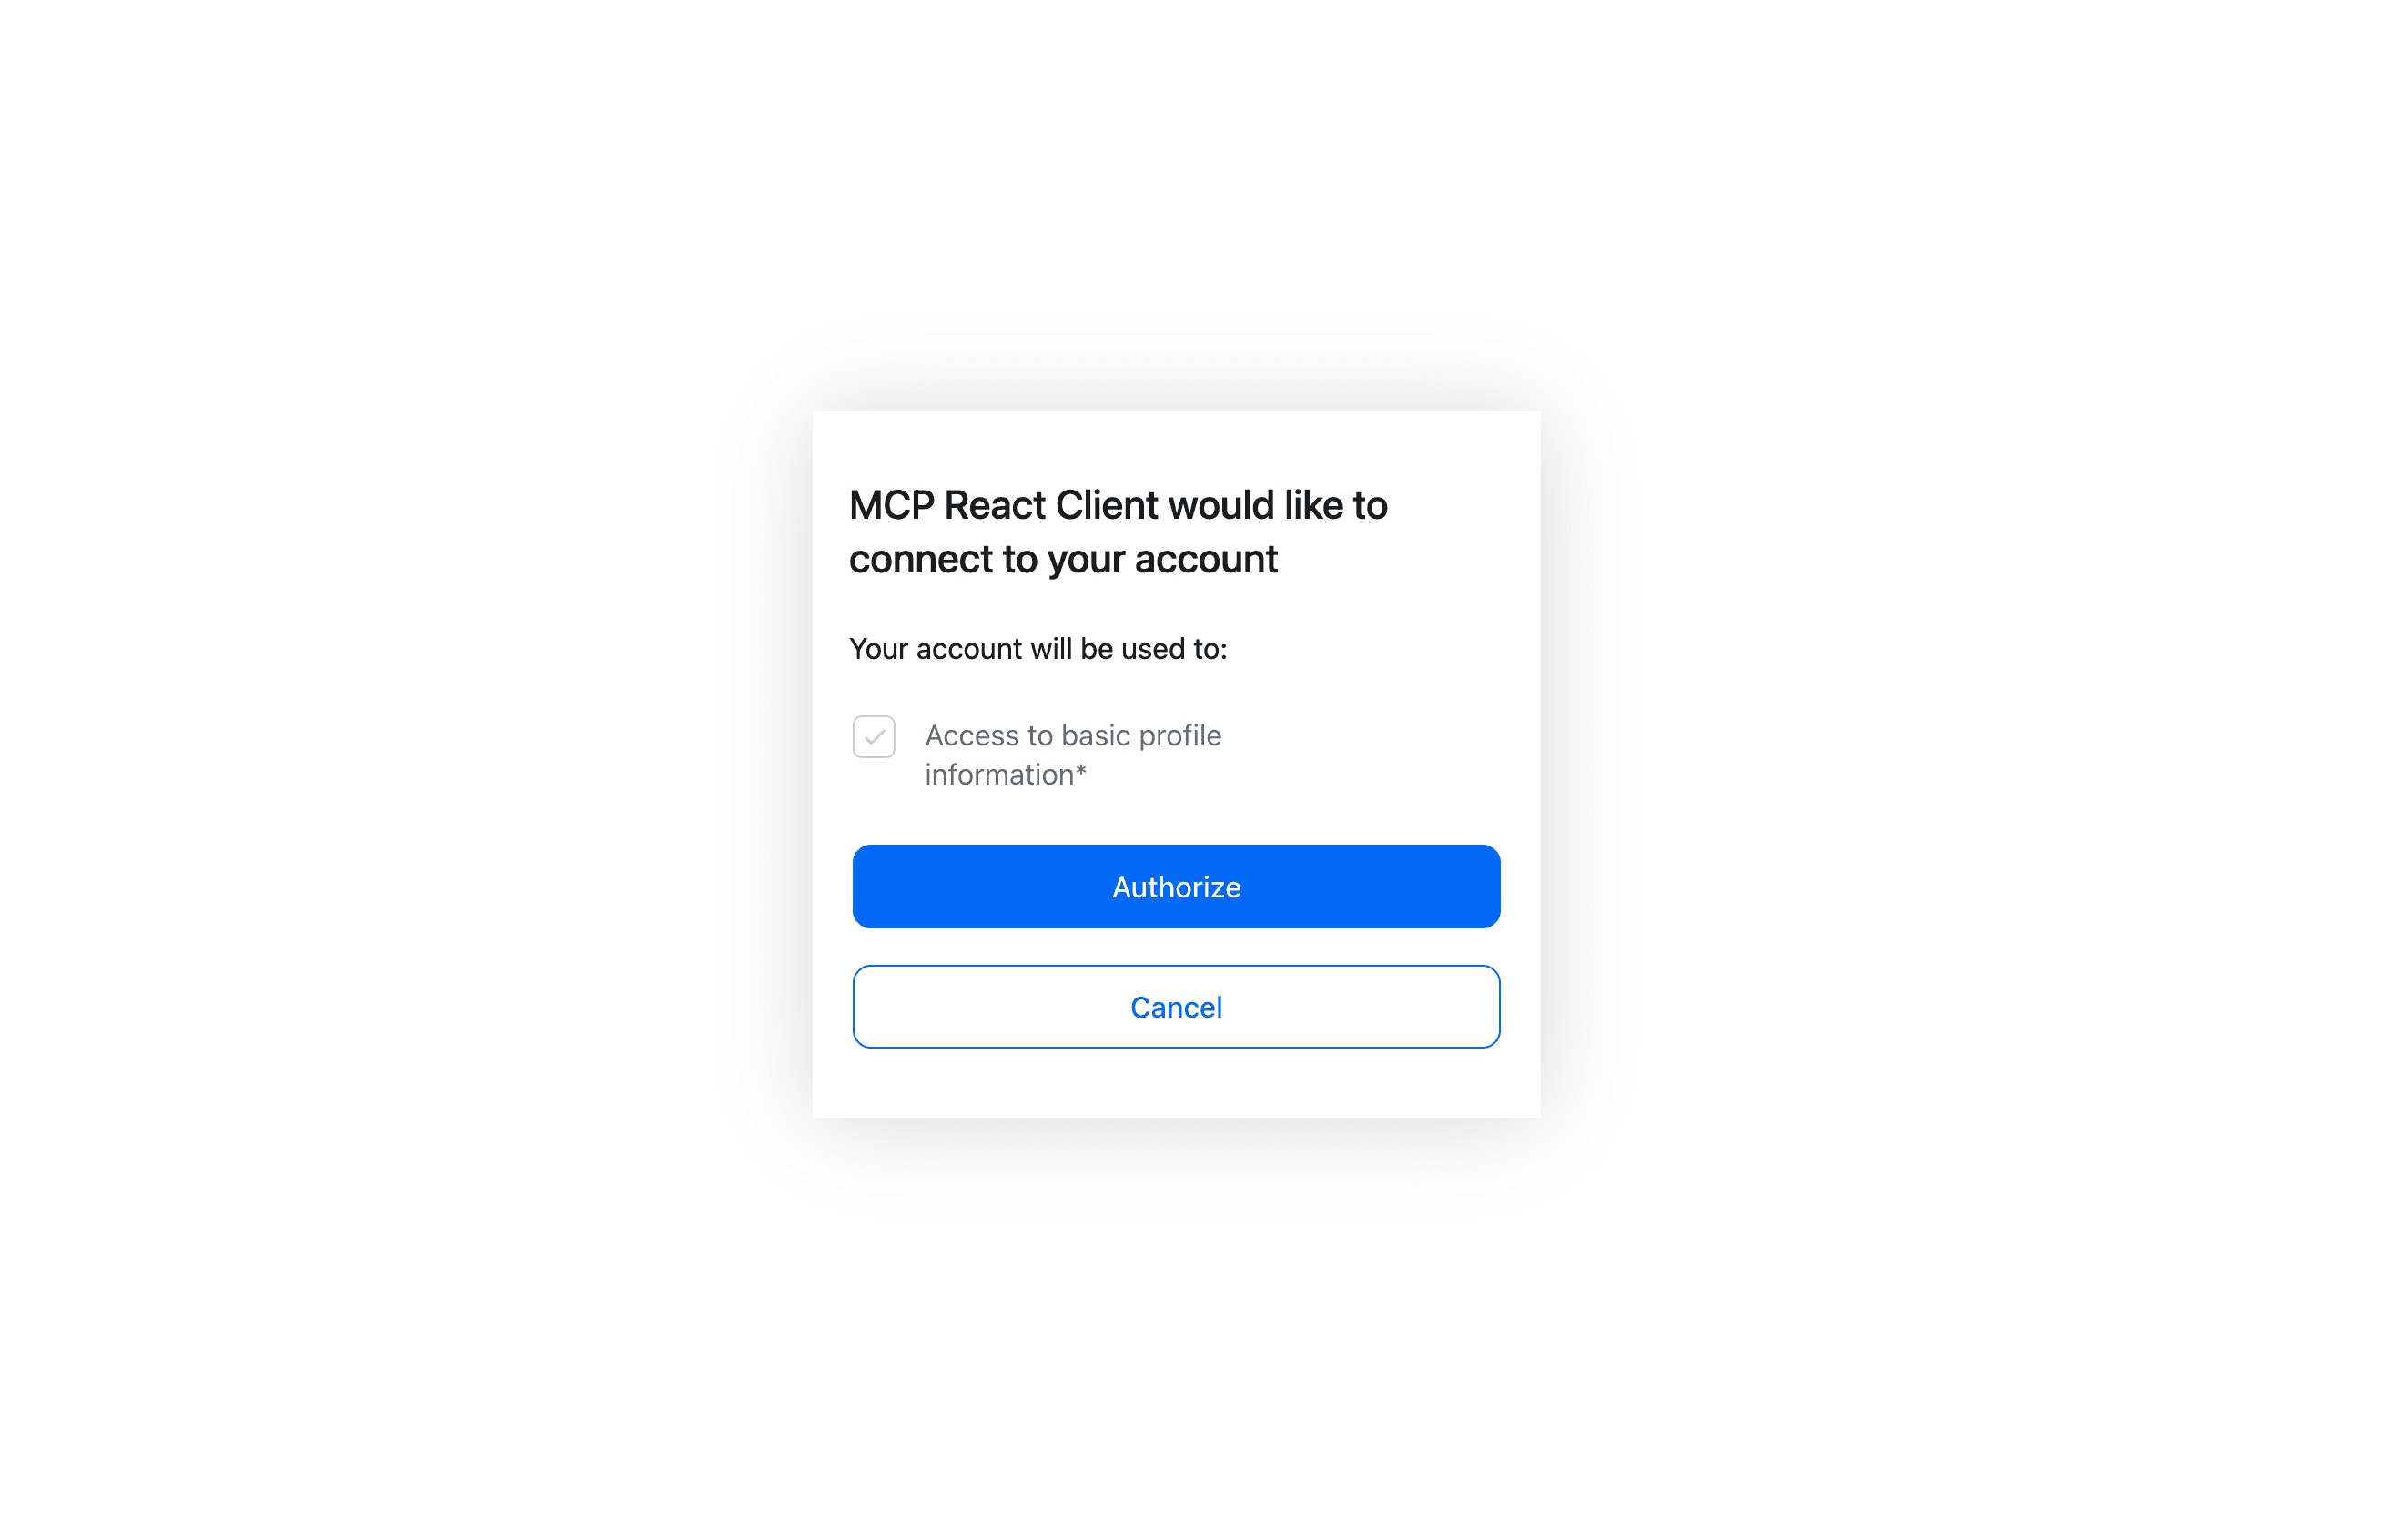
The client would then programmatically register as an OAuth client and start the auth process for the user. The user would go through the traditional OAuth consent flow, first authenticating with social login or email OTP (or passkeys or really any auth method you’d like to configure) and then giving consent.
For more details on customizing the auth flow, check out our Inbound Apps documentation.
Finally, the token would be issued to the client. On future requests the user would be authenticated, so they will connect as usual.
Handling authorization in tool calls
What if the tool call needs access to user specific information? Fortunately, there’s a simple and effective way to resolve this scenario. The tool handler has an `extra` object that contains the authInfo by default with scopes, expiration, the bearer token itself, and more.
export const createServer = () => {
    // Create server instance
    const server = new McpServer({
        name: "analytics",
        version: "1.0.0",
    });

    // Add get-schema tool
    server.tool(
        "get-schema",
        "Fetch the database schema",
        {},
        async (_, { extra }) => {
            const scopes = extra?.authInfo?.scopes;
            if (!scopes || scopes && scopes.indexOf("get-schema") < 0) {
                return {
                    content: [
                        {
                            type: "text",
                            text: "Unauthorized: Missing get-schema scope",
                            code: 403
                        }
                    ]
                }
            }
Descope supports this capability with the official MCP TypeScript SDK. In our solution, the descopeMcpBearerAuth sets the AuthInfo object on the auth key of the request object after validating the JWT. Then, in the message handler at the MCP transport level, the object is passed through to the tool call, bringing this context from HTTP to SSE.
Deployment to Fly.io
Configuring the server to run on Fly.io, a global application hosting platform, is straightforward.
Create a Dockerfile
First, we’ll include a lightweight Dockerfile to build and run the Node.js Express server.
To begin, create a file named Dockerfile in your project root.
touch DockerfileNext, add the following contents to Dockerfile:
# Build stage
FROM node:18-alpine AS build       # Use a minimal Node.js 18 image

WORKDIR /app                       # Set working directory inside the container

COPY package*.json .               # Copy package manifest files

RUN npm install                    # Install dependencies

COPY . .                           # Copy the rest of the project files

RUN npm run build                  # Run the build step (e.g., TypeScript compilation)

EXPOSE 3000                        # Expose port 3000 to the host system

CMD [ "npm", "run", "start" ]      # Command to start the server
The node:18-alpine ensures a small image size and quick cold starts, while the multi-step build keeps the final container efficient and production ready.
As an optional step, you can also create a .dockerignore tile to avoid copying unnecessary files into your Docker image:
touch .dockerignoreNext, add the content below:
node_modules
npm-debug.log
Dockerfile
.dockerignore
*.tsbuildinfo
As an optional step, you can now build the Docker image locally to make sure the Dockerfile works before deploying:
docker build -t mcp-server-weather .Read more about running the image per the Docker docs here if you’d like. Now, we are ready to use the Fly.io CLI to deploy.
CLI deployment steps
Now that we have all the configuration ready, we can use the Fly.io CLI to deploy our server. Here are the steps, all done from the root of the project folder:
First, install the Fly.io CLI and run flyctl launch. This will detect the Dockerfile, prompt you to create a fly.toml, ask for a region, and optionally deploy right away.
Here’s what the fly.toml could look like:
app = "mcp-server-weather"          # Unique Fly.io app name
primary_region = "sjc"              # Primary deployment region (San Jose, California)

[http_service]
  internal_port = 3000              # Port the app listens on internally
  force_https = true                # Enforce HTTPS connections
  auto_stop_machines = "stop"       # Automatically stop idle machines
  auto_start_machines = true        # Automatically start machines when requests arrive
  min_machines_running = 0          # No always-on instances, serverless-style scaling
  processes = ["app"]               # Process group defined as 'app'

[[vm]]
  memory = "1gb"                    # Allocate 1GB of memory
  cpu_kind = "shared"              # Use shared CPU resources
  cpus = 1                          # Allocate 1 virtual CPU
Next, set your environment variables (secrets) in the Fly.io UI or by running the below command in your CLI:
fly secrets set DESCOPE_PROJECT_ID=      # Your Descope project ID

fly secrets set DESCOPE_MANAGEMENT_KEY=  # Your Descope management key

fly secrets set SERVER_URL=             # The URL where your server will be hosted
Now that everything is set up, you can run the following to build and deploy your Docker image:
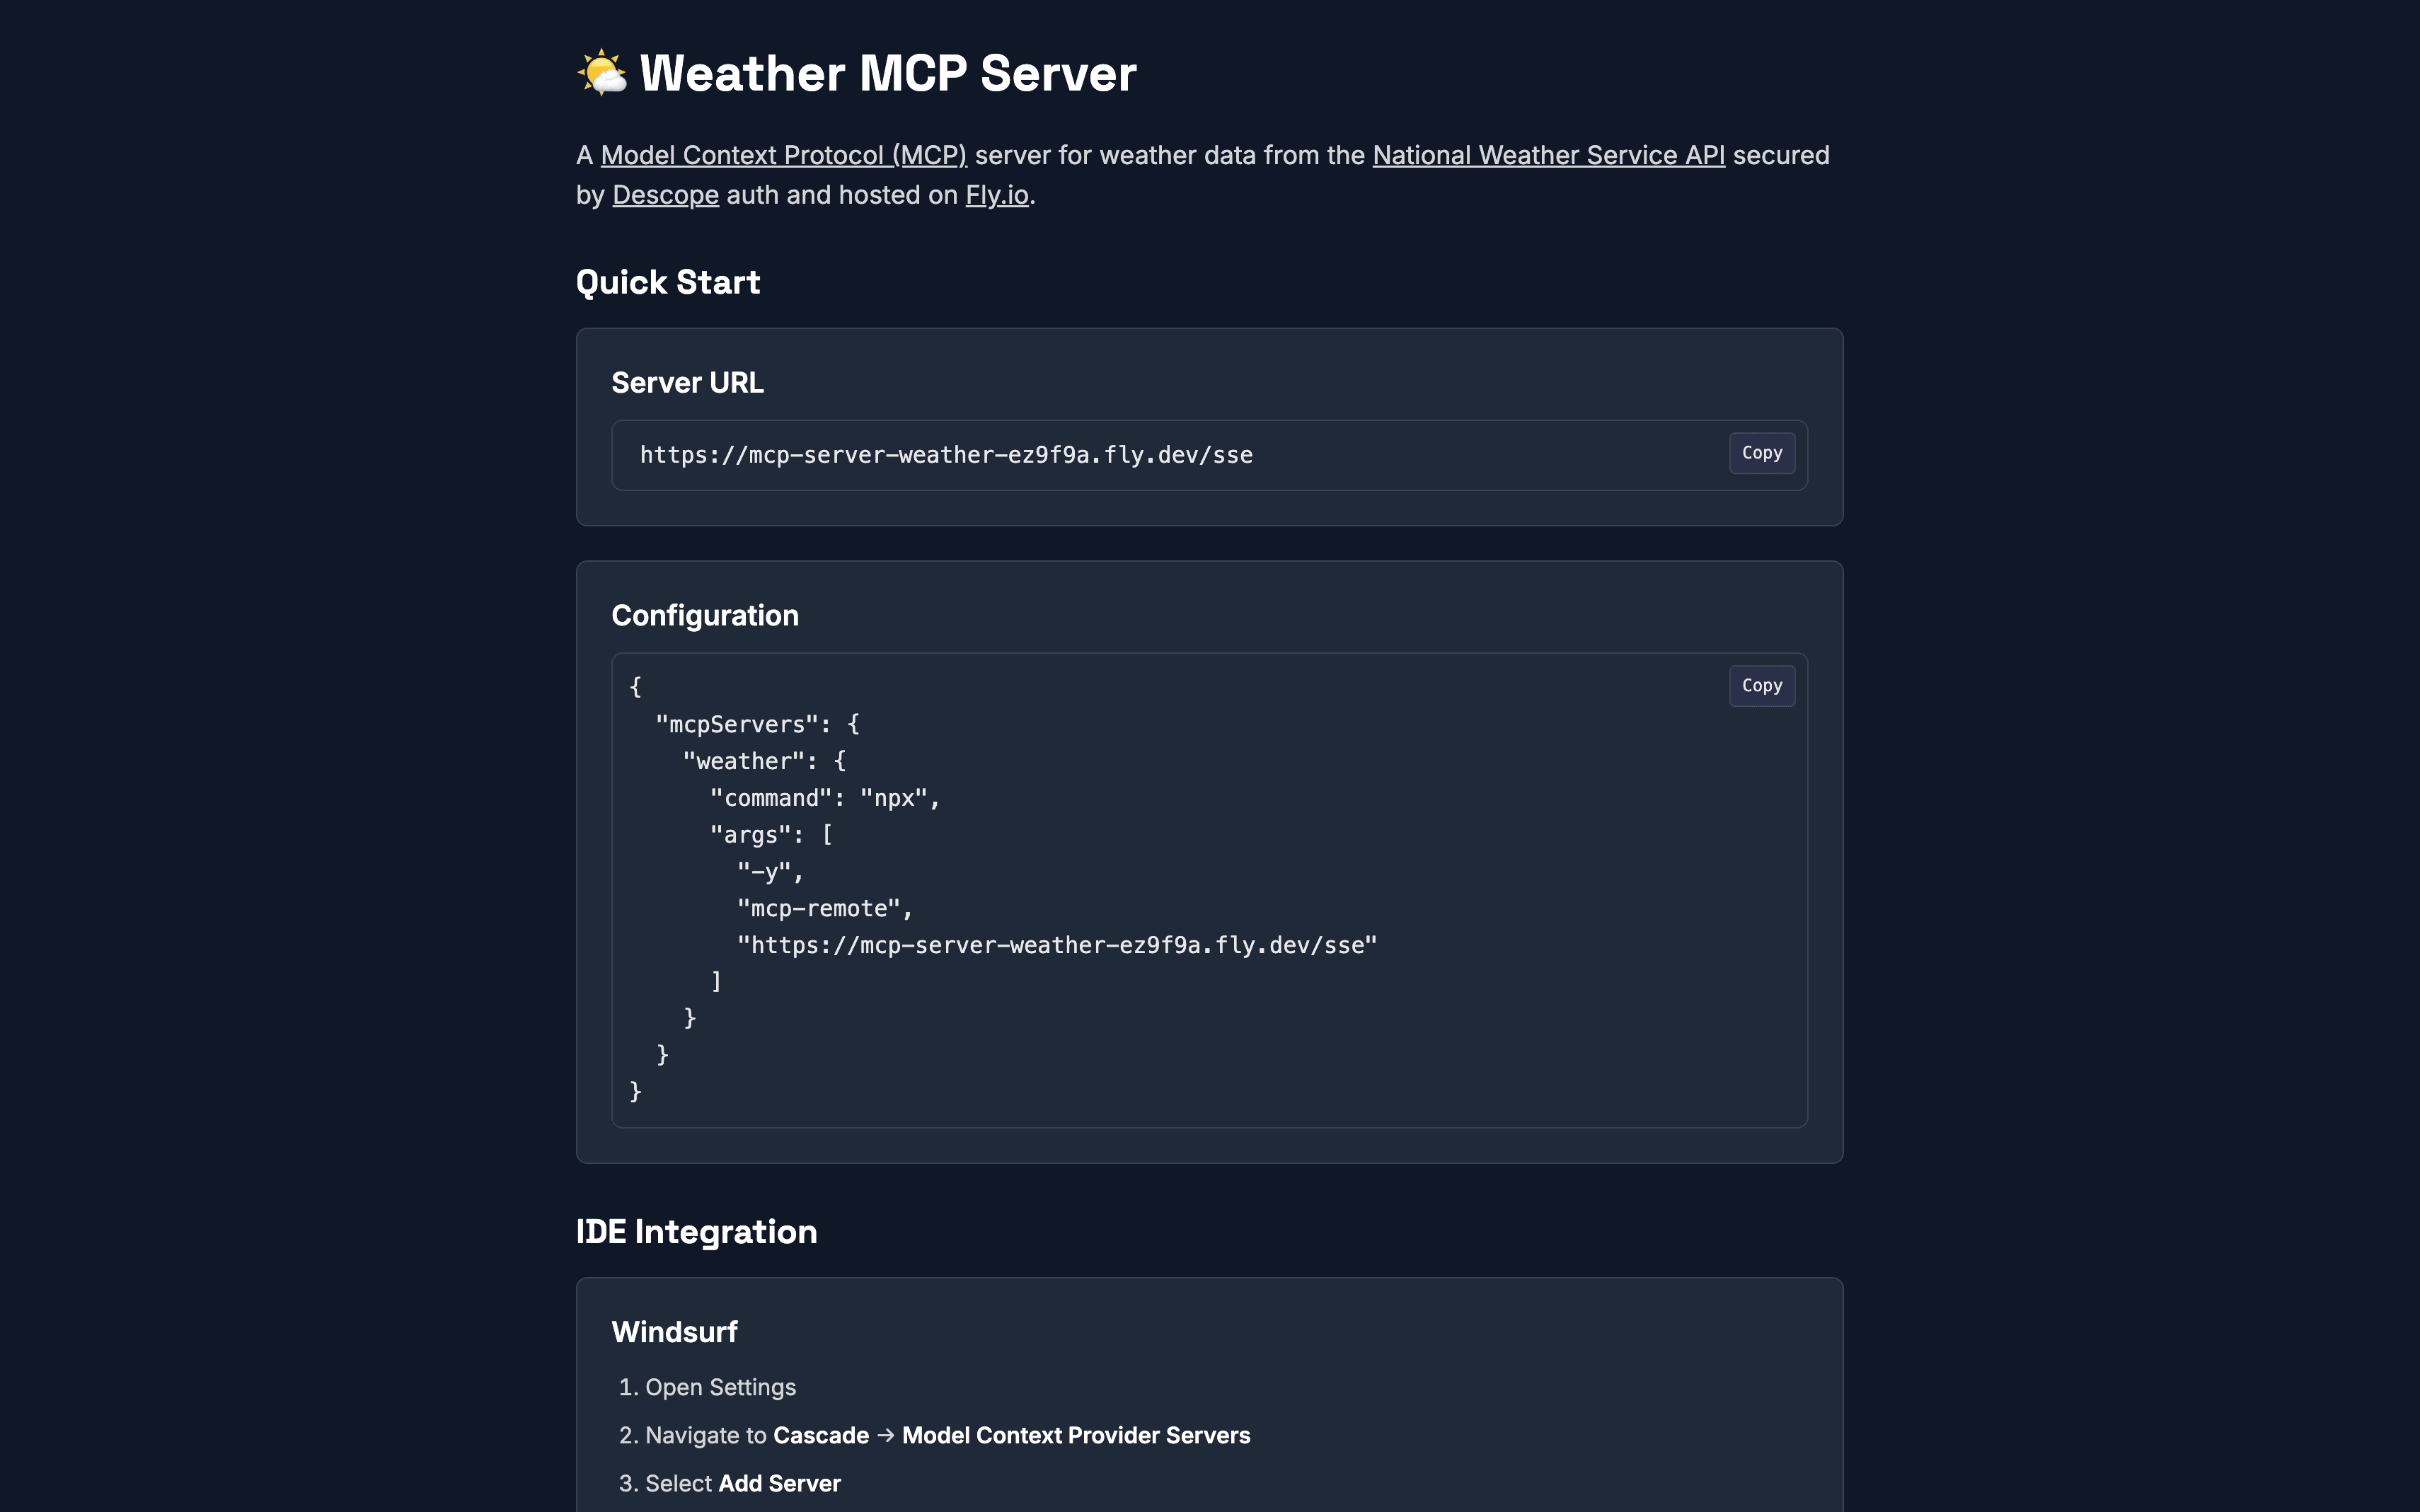
flyctl deployOnce deployed, navigate to the root URL of your Fly.io app (e.g., https://your-mcp-server-weather-slug.fly.dev) in a web browser. The home page will provide usage instructions and guidance on how to connect MCP-compliant clients to your server.
Securing MCP server interactions with Descope
In this post, we walked through the steps needed to secure a MCP Server with Descope and deploy it to Fly.io. The MCP server uses Descope as an identity provider and includes AI tools that call the National Weather Service API on behalf of the user.
Remote MCP Servers can make LLMs more capable, equipping them powerful tools and real-time information and. Although MCP draws on battle-tested protocols to secure authorization, building from scratch can be difficult, time-consuming, and potentially risky. Descope's external IAM solutions enable AI agents to securely access tools, workflows, and data with fine-grained control—without the hassle of creating it all yourself.
Does your current project involve building a remote MCP server? Or are you simply curious about the AI auth solutions offered by Descope? Visit our microsite highlighting agentic identity demos, check out AI Launch Week, or get connected with like-minded developers in our Slack community, AuthTown.