
Table of Contents
This tutorial was written by Dedan Ndungu, a software engineer with experience in mobile app development using Java, Kotlin, and Flutter. Connect with him on LinkedIn or X to see more of his work!
Flutter is a modern framework for building beautiful and highly performative cross-platform apps. You can quickly ship apps for different platforms from a single codebase, thus saving time and resources. User authentication is a common feature in modern apps, which requires app users to sign up and log in to provide them with an identity. This is important to prevent fraud and provide a well-curated user experience. However, setting up user authentication and roles can be challenging and complex when building from scratch.
Descope is a solution for seamlessly integrating secure authentication into your Flutter app, leaving you to focus on what matters most to you. Additionally, Descope supports both web and mobile platforms when building your app with Flutter.
In this article, you will learn how to integrate Descope with a Flutter app, authenticate a user from the app, and configure authentication options, user roles, and permissions on the Descope dashboard.
If you're a visual learner, you can watch the video tutorial below instead!
Prerequisites
To complete this tutorial, you need the following:
A Descope account (free tier available)
A basic understanding of Flutter development and Dart programming
A Flutter development environment set up (IDE or command line tools)
Setting up Descope
Once you have signed up to Descope, log in and check the Descope dashboard, which offers many options for configuring authentication in your application.
On the left, you should see a sidebar, as shown in the following screenshot:
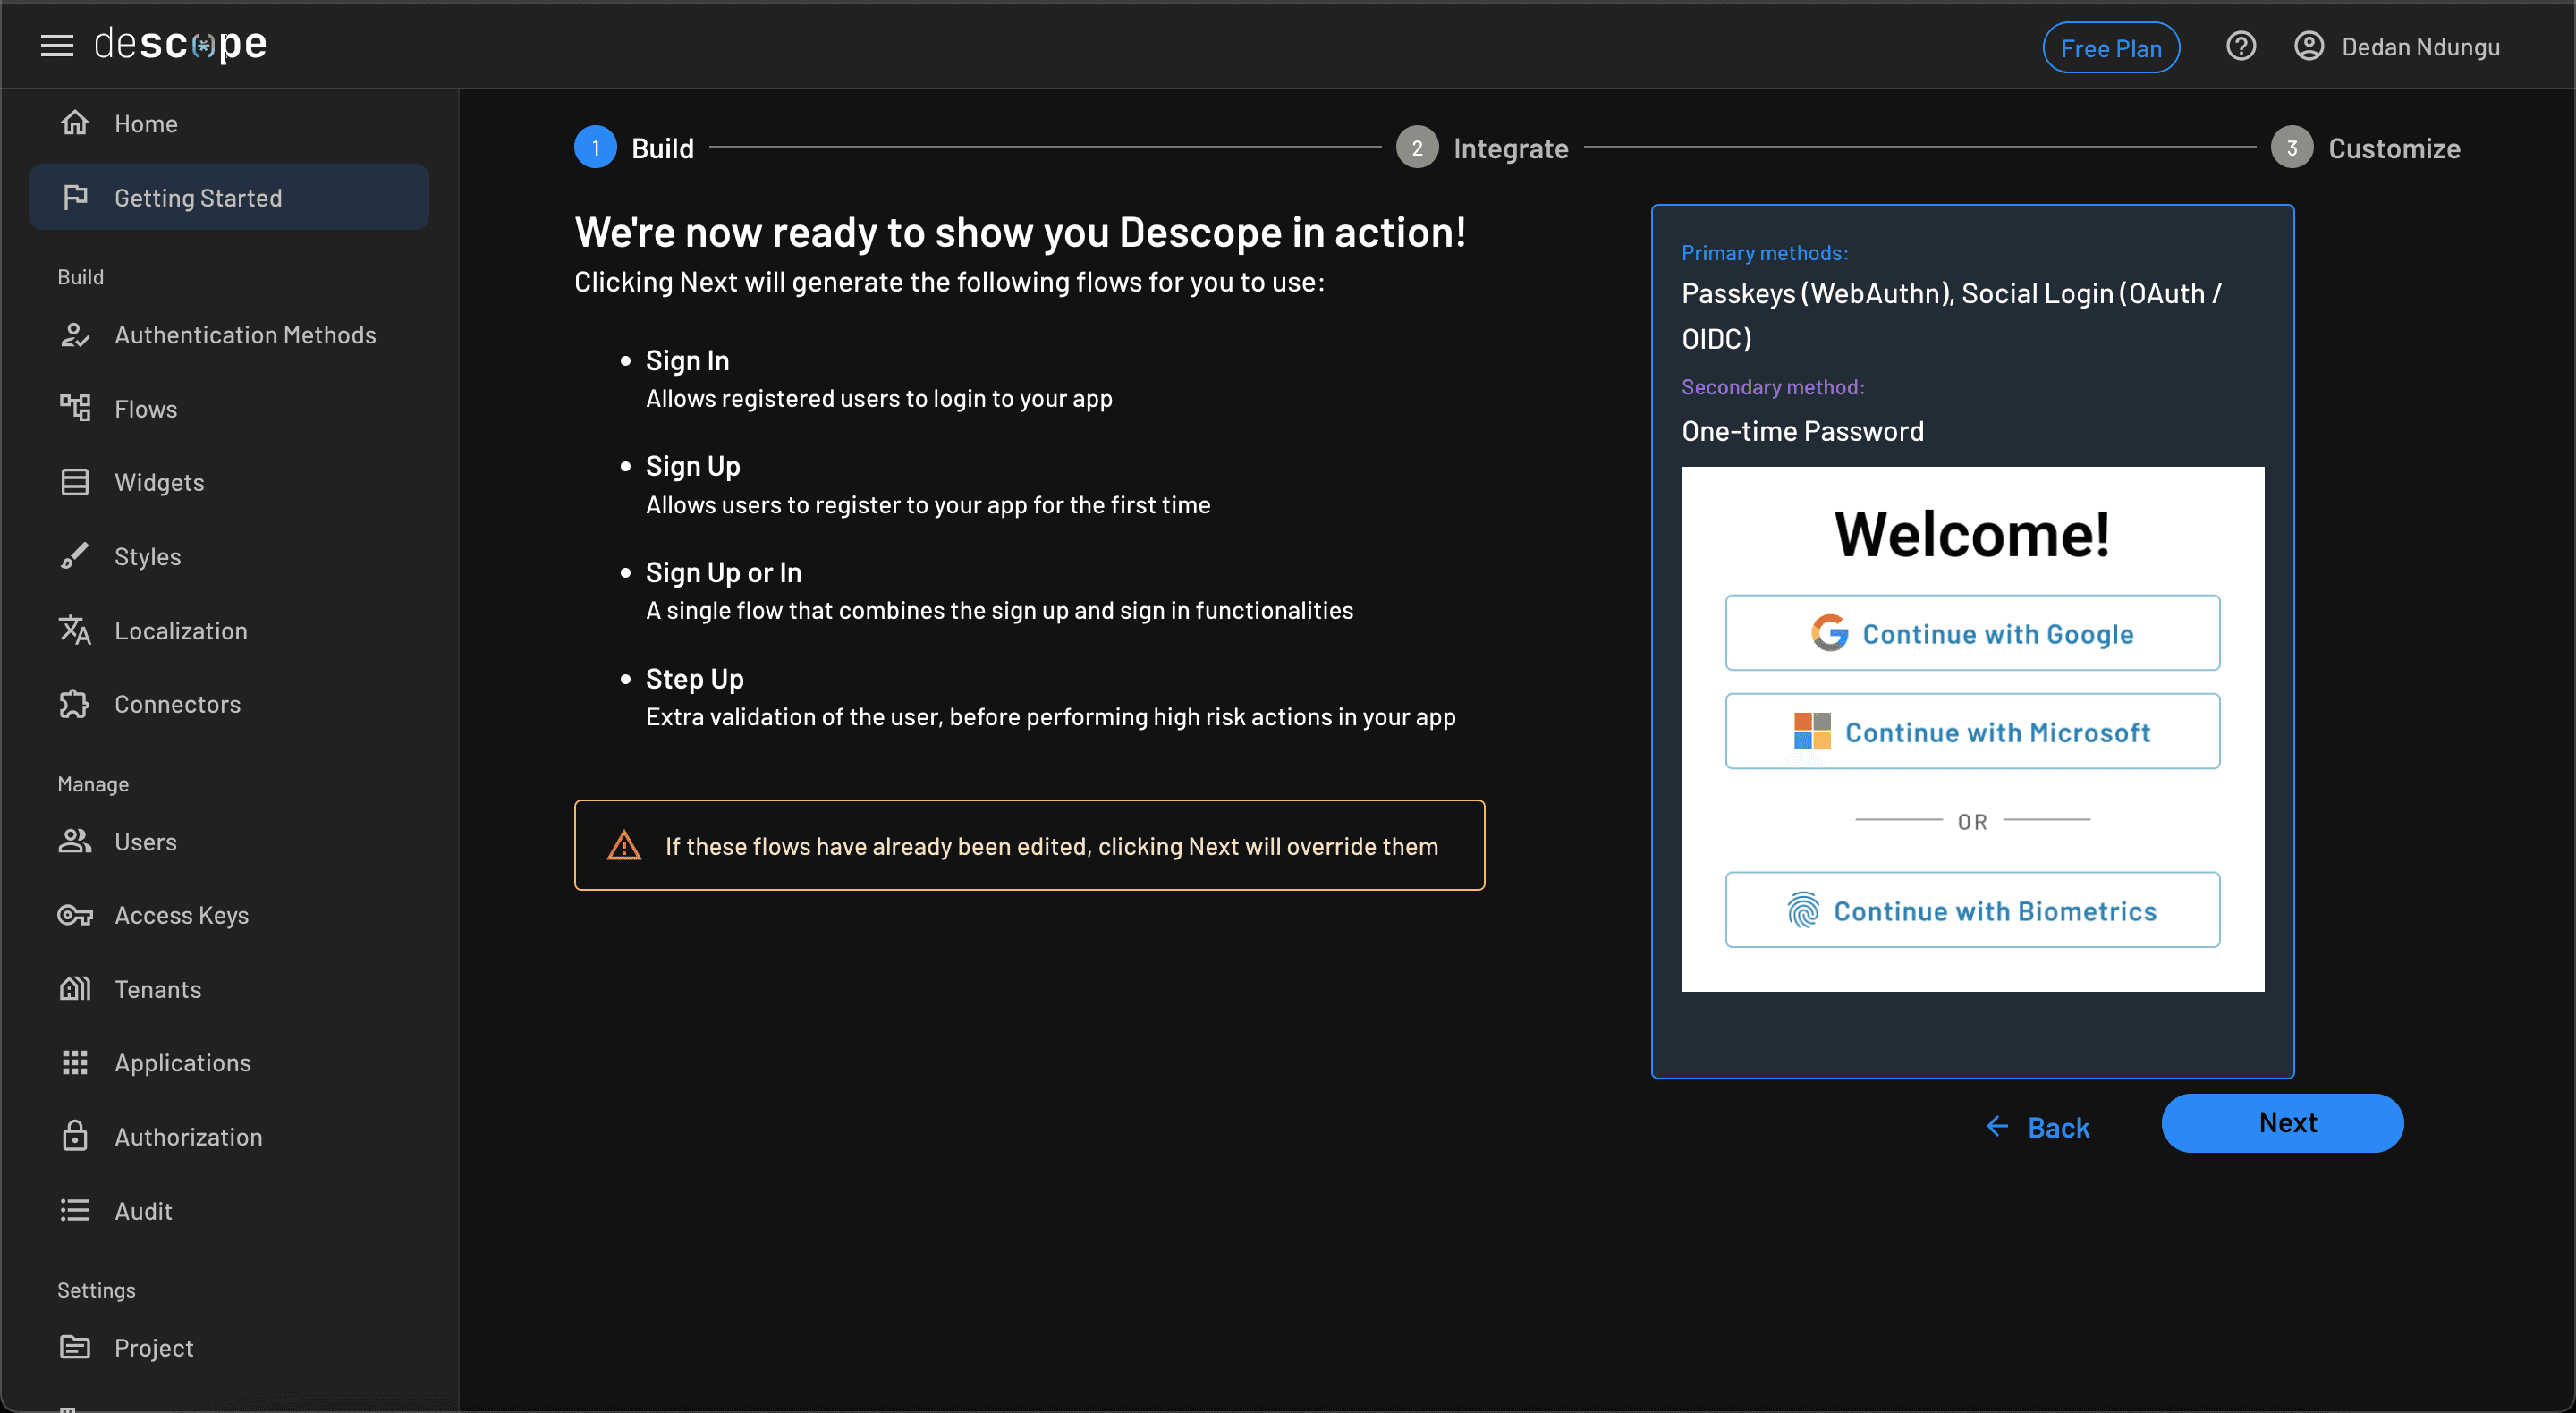
The Getting Started tab allows you to quickly set up a sign-up and login screen flow with your preferred authentication methods for your app. In the Build section, you can configure the various authentication methods, create and edit authentication flows, design and style the authentication screens, and set up connections to third-party services. The Manage section is primarily used to view and organize users’ roles and other administration actions.
Configuring Descope authentication flows
Descope Flows is a no-code builder for defining authentication-related screens and flows for your app. The flows include authentication actions, conditions, and screen views, which can be created and edited in the Flows tab. To play around with the various options, check out Descope Explorer for the various integrations you can use for your app.
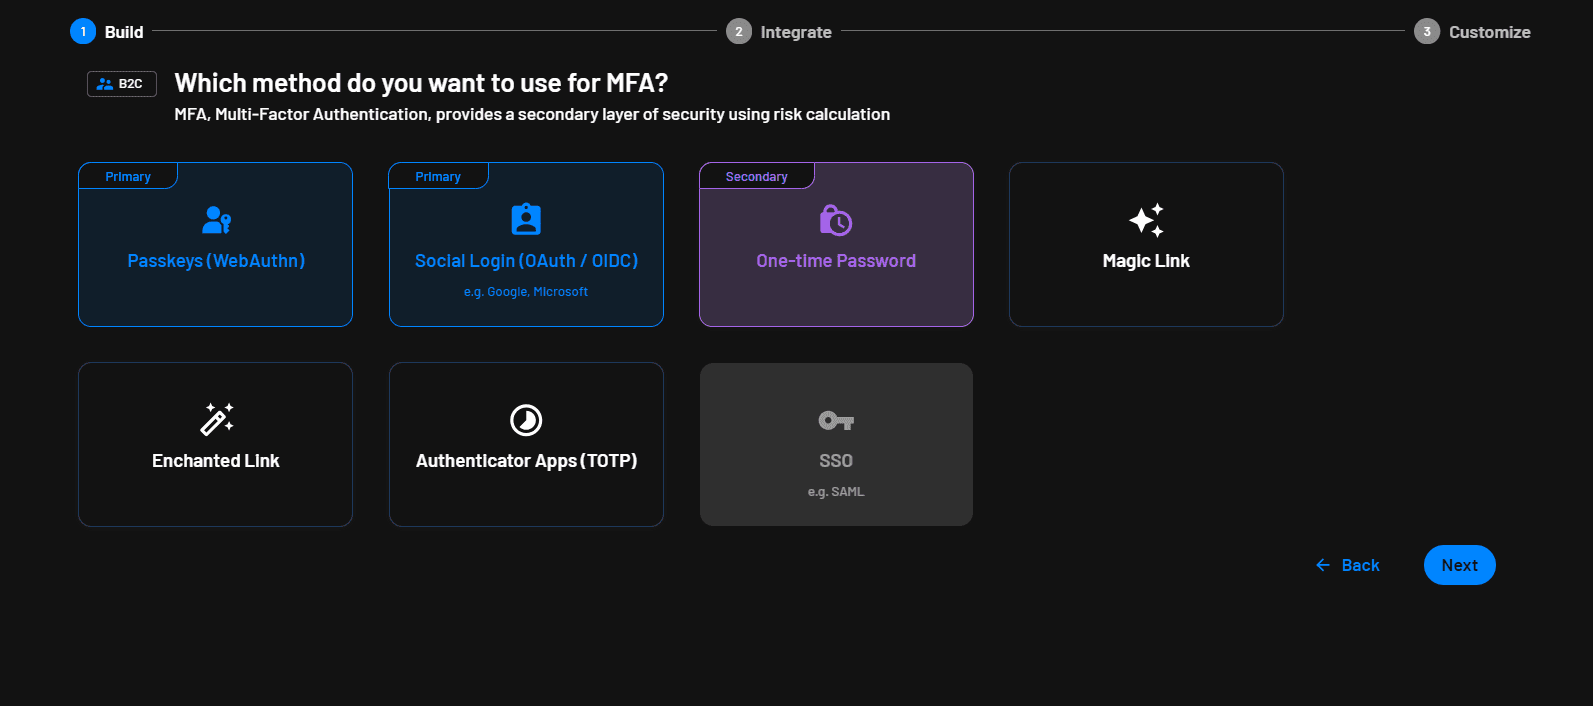
For this tutorial, you will configure the Passkeys and Social Login methods with the OTP MFA option. Open the Getting Started tab and start the flow setup, as shown subsequently:
Integrating Descope with Flutter
Descope offers a Flutter package to simplify your integration experience. Before integrating, you will need a Flutter project. To create one, open your terminal and run the following command:
flutter create --org com.auth descope_appWhen the project is created, open it using Visual Studio Code and let it sync. To add the Descope package to your app, run the following command:
flutter pub add descopeWith the Descope package installed, you can now initialize it, preferably when the app starts.
Before setting up the SDK, you need to complete a few additional configuration steps for iOS and Android:
iOS configuration setup
Open the ios/Podfile file and edit the target platform to 13.0 as shown here:
# Uncomment this line to define a global platform for your project
platform :ios, '13.0'
Android configuration setup
Open android/app/build.gradle and change minSdk = flutter.minSdkVersion to minSdk = 24 to ensure the minimum supported Android version is 24.
To support Descope Flows in an Android app, you must configure Android App Links. Open the file android/app/src/main/AndroidManifest.xml and add the following code at the bottom of the activity tags:
<activity>
    <!-- add the following at the end of the activity tag -->
    <intent-filter  android:autoVerify="true">  <!-- autoVerify required for app links -->
    <action  android:name="android.intent.action.VIEW"  />
    <category  android:name="android.intent.category.DEFAULT"  />
    <category  android:name="android.intent.category.BROWSABLE"  />

    <!-- the path should correspond with the routing paths defined in Flutter routing configuration -->
    <data  android:scheme="https"  android:host="your.deeplink.url"  android:path="/auth-android"  />
    <!-- Necessary when using magic links as an authentication option -->
    <data  android:scheme="https"  android:host="your.deeplink.url"  android:path="/magiclink"  />
    </intent-filter>
</activity>
Replace your.deeplink.url with your actual host URL that is verifiable by the Android framework, as described in the “Verify Android App Links” section. You can also enable magic link authentication support by changing the android:launchMode="singleTop" value to singleTask mode in the manifest file earlier.
Descope SDK initialization
You need the project ID from your Descope account to initialize the Descope SDK. Head over to the Descope dashboard, scroll to the Settings section from the sidebar, and click the Project tab. You should see the project ID. Copy the ID and return to the Flutter app. You should keep your project ID secure, so it’s best not to add it directly to the code. One option for securing it is using an ENV file. Add the package to load the ENV file:
flutter pub add flutter_dotenvThen, create an ENV file in your project root folder with the following contents:
DESCOPE_PROJECT_ID = "YOUR-PROJECT-ID"Make sure to update your assets in the pubspec.yaml file to specify where the ENV file is located:
 assets:
    - .env
Next, you can initialize the Descope SDK by opening the main.dart file and editing the main function to match the following content:
Future<void> main() async {
  // WidgetsFlutterBinding must be initialized before loading the Descope session manager
  WidgetsFlutterBinding.ensureInitialized();
  await dotenv.load(fileName: ".env");
  Descope.setup(dotenv.get('DESCOPE_PROJECT_ID'), (config) {
    if (kDebugMode) {
      config.logger = DescopeLogger();
    }
  });
  await Descope.sessionManager.loadSession();

  runApp(const MyApp());
}
In the preceding code, you ensure WidgetsFlutterBinding is initialized and then get the DESCOPE_PROJECT_ID from the ENV file. You then pass the project ID to set up the Descope SDK while enabling logging in debug mode.
Finally, you load the Descope session manager, which checks if a user is already authenticated for the current app instance.
Implementing the signup / login functionality
Your app will have two screens—the welcome and home screens. You will use the go_router package to handle navigation within the app. Please run this command to add it to your app:
flutter pub add go_routerTo configure your navigation routes, update the MyApp class in the main.dart file, as shown in the following code:
import 'package:descope_app/home_screen.dart';
import 'package:descope_app/welcome_screen.dart';
import 'package:flutter/foundation.dart';
import 'package:flutter/material.dart';
import 'package:descope/descope.dart';
import 'package:flutter_dotenv/flutter_dotenv.dart';
import 'package:go_router/go_router.dart';

Future<void> main() async {
  // WidgetsFlutterBinding must be initialized before loading the Descope session manager
  WidgetsFlutterBinding.ensureInitialized();
  await dotenv.load(fileName: ".env");
  Descope.setup(dotenv.get('DESCOPE_PROJECT_ID'), (config) {
    if (kDebugMode) {
      config.logger = DescopeLogger();
    }
  });
  await Descope.sessionManager.loadSession();

  runApp(const MyApp());
}

class MyApp extends StatelessWidget {
  const MyApp({super.key});

  @override
  Widget build(BuildContext context) {
    return MaterialApp.router(
      title: 'Descope Flutter Sample App',
      theme: ThemeData(
        colorScheme: ColorScheme.fromSeed(seedColor: Colors.green),
        useMaterial3: true,
      ),
      routerConfig: GoRouter(
        routes: [
          GoRoute(
            path: '/',
            builder: (_, __) {
              final Uri currentUri = Uri.base;
              return Descope.sessionManager.session?.refreshToken.isExpired ==
                      false
                  ? const HomeScreen()
                  : WelcomeScreen(
                      code: currentUri.queryParameters['code'],
                    );
            },
            routes: [
              GoRoute(
                path: 'home',
                name: 'home',
                builder: (_, __) => const HomeScreen(),
              ),
              GoRoute(
                path: 'welcome',
                name: 'welcome',
                builder: (_, __) => const WelcomeScreen(),
              ),
              GoRoute(
                path: 'auth-android',
                redirect: (context, state) {
                  try {
                    Descope.flow.exchange(state.uri);
                  } catch (e) {
                    print(e);
                  }
                  return '/';
                },
              ),
              GoRoute(
                path: 'magiclink',
                redirect: (context, state) async {
                  try {
                    await Descope.flow.resume(state.uri);
                  } catch (e) {
                    print(e);
                  }
                  return '/';
                },
              ),
            ],
          ),
        ],
      ),
    );
  }
}
In the preceding code, the initial route checks if there is a Descope refreshToken and if it’s expired. If it is valid, the app navigates to the home screen; otherwise, it displays the welcome screen and passes an optional parameter, code, which is present during OAuth authentication.
You also included the auth-android and magiclink routes, which you configured earlier in the manifest. The Android platform uses these routes to receive login status from Descope.
At this point, you should notice an error that indicates that the WelcomeScreen is not defined. To resolve this, please create a new file, welcome_screen.dart, in the lib folder and add the following code to facilitate Descope authentication:
import 'package:descope/descope.dart';
import 'package:flutter/material.dart';
import 'package:flutter_dotenv/flutter_dotenv.dart';
import 'package:go_router/go_router.dart';

class WelcomeScreen extends StatefulWidget {
  final String? code;
  const WelcomeScreen({super.key, this.code});

  @override
  State<WelcomeScreen> createState() => _WelcomeScreenState();
}

class _WelcomeScreenState extends State<WelcomeScreen> {
  @override
  void initState() {
    super.initState();
    if (widget.code != null) {
      signupOrLogin();
    }
  }

  Future<void> signupOrLogin() async {
    try {
      final options = DescopeFlowOptions(
          mobile: DescopeMobileFlowOptions(
              flowUrl:
                  'https://auth.descope.io/${dotenv.get('DESCOPE_PROJECT_ID')}?flow=sign-up-or-in&debug=true',
              deepLinkUrl: 'https://your.deeplink.url/auth-android'),
          web: DescopeWebFlowOptions(
            flowId: 'sign-up-or-in',
            flowContainerCss: {
              "background-color": "antiquewhite",
              "width": "500px",
              "min-height": "300px",
              "margin": "auto",
              "position": "relative",
              "top": "50%",
              "transform": "translateY(-50%)",
              "display": "flex",
              "flex-direction": "column",
              "align-items": "center",
              "justify-content": "center",
              "box-shadow": "0px 0px 10px gray",
            },
          ));
      Descope.flow.start(options).then((authResponse) {
        final session = DescopeSession.fromAuthenticationResponse(authResponse);
        Descope.sessionManager.manageSession(session);
        if (!mounted) return;
        context.pushReplacementNamed('home');
      });
    } on DescopeException catch (e) {
      switch (e) {
        case DescopeException.wrongOTPCode:
        case DescopeException.invalidRequest:
        case DescopeException.flowCancelled:
          print(e);
        default:
          print(e);
      }
    }
  }

  @override
  Widget build(BuildContext context) {
    return Scaffold(
      appBar: AppBar(
        title: const Text('Authenticate With Descope'),
      ),
      body: Center(
        child: Column(
          mainAxisAlignment: MainAxisAlignment.center,
          children: <Widget>[
            Text(
              '',
              textAlign: TextAlign.center,
            ),
            const SizedBox(height: 20),
            ElevatedButton(
              onPressed: signupOrLogin,
              child: const Text('Sign Up or Login'),
            )
          ],
        ),
      ),
    );
  }
}
In the preceding code, the function signupOrLogin handles Descope authentication. Within this function, you first configure the DescopeFlowOptions for both mobile and web platforms. For the mobile flow options, you specify a flowUrl where the previously defined flows are hosted (in this case, at Descope) and a deepLinkUrl to return to with the result after authenticating. For the web flow options, you configure the flowId of the desired flow from those configured earlier; in this case, sign-up-or-in. Additionally, you provide custom CSS code to design the Descope authentication screen.
After declaring the flow options, you initiate, start, and wait for the flow result. Once the authentication response is back, you transform it to a DescopeSession, which you then use to manage the user. After successful authentication, the app navigates to the home screen; otherwise, it throws an error.
For Flutter web, OAuth authentication methods redirect back to the app with query parameters. Ensure these parameters remain intact and call the
signupOrLoginfunction to automatically continue and complete the flow.
To define the HomeScreen class, create a new file, home_screen.dart, in the lib folder and add the following code:
import 'package:descope/descope.dart';
import 'package:flutter/material.dart';
import 'package:go_router/go_router.dart';

class HomeScreen extends StatefulWidget {
  const HomeScreen({super.key});

  @override
  State<HomeScreen> createState() => _HomeScreenState();
}

class _HomeScreenState extends State<HomeScreen> {
  DescopeSession? session = Descope.sessionManager.session;

  Future<void> _logout() async {
    final refreshJwt = Descope.sessionManager.session?.refreshJwt;
    if (refreshJwt != null) {
      await Descope.auth.logout(refreshJwt);
      Descope.sessionManager.clearSession();
    }

    if (!mounted) return;
    context.pushReplacementNamed('welcome');
  }

  @override
  Widget build(BuildContext context) {
    if (session == null) {
      return const Scaffold(
        body: Center(
          child: Text('No user data available'),
        ),
      );
    }
    DescopeUser userInfo = session!.user;
    return Scaffold(
      body: Center(
        child: Column(
          mainAxisAlignment: MainAxisAlignment.center,
          children: <Widget>[
            Text(
              'Hi, ${userInfo.name}!',
              textAlign: TextAlign.center,
            ),
            const SizedBox(height: 20),
            ElevatedButton(
              onPressed: _logout,
              child: const Text('Log out'),
            )
          ],
        ),
      ),
    );
  }
}
On the home screen, you display the authenticated user name and a logout button, which clears the user’s Descope session when pressed. To run and test the Flutter app on the web with ease, execute the following command on the terminal:
flutter run -d web-server --web-port 8080 --web-hostname 0.0.0.0Implementing role-based access control
To improve security, users are granted different permissions. However, with role-based access control (RBAC), instead of assigning permissions to users, you create and attach specific permissions to a role, which is then assigned to a specific user. For example, you can assign ledger and book editing permissions to a role called accountant, which can then be assigned to a user who performs accounting tasks.
Descope supports RBAC by enabling you to create permissions that can be attached to a specific role. These roles can then be assigned to users who have signed up from your application.
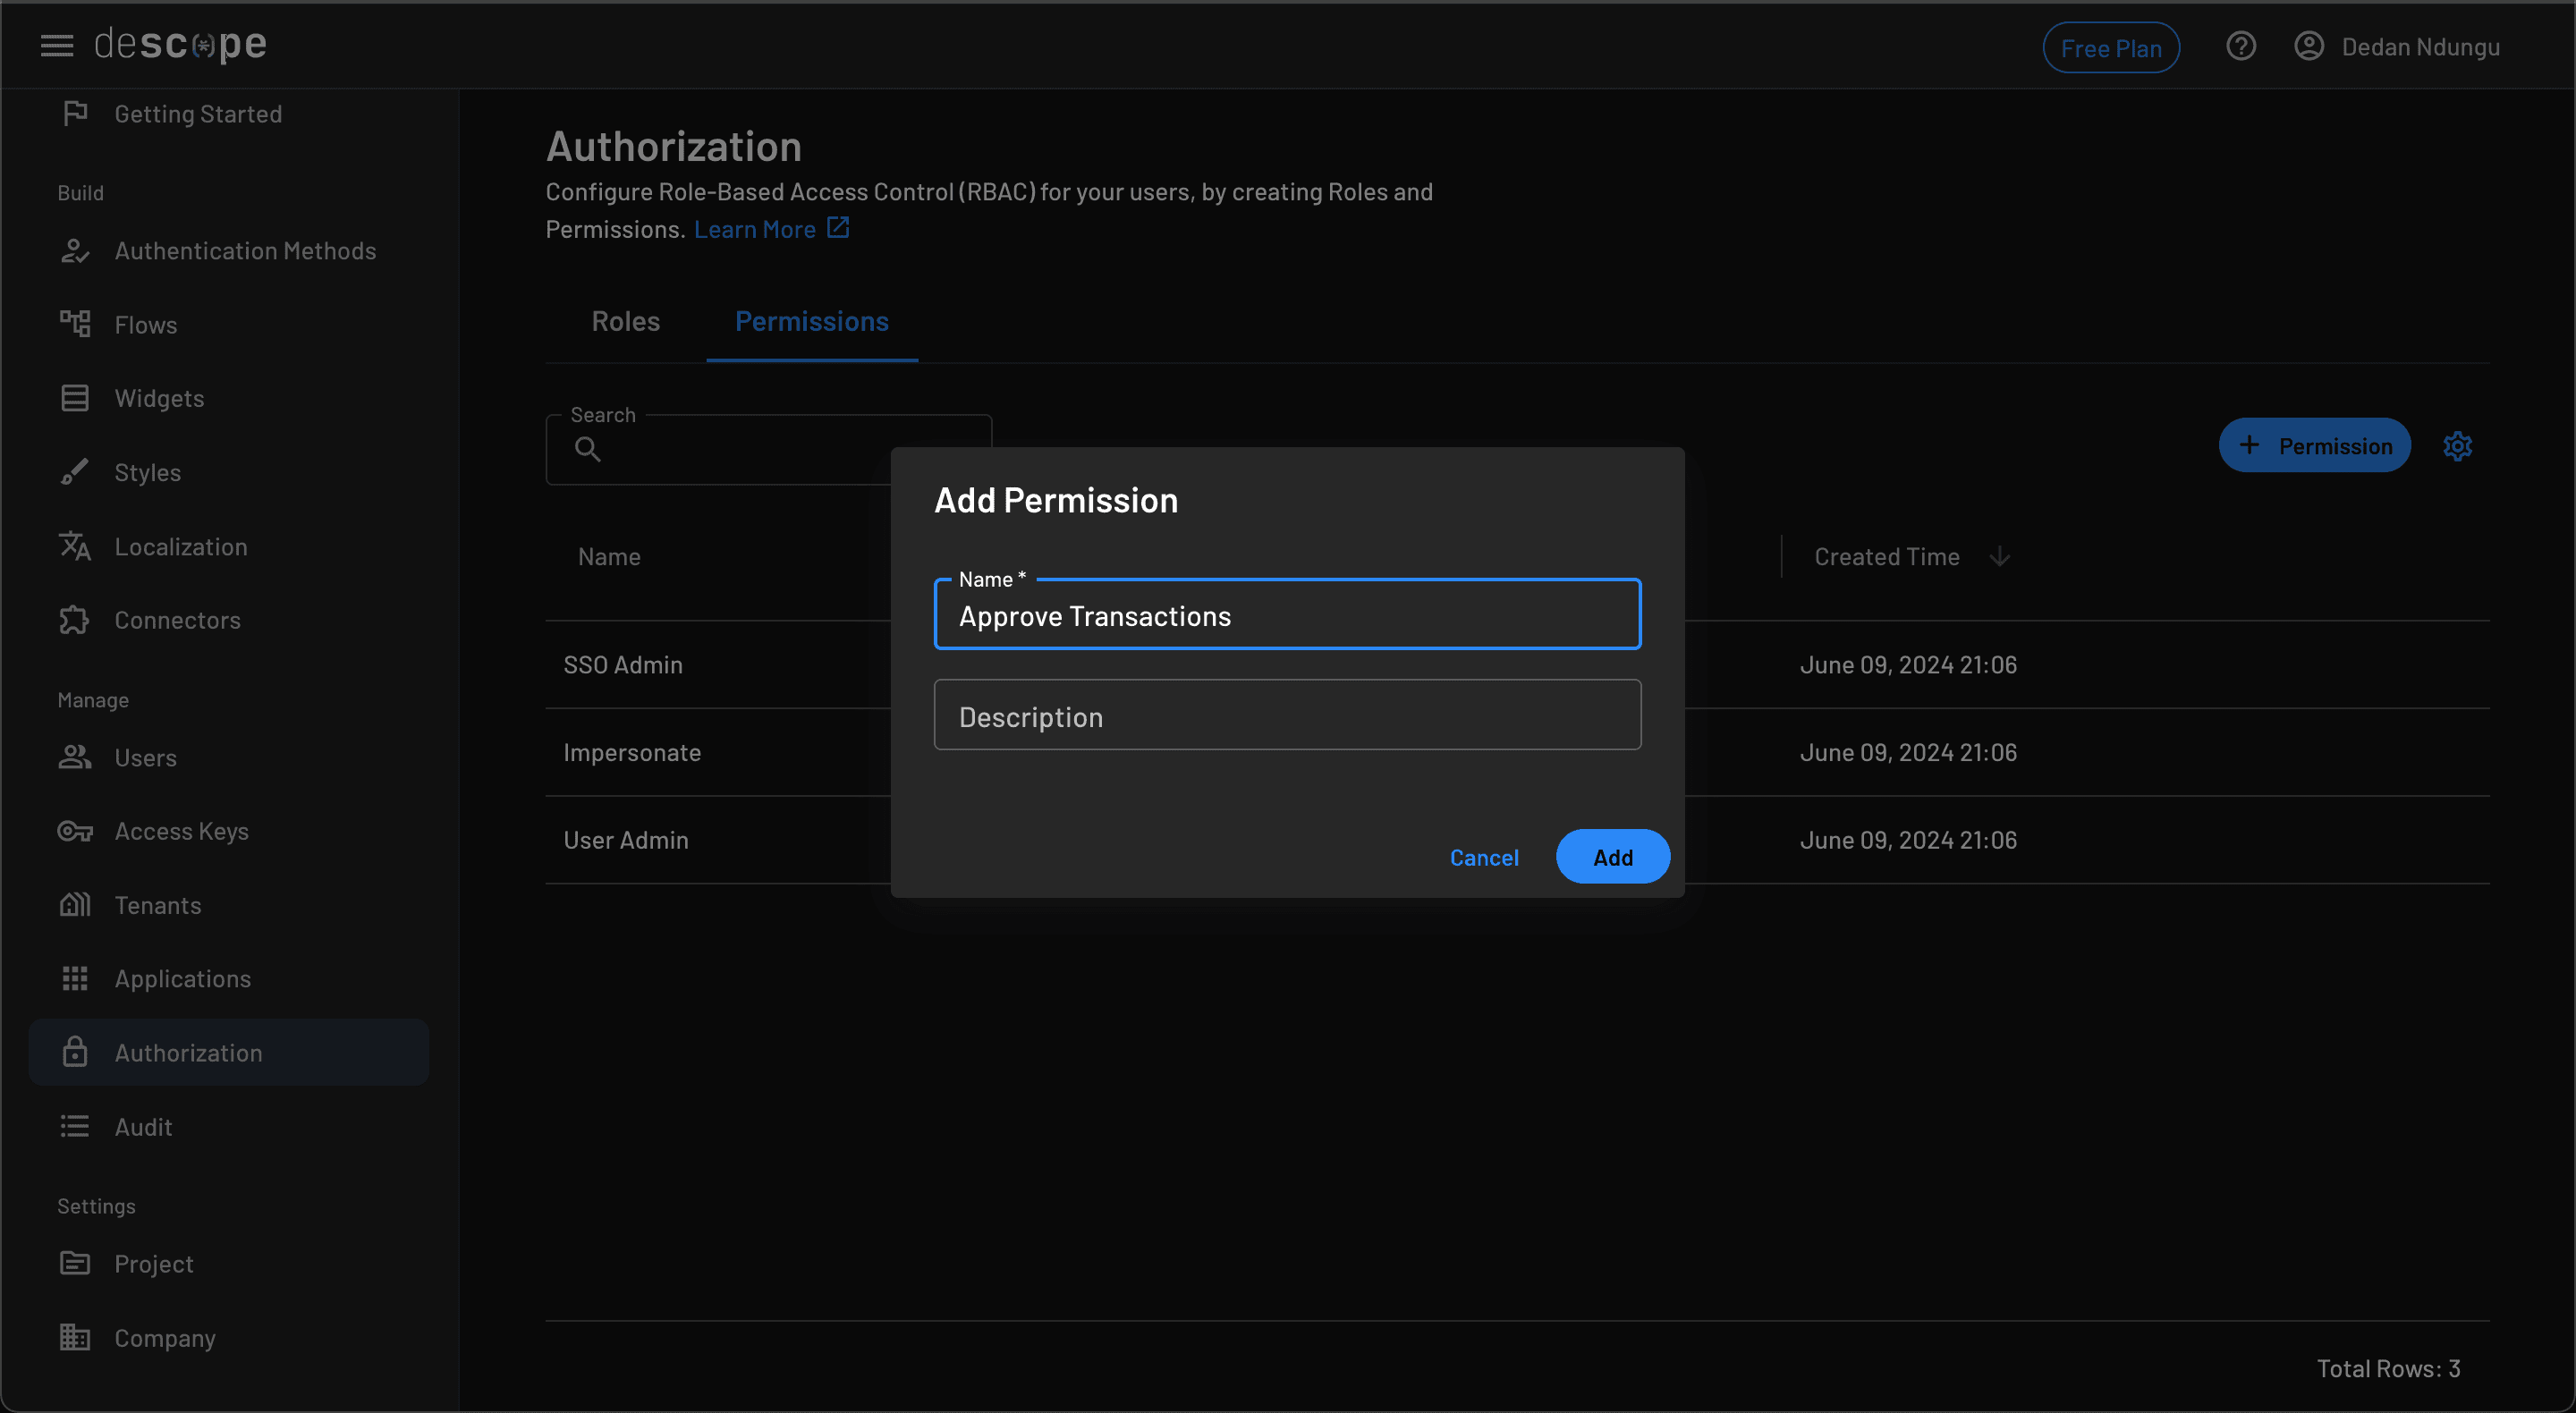
To create permissions on Descope, click Authorization on the sidebar and then select the Permissions tab. Selecting the + Permission button displays a dialog where you can create a permission. For this tutorial, create a permission named Approve Transactions, as shown in the following screenshot:
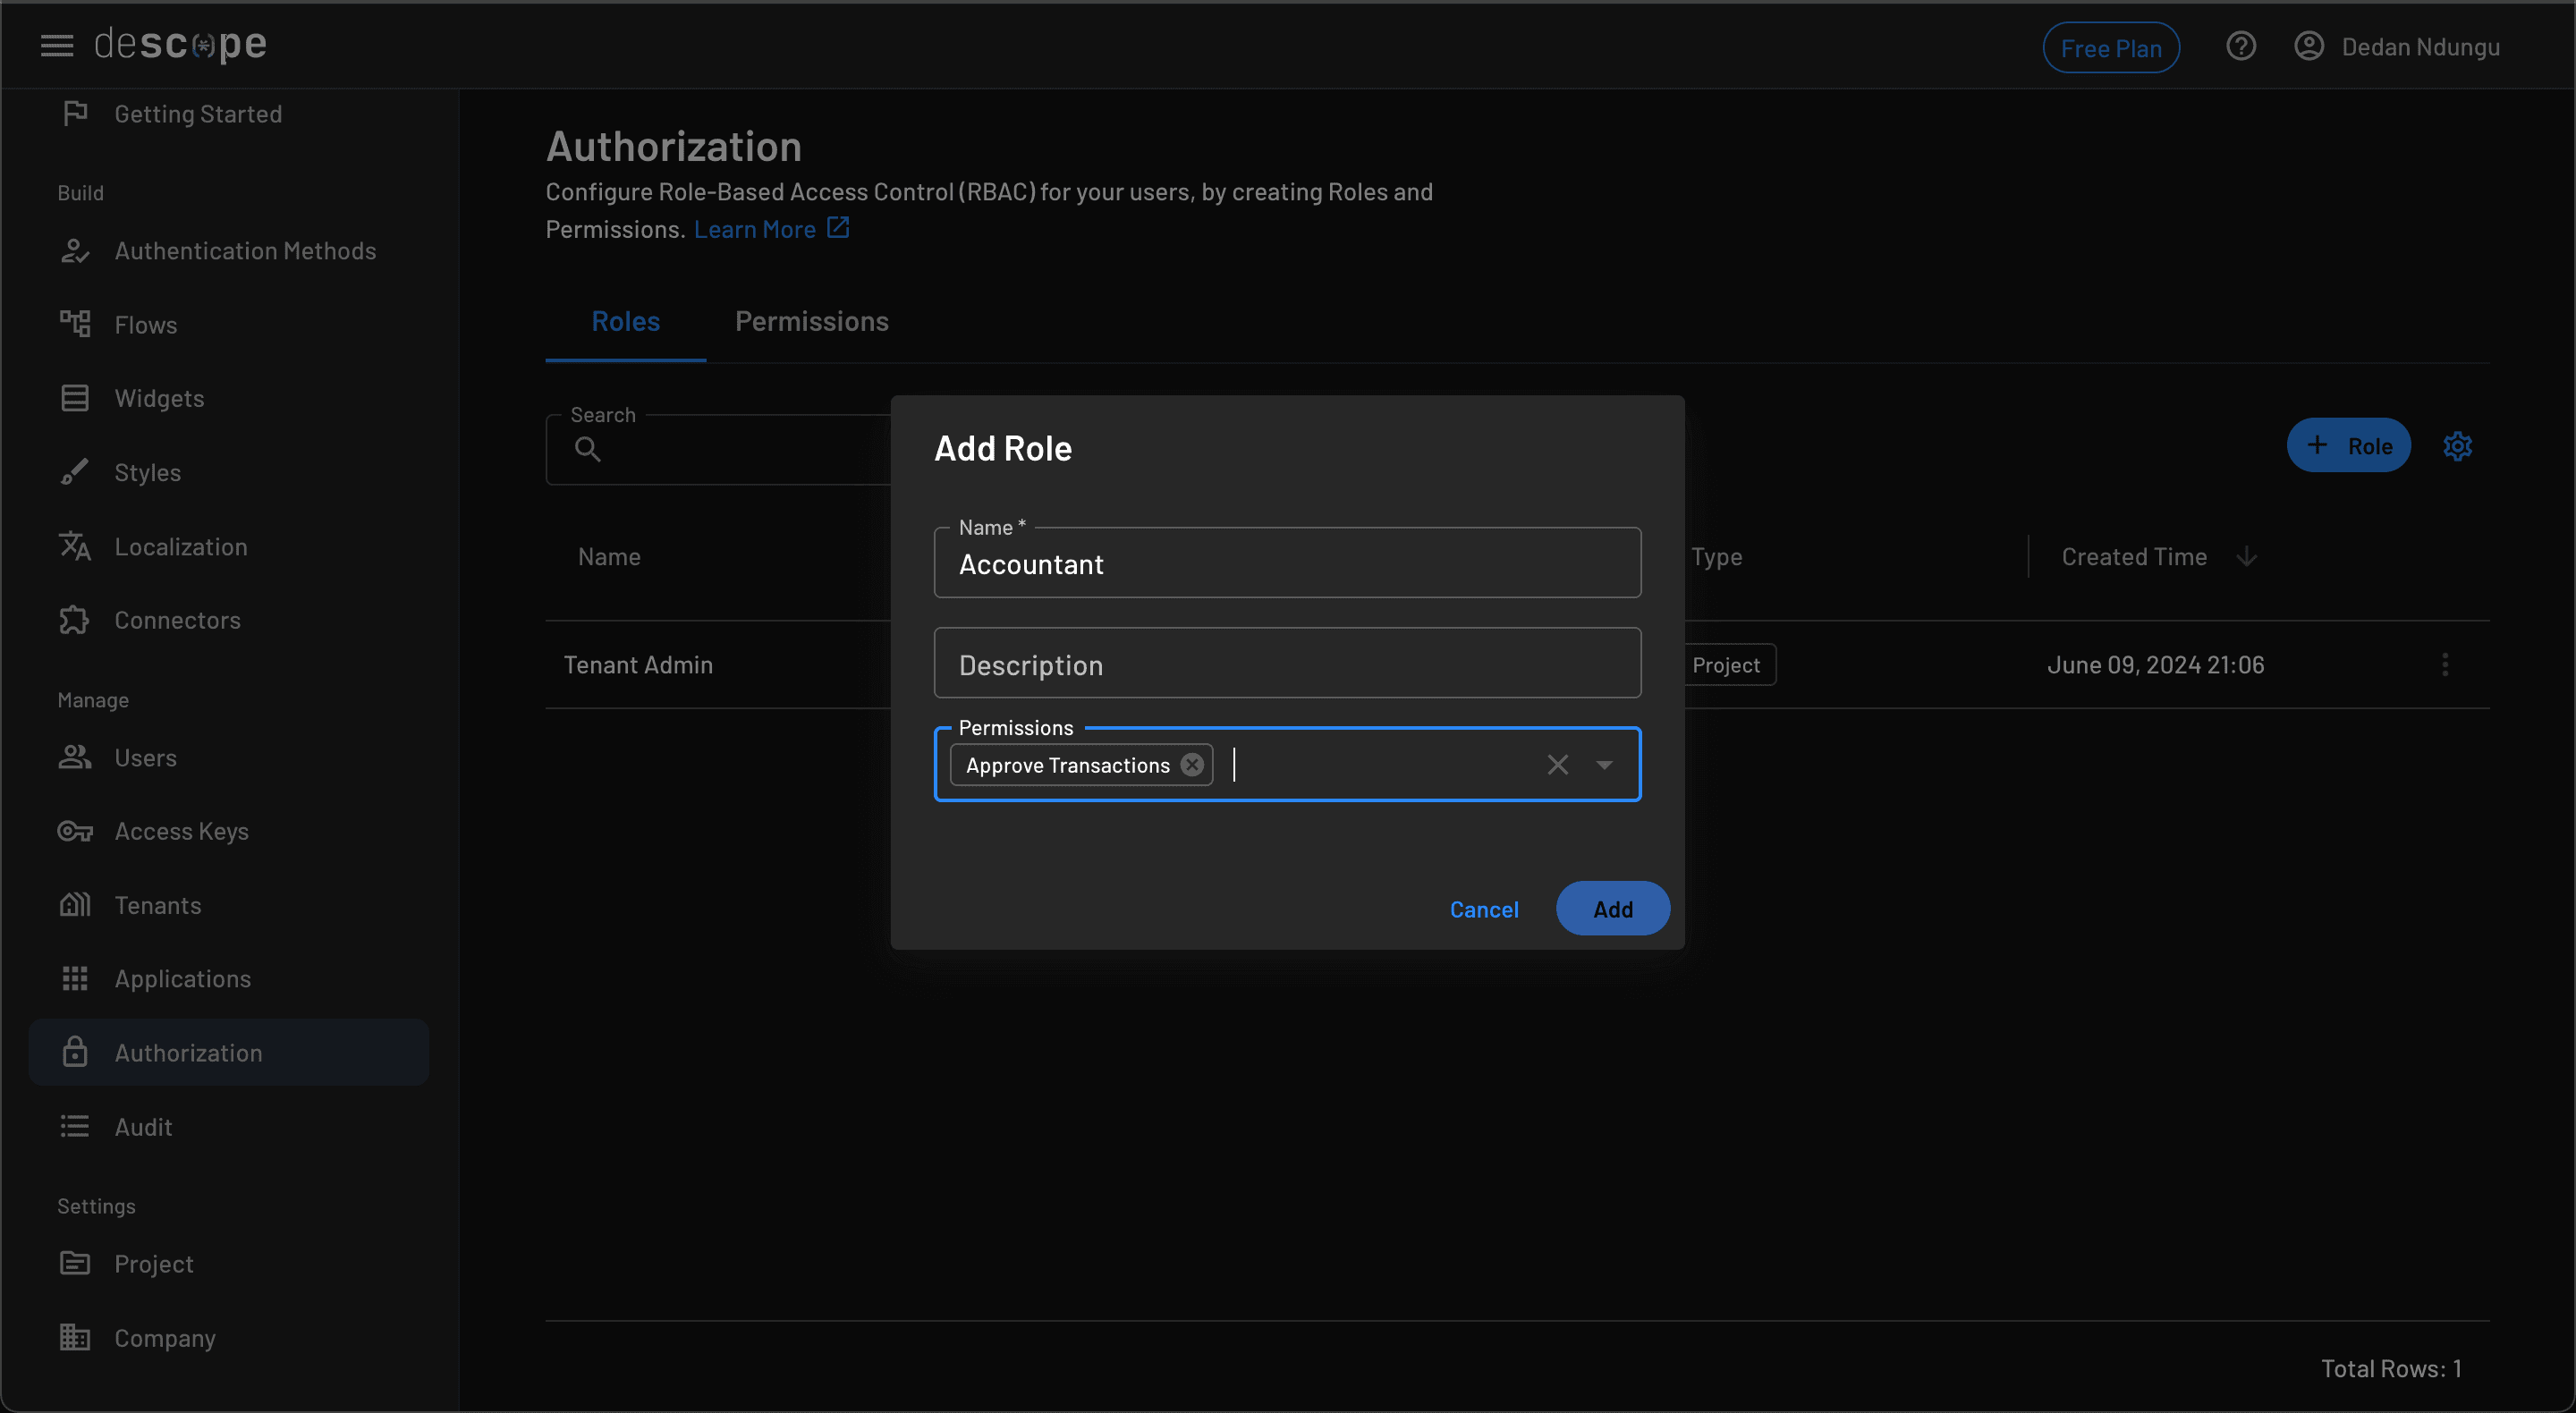
Next, select the Roles tab and click the + Roles button to display the input dialog. Create a role named Accountant and assign the permission you created earlier:
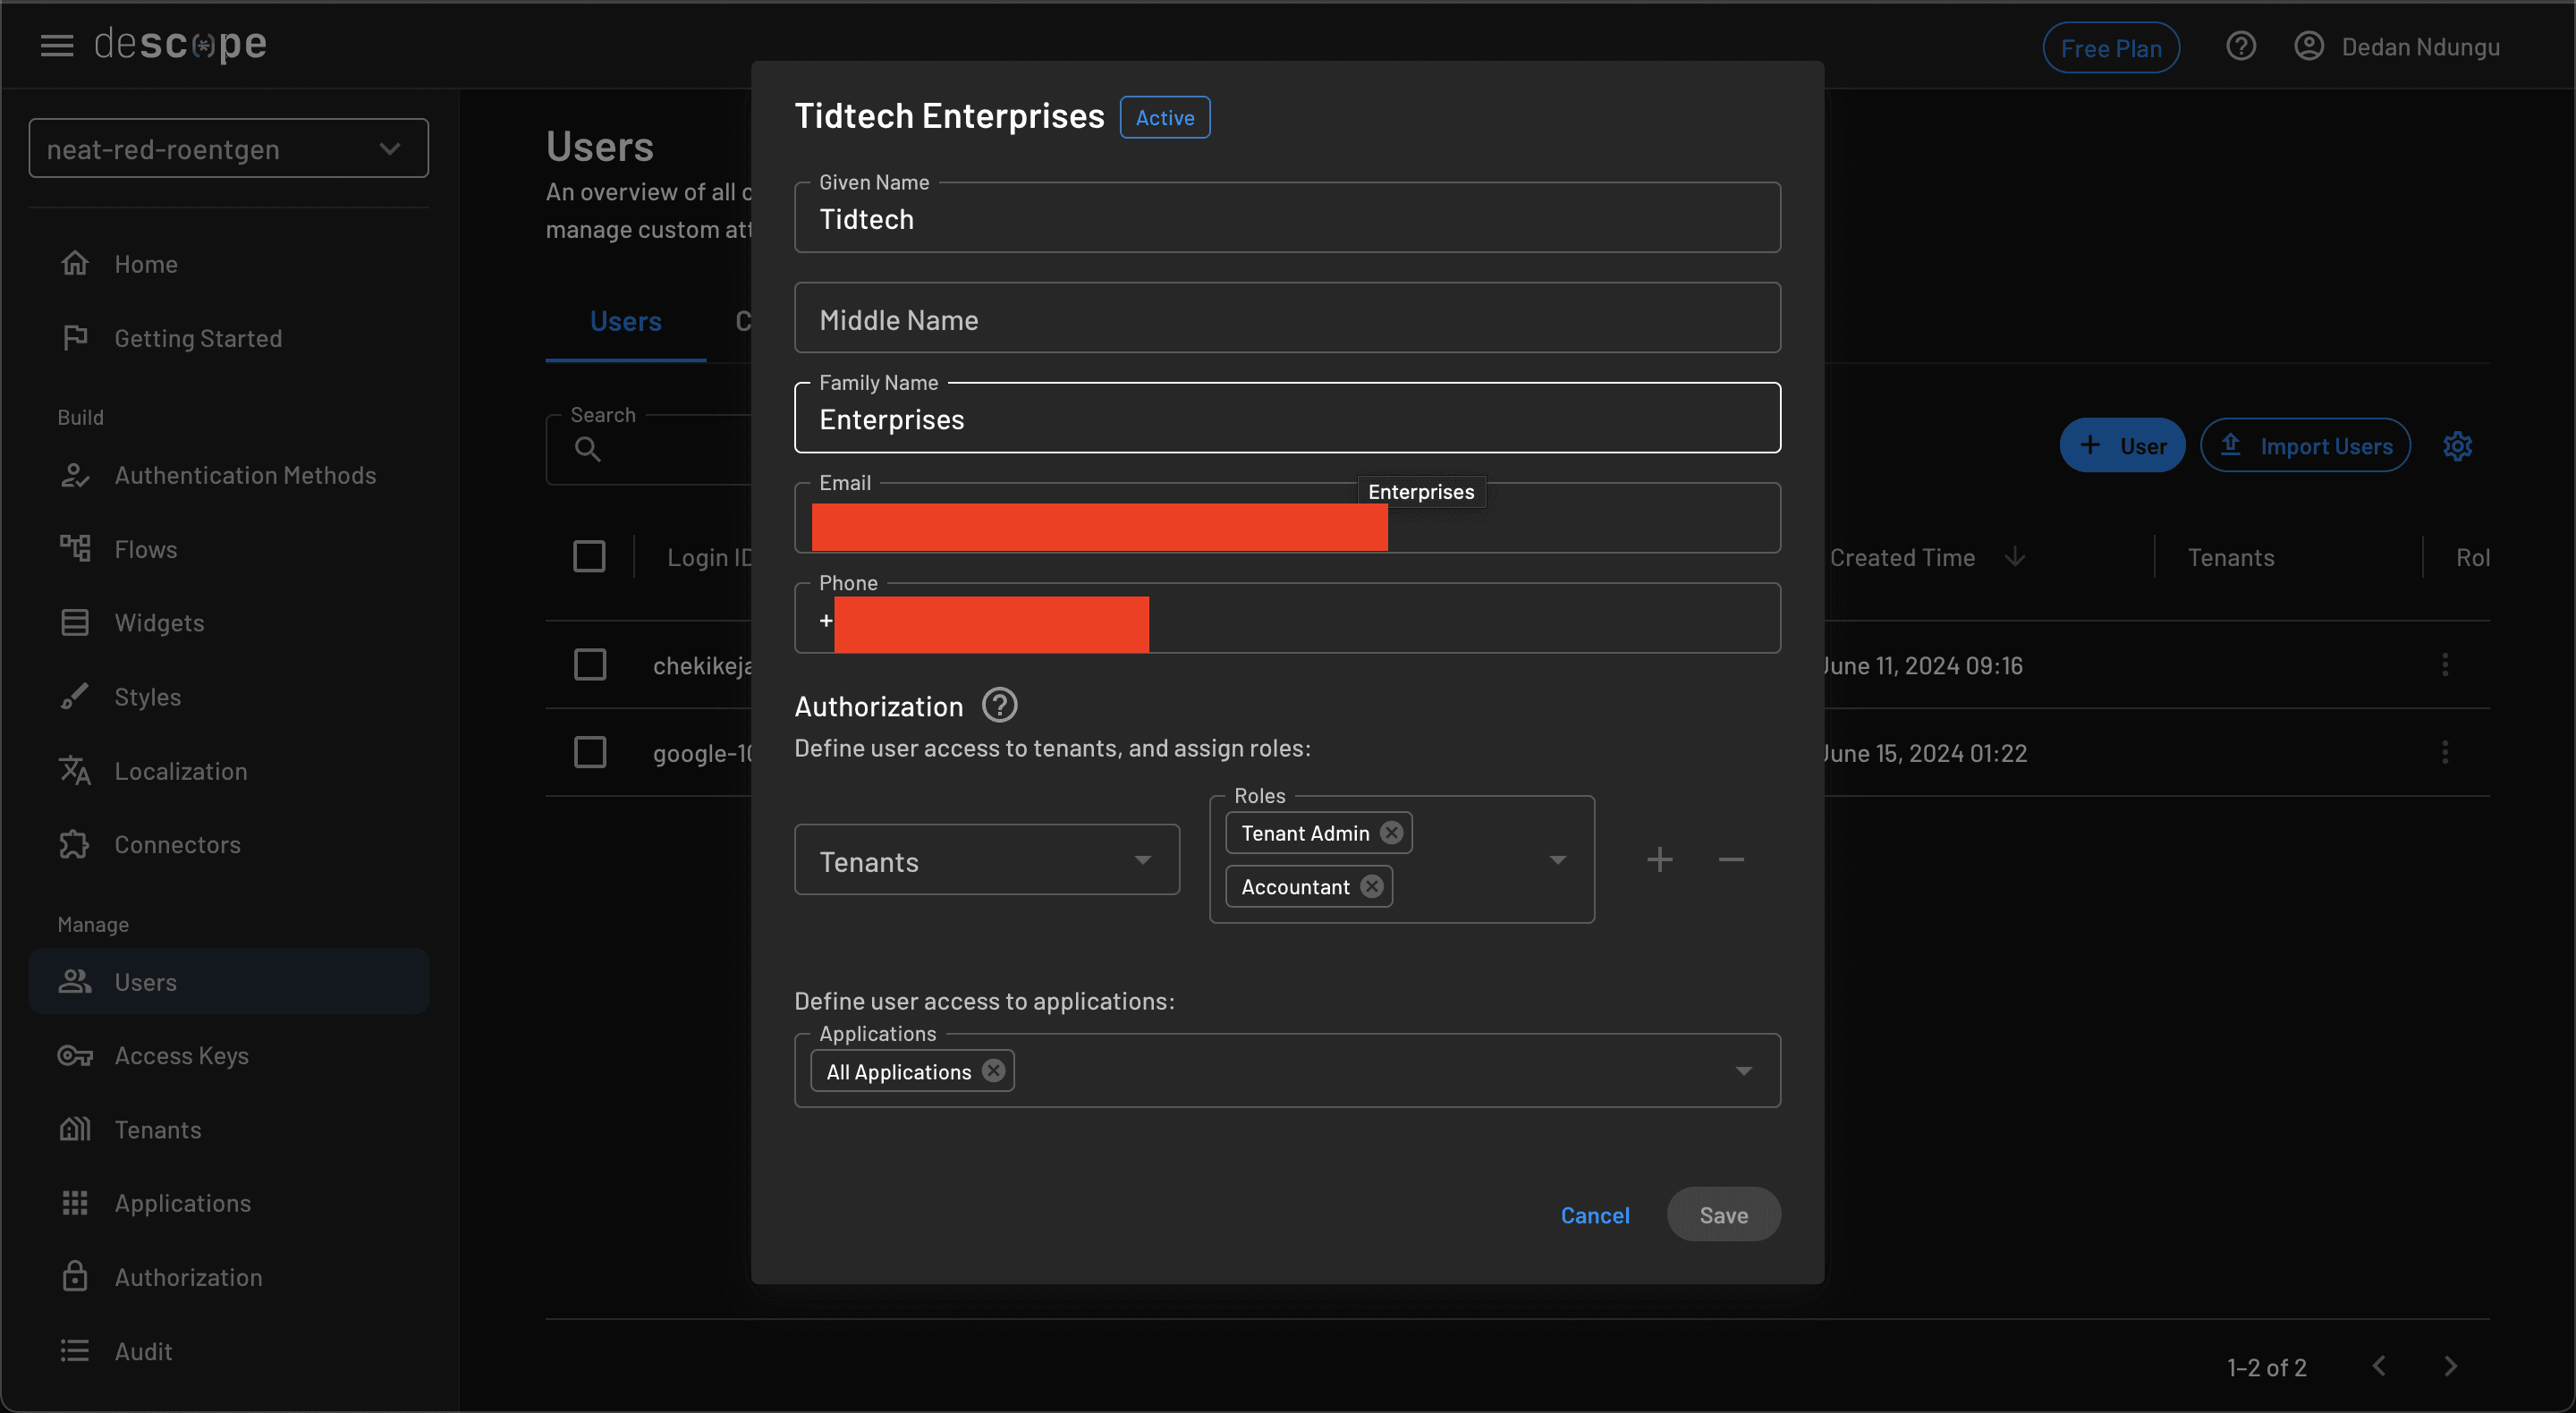
With a role defined, you can now assign it to a user. Initially, you need to register the user from the app and then open the Users tab in the Descope dashboard. Locate the registered user from the list and assign them the role by clicking Edit in the options list. You can assign as many roles as you need and then save the configuration:
After the previous step, you can view the user’s permissions and roles from the app after a successful login. You can add the following code in the build method of the HomeScreen class to get the permissions and roles assigned to the logged-in user:
    List<String> permissions =
        Descope.sessionManager.session?.permissions() ?? [];
    List<String> roles = Descope.sessionManager.session?.roles() ?? [];
Protecting app content with RBAC
User roles can control access to content and display relevant information to different users. You can assign different users different roles and then use conditional statements to filter content that you would like displayed to them or actions they are allowed to perform. For instance, you can add the following code in the Column widget of the home screen to check if the user has the role of Accountant and display a button that enables them to view transactions if they do:
Text('Your roles in the company are: ${roles}'),
roles.contains("Accountant")
                ? ElevatedButton(
                    onPressed: () {}, child: const Text('View Transactions'))
                : SizedBox.shrink(),
Depending on how complex your app is, there are various practices to consider when working with RBAC, especially when designing the app’s UI and performing navigations. To reduce clutter, display only the UI elements relevant to a user’s role and ensure they can perform only the tasks assigned to that role. Furthermore, you can leverage RBAC to structure your app navigation so that different roles have different dashboards or screens.
Conclusion
In this article, you configured authentication flows on the Descope dashboard, which you integrated into your Flutter app. You learned how to set up Descope to support authentication in both mobile and web apps. You also touched on RBAC and configured roles and permissions on Descope while using them to control access to your app. You can find the code to the tutorial in this GitHub repository.
Descope simplifies your app development experience by abstracting user authentication and providing fully-fledged access management. Their Flutter app integration is smooth and provides many options for managing user sessions. With Descope, you can focus on building the crucial parts, saving you lots of stress and resources. Sign up for a free account or book a demo.