Table of Contents
How to add passkeys to Okta CIS
Passkeys are a cutting-edge authentication technology designed to replace traditional passwords with secure, user-friendly login methods. Unlike conventional passwords, passkeys leverage public key cryptography to create unique, device-specific credentials resistant to phishing and replay attacks. All modern browsers support passkeys, which has led to their exponential adoption as a mainstream auth method.
While passkeys boast several benefits, such as secure biometric authentication and passwordless login, not everyone wants to rip and replace their existing auth provider just to add them. Descope makes it simple to add and configure passkeys without changing your user store or primary authentication provider.
This comprehensive guide demonstrates how to seamlessly integrate a Sign in with Passkeys option into your existing Okta application, a feature notably absent in current offerings from Okta CIS (also called Okta CIAM). This addition not only strengthens your application's security posture but also aligns with the latest trends in identity management, making it a valuable enhancement for your user authentication process.
How to add passkeys to Okta CIS
First, let’s set the context with a couple definitions:
OpenID Connect (OIDC) is a simple identity layer on top of the OAuth 2.0 standard. It allows clients to verify the identity of the end user and obtain basic profile information in an interoperable and REST-like manner.
An identity provider (IdP) is a system entity that creates, maintains, and manages identity information for principals and provides principal authentication to other service providers within a federation.
In this guide, Descope will act as an OIDC IdP, which allows us to add passkey authentication on top of Okta's conventional username and password authentication.
Prerequisites:
A Descope account. If you don’t have one yet, sign up for a Free Forever account.
Access to an Okta account to set up Descope as an IdP. Ensure you’re logged in as an admin (use the Admin button on the top navbar).
The Angular SDK provided by Okta.
To begin, fill out your clientID (under Applications) and issuer details (e.g., https://{yourOktaDomain}.com/oauth2/default). These are specific to your Okta tenant, following the readme file (update in your src/app/app.module.ts file).
Once you have set up the sample app on your local desktop, run it on localhost:4200. Log in to your Descope account, click on Flows, and add a passkeys-with-descope flow into your project. The flow is designed in such a way that the user’s email is verified when using passkeys for authentication.
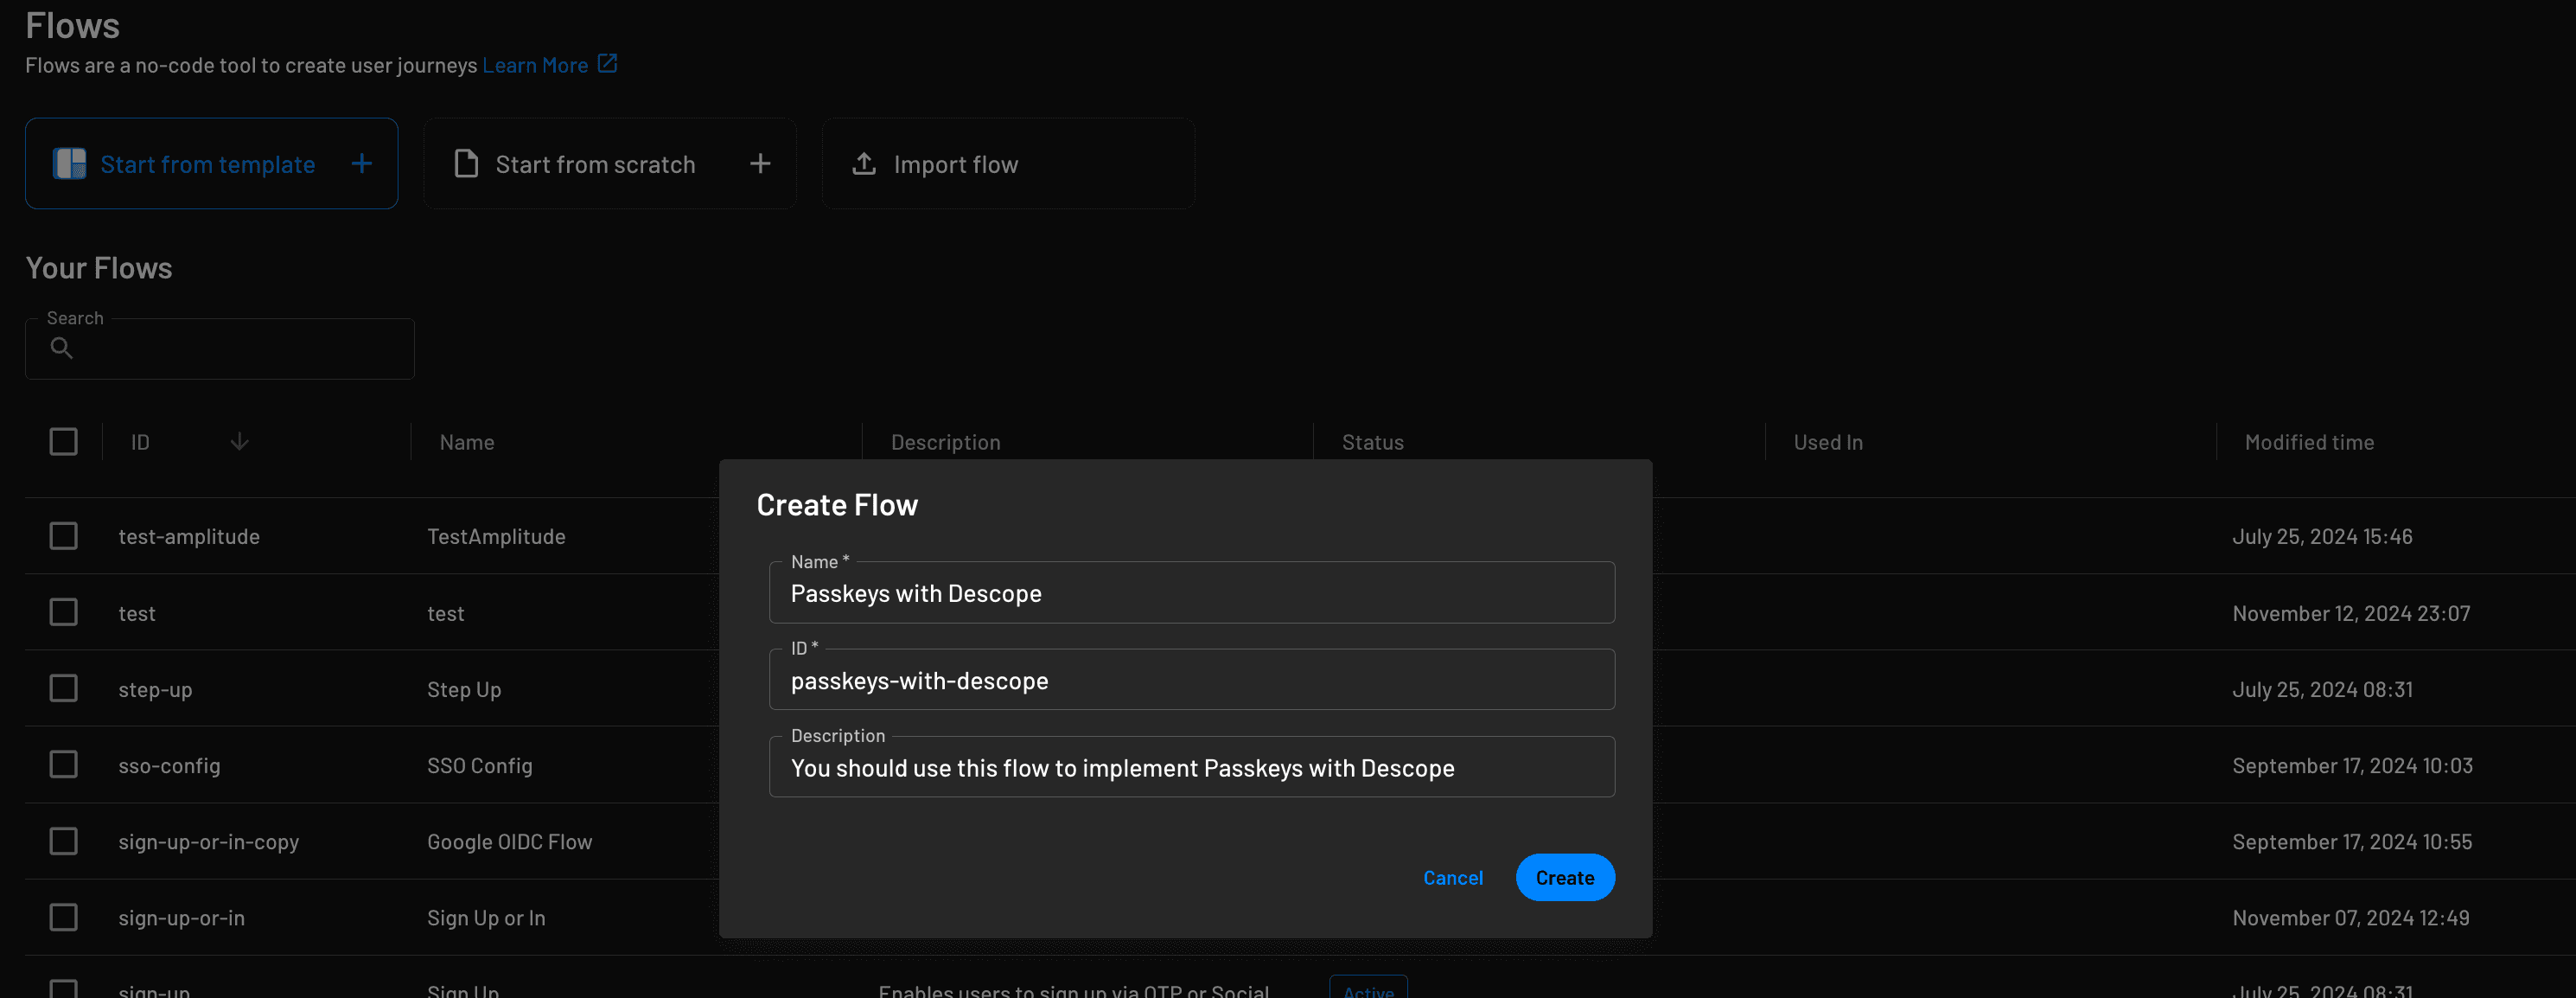
You can create your own flow from scratch or use a flow template (Start from template) specific to the passkeys auth method.

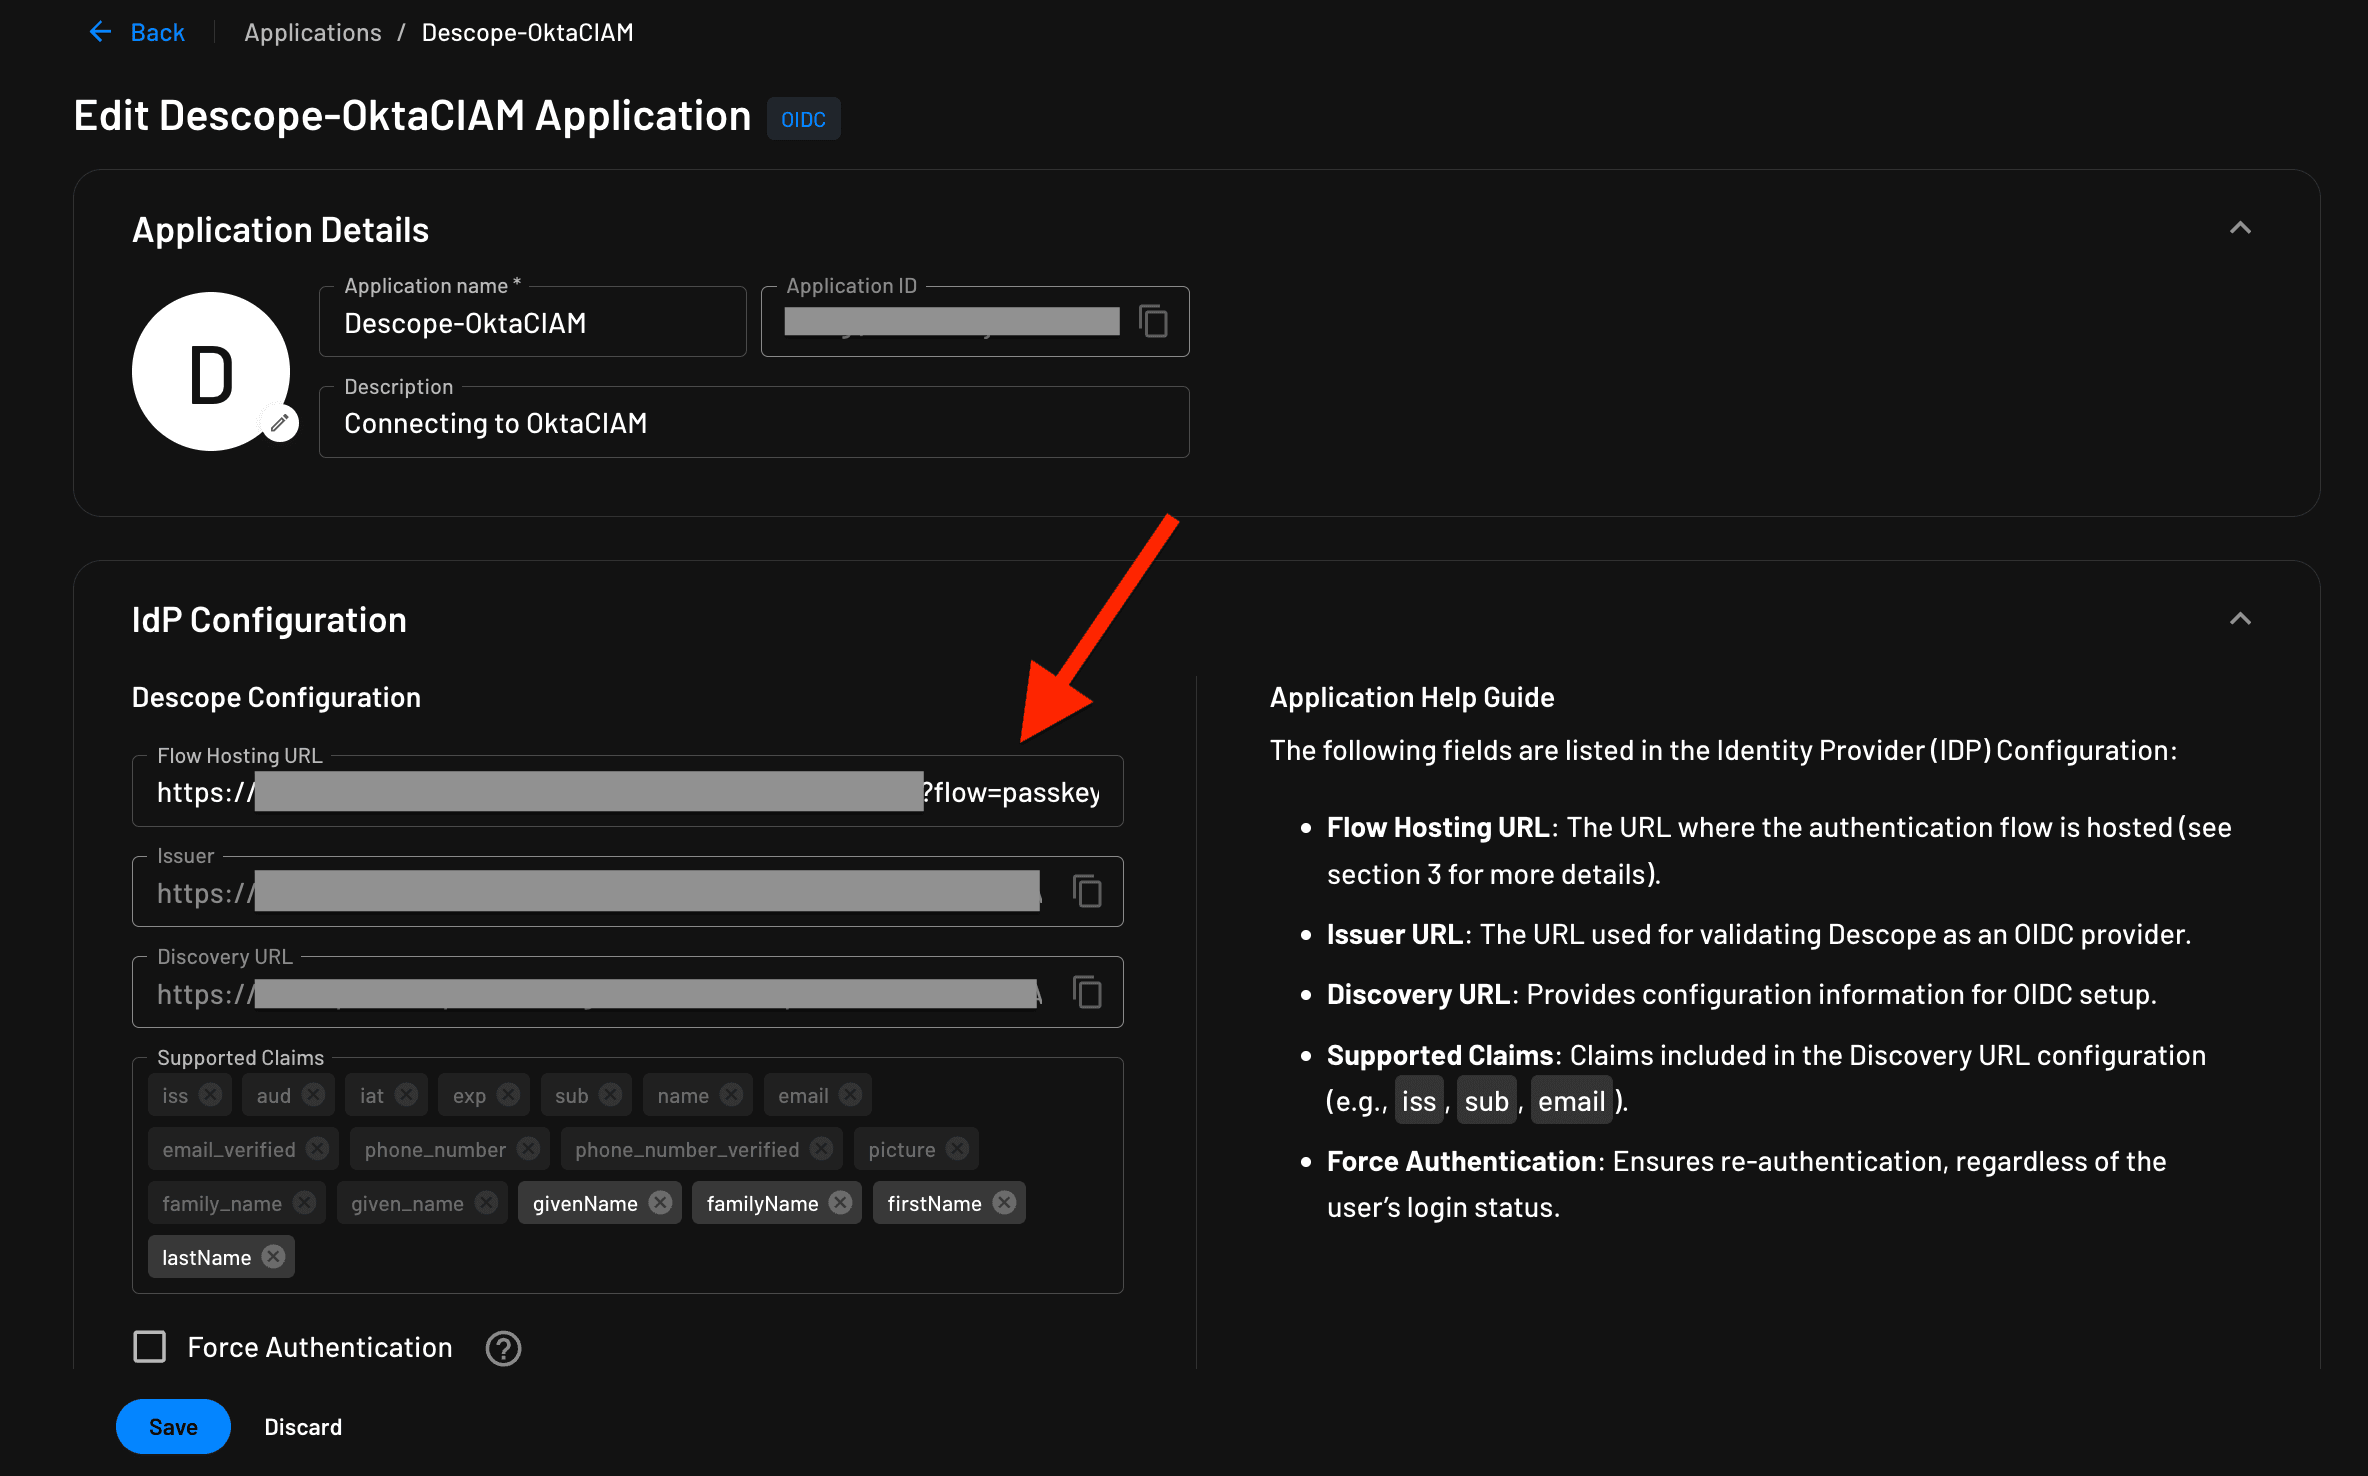
Ensure you have updated the flow hosting URL with the flow ID in the section shown under Manage > Applications > OIDC default application. This is done so that the OIDC endpoints you later configure on Okta’s side know to communicate with Descope’s OIDC application, which is hosting our flow URL.
Connect Descope with Okta
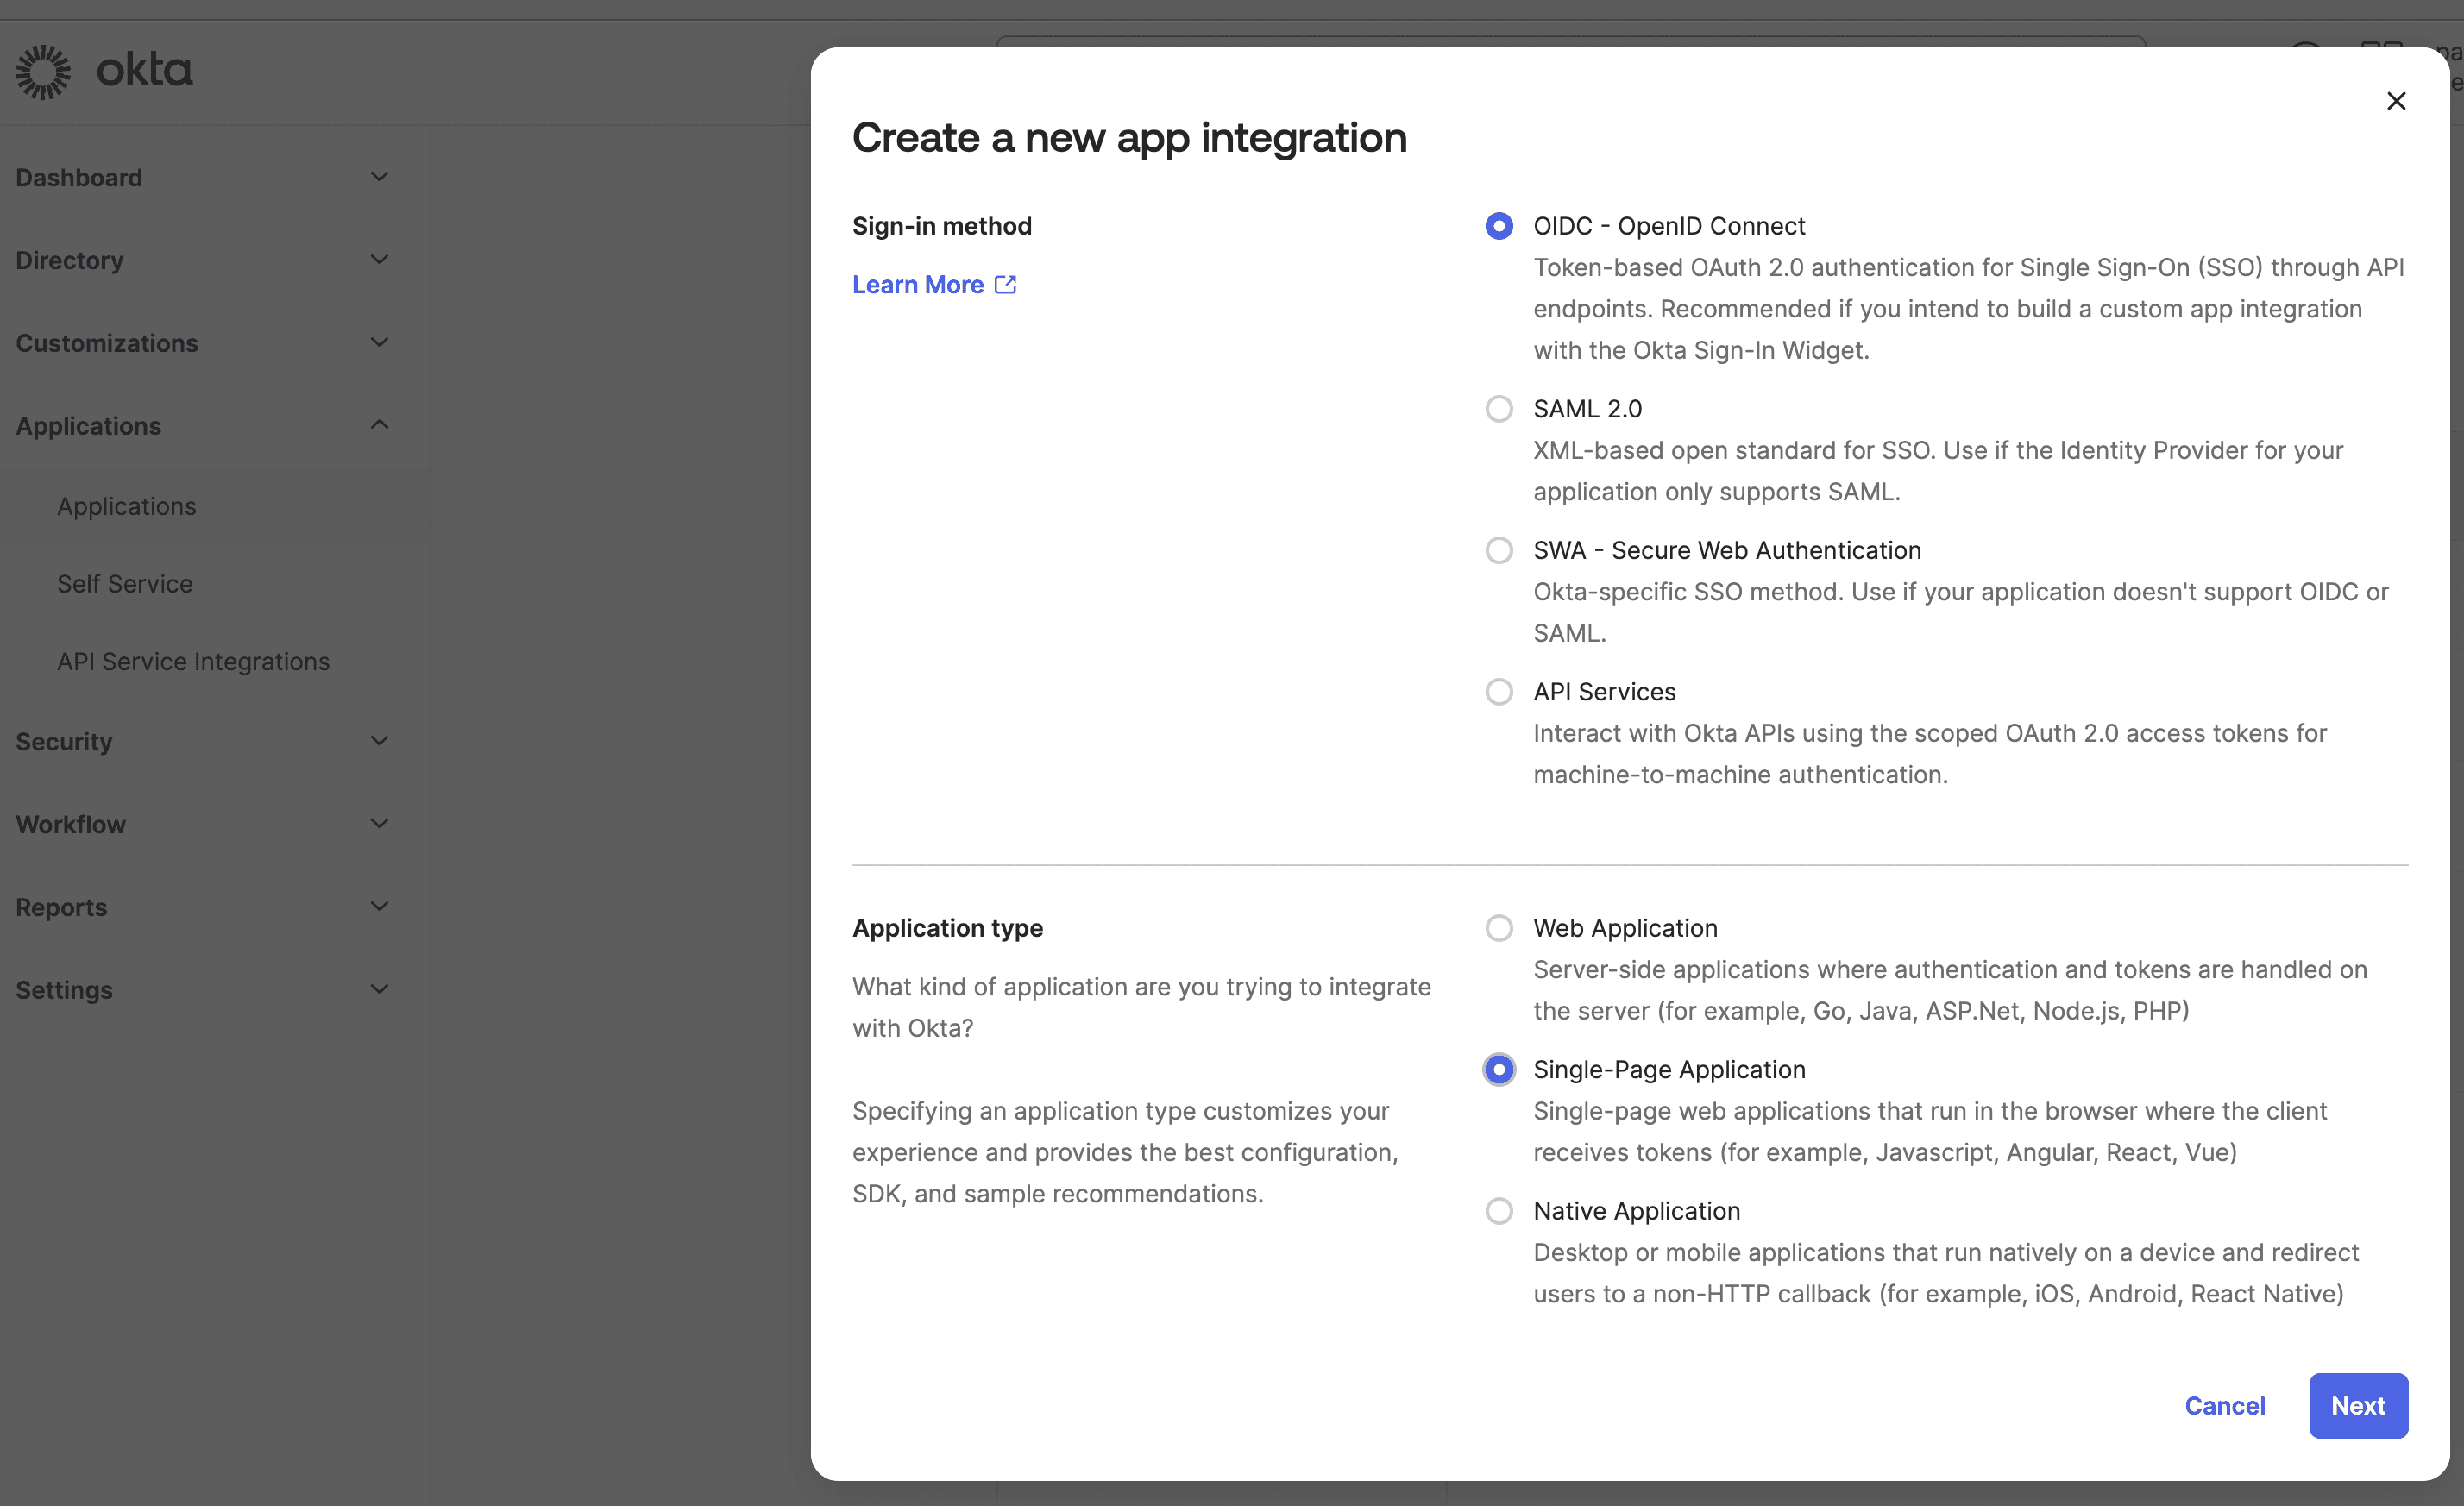
To set up Descope in Okta, we'll begin by creating an application within the Okta Dashboard. This contains all your sign in and sign-out URLs. Under the Applications tab, click on Application, then Create App Integration. Next, choose OIDC - OpenID Connect, with the application type being a Single-Page Application.
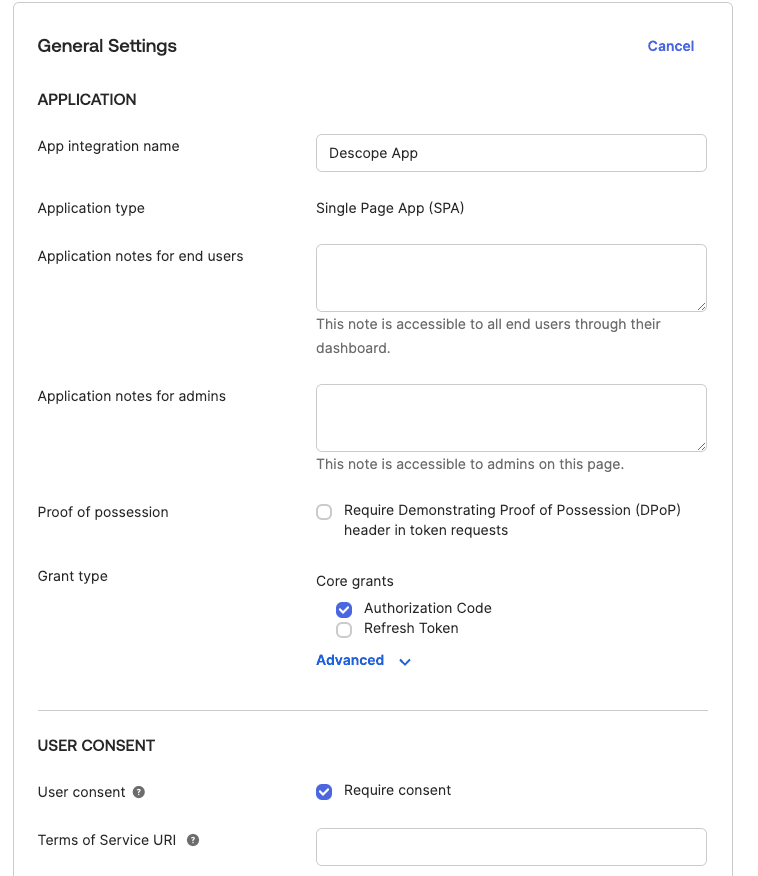
Fill in the following information as below:
App Name: Descope App
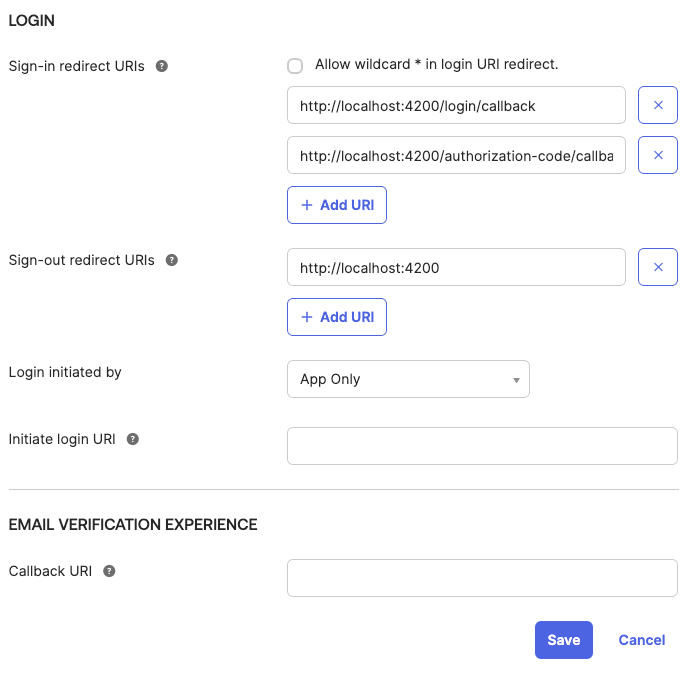
Next, add the following:
Sign-in redirect URIs: http://localhost:4200/login/callback
Sign-out redirect URIs: http://localhost:4200
Once you have created your app, transition to the Okta dashboard and select Security. Click on Add Identity Providers.

Select OpenID Connect IdP and click Next.

Fill in all the required fields and name the IdP "Passkeys".
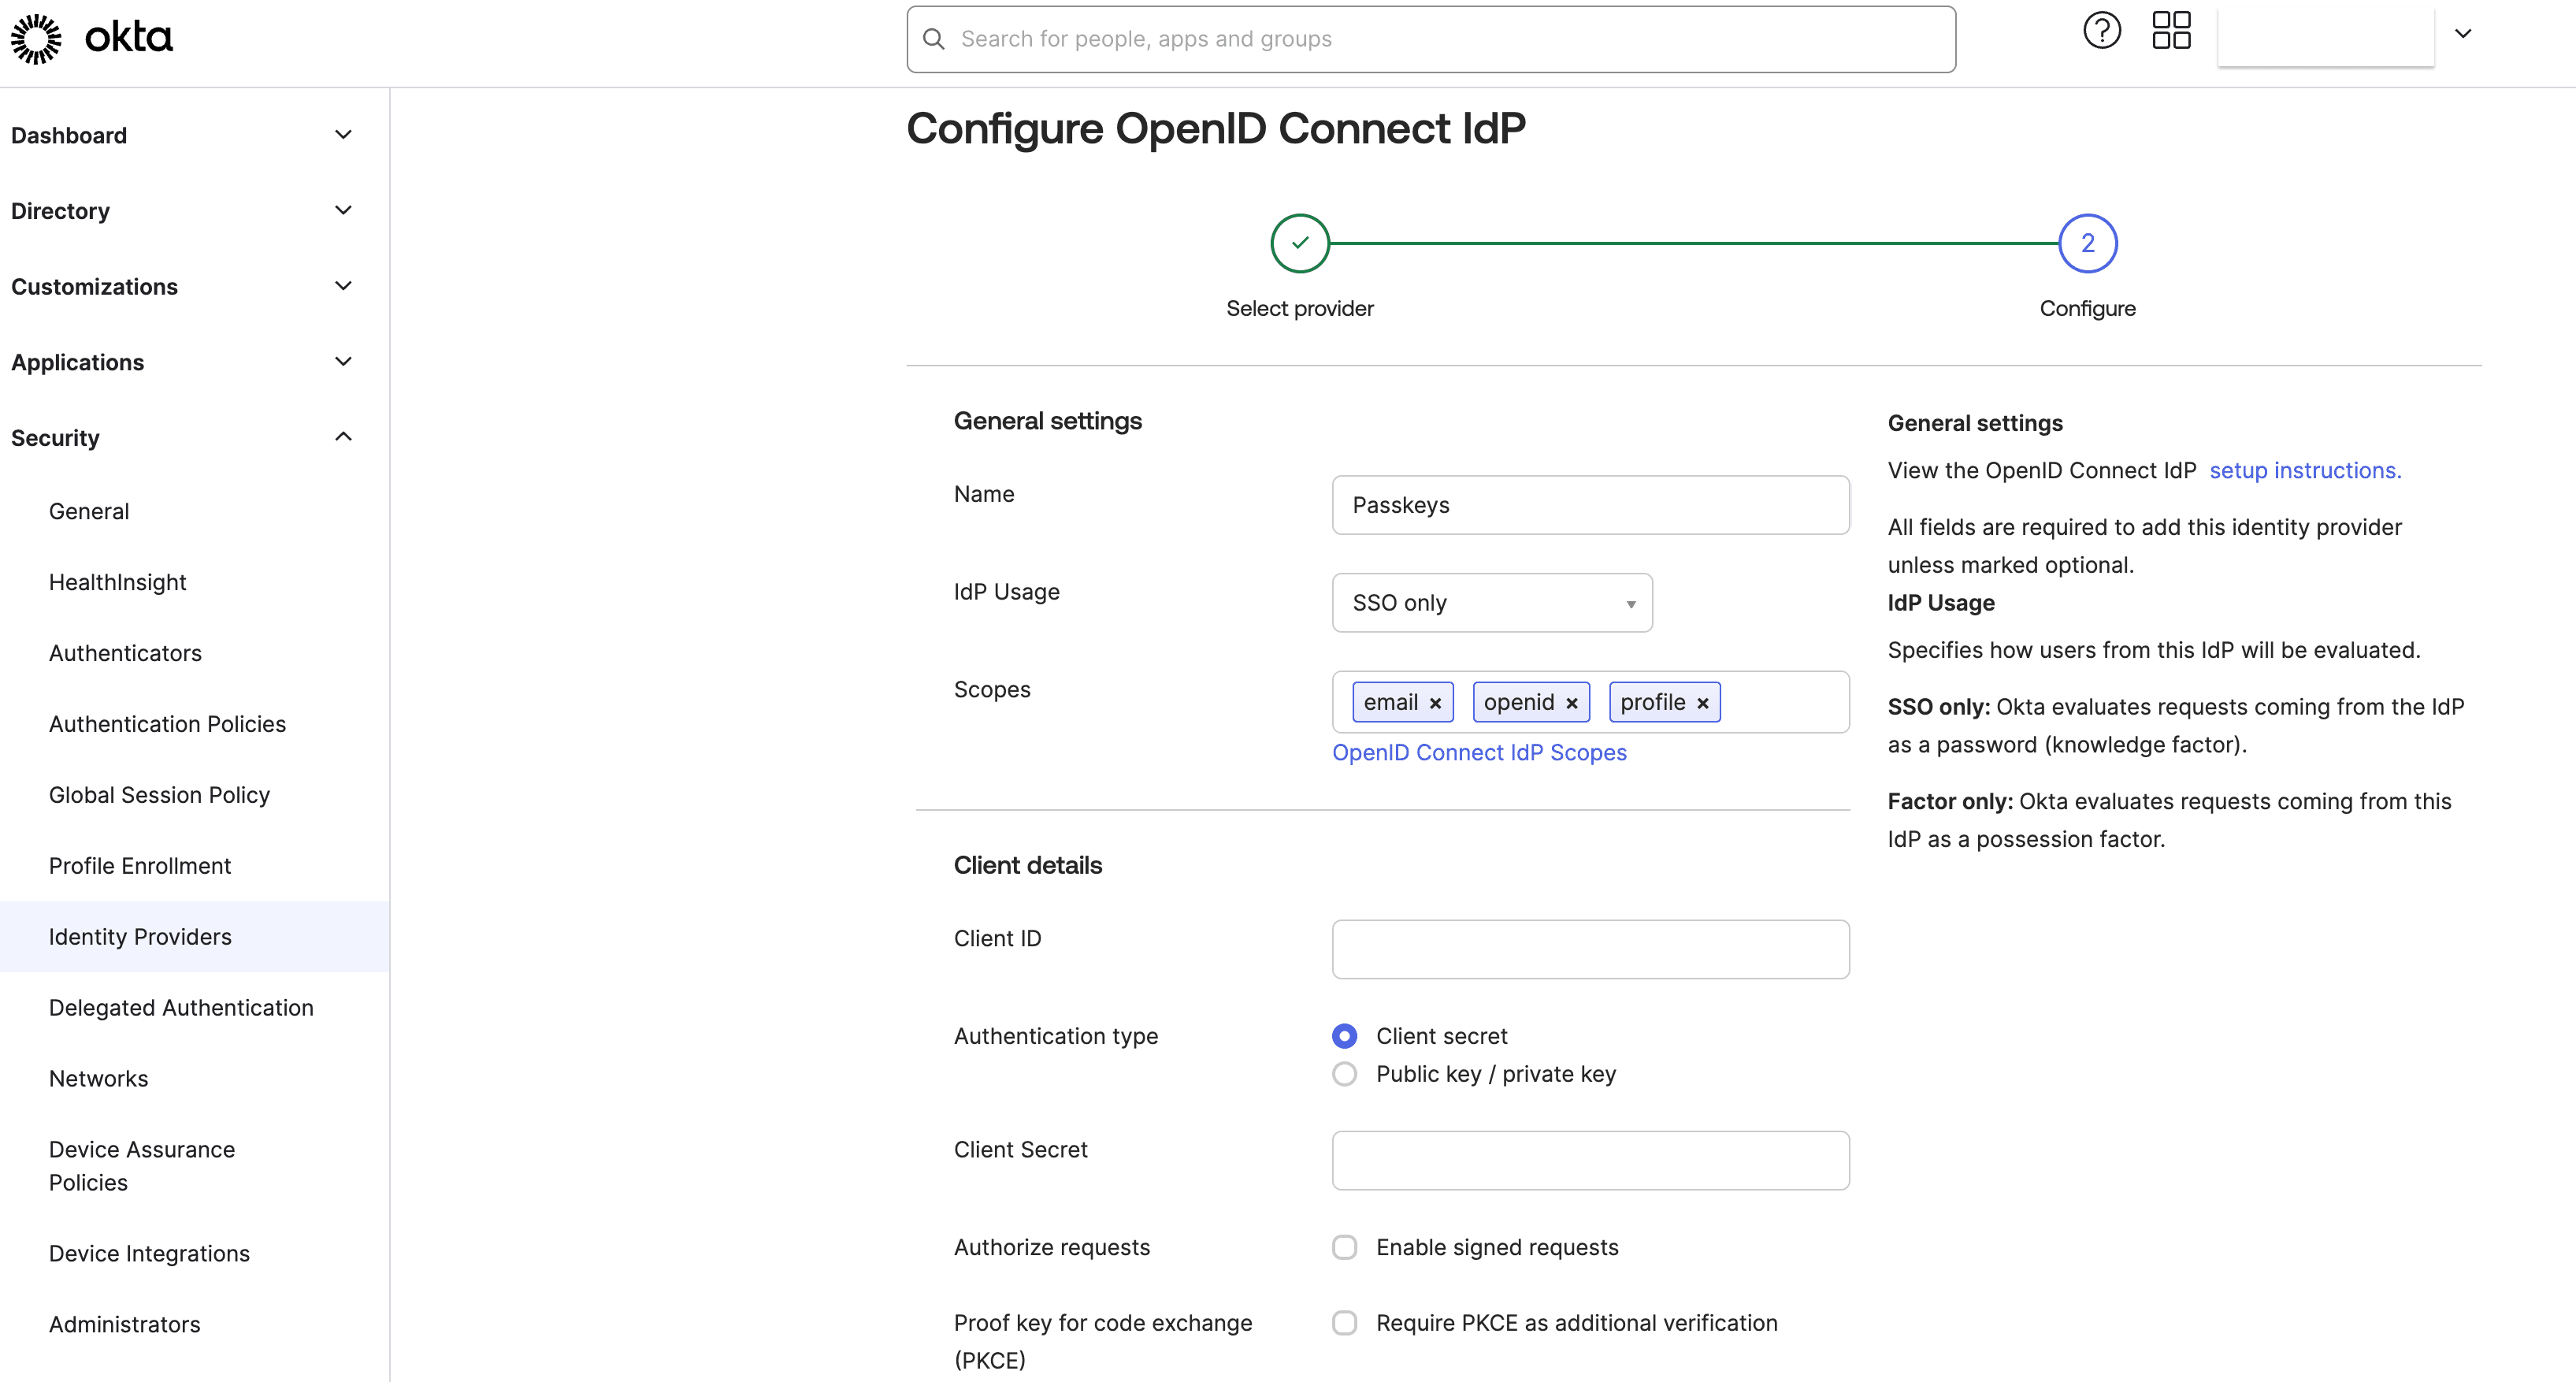
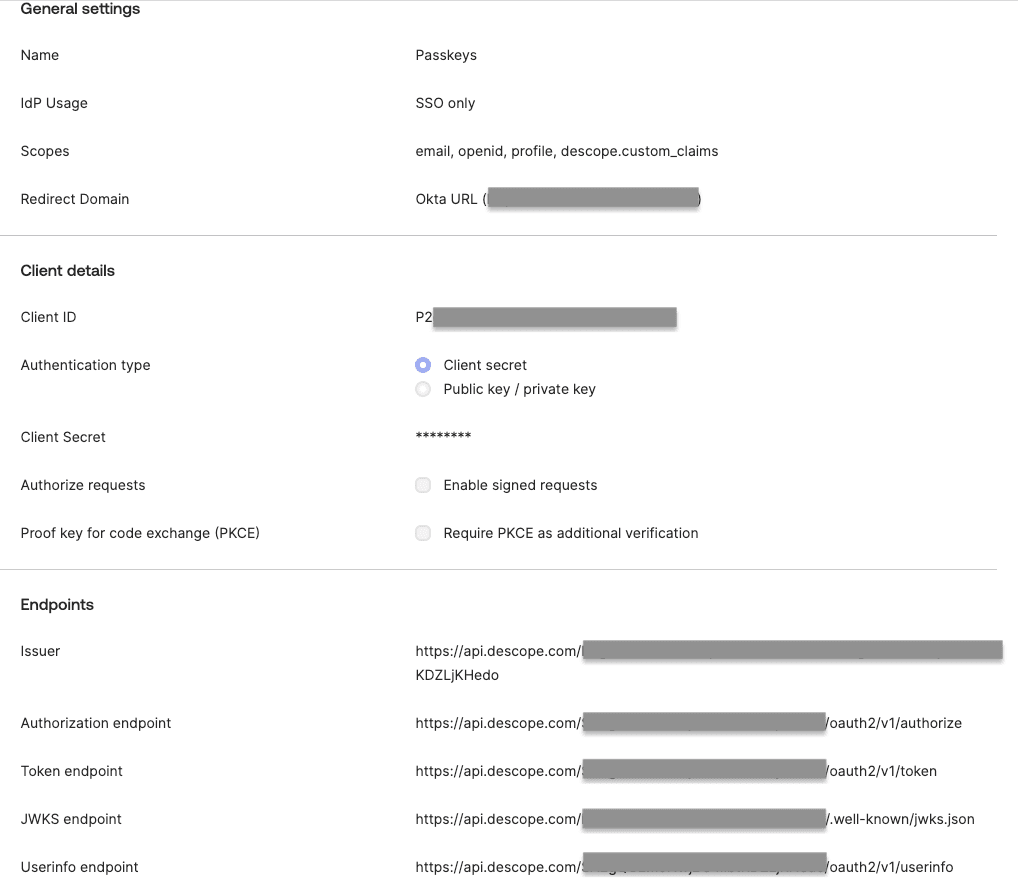
Here, the Client ID is your Descope Project ID (grab it from Project Settings within the Descope Console). The Client Secret is the API key generated under Access Keys in the Descope Console.

The next step is providing all the Descope endpoints.
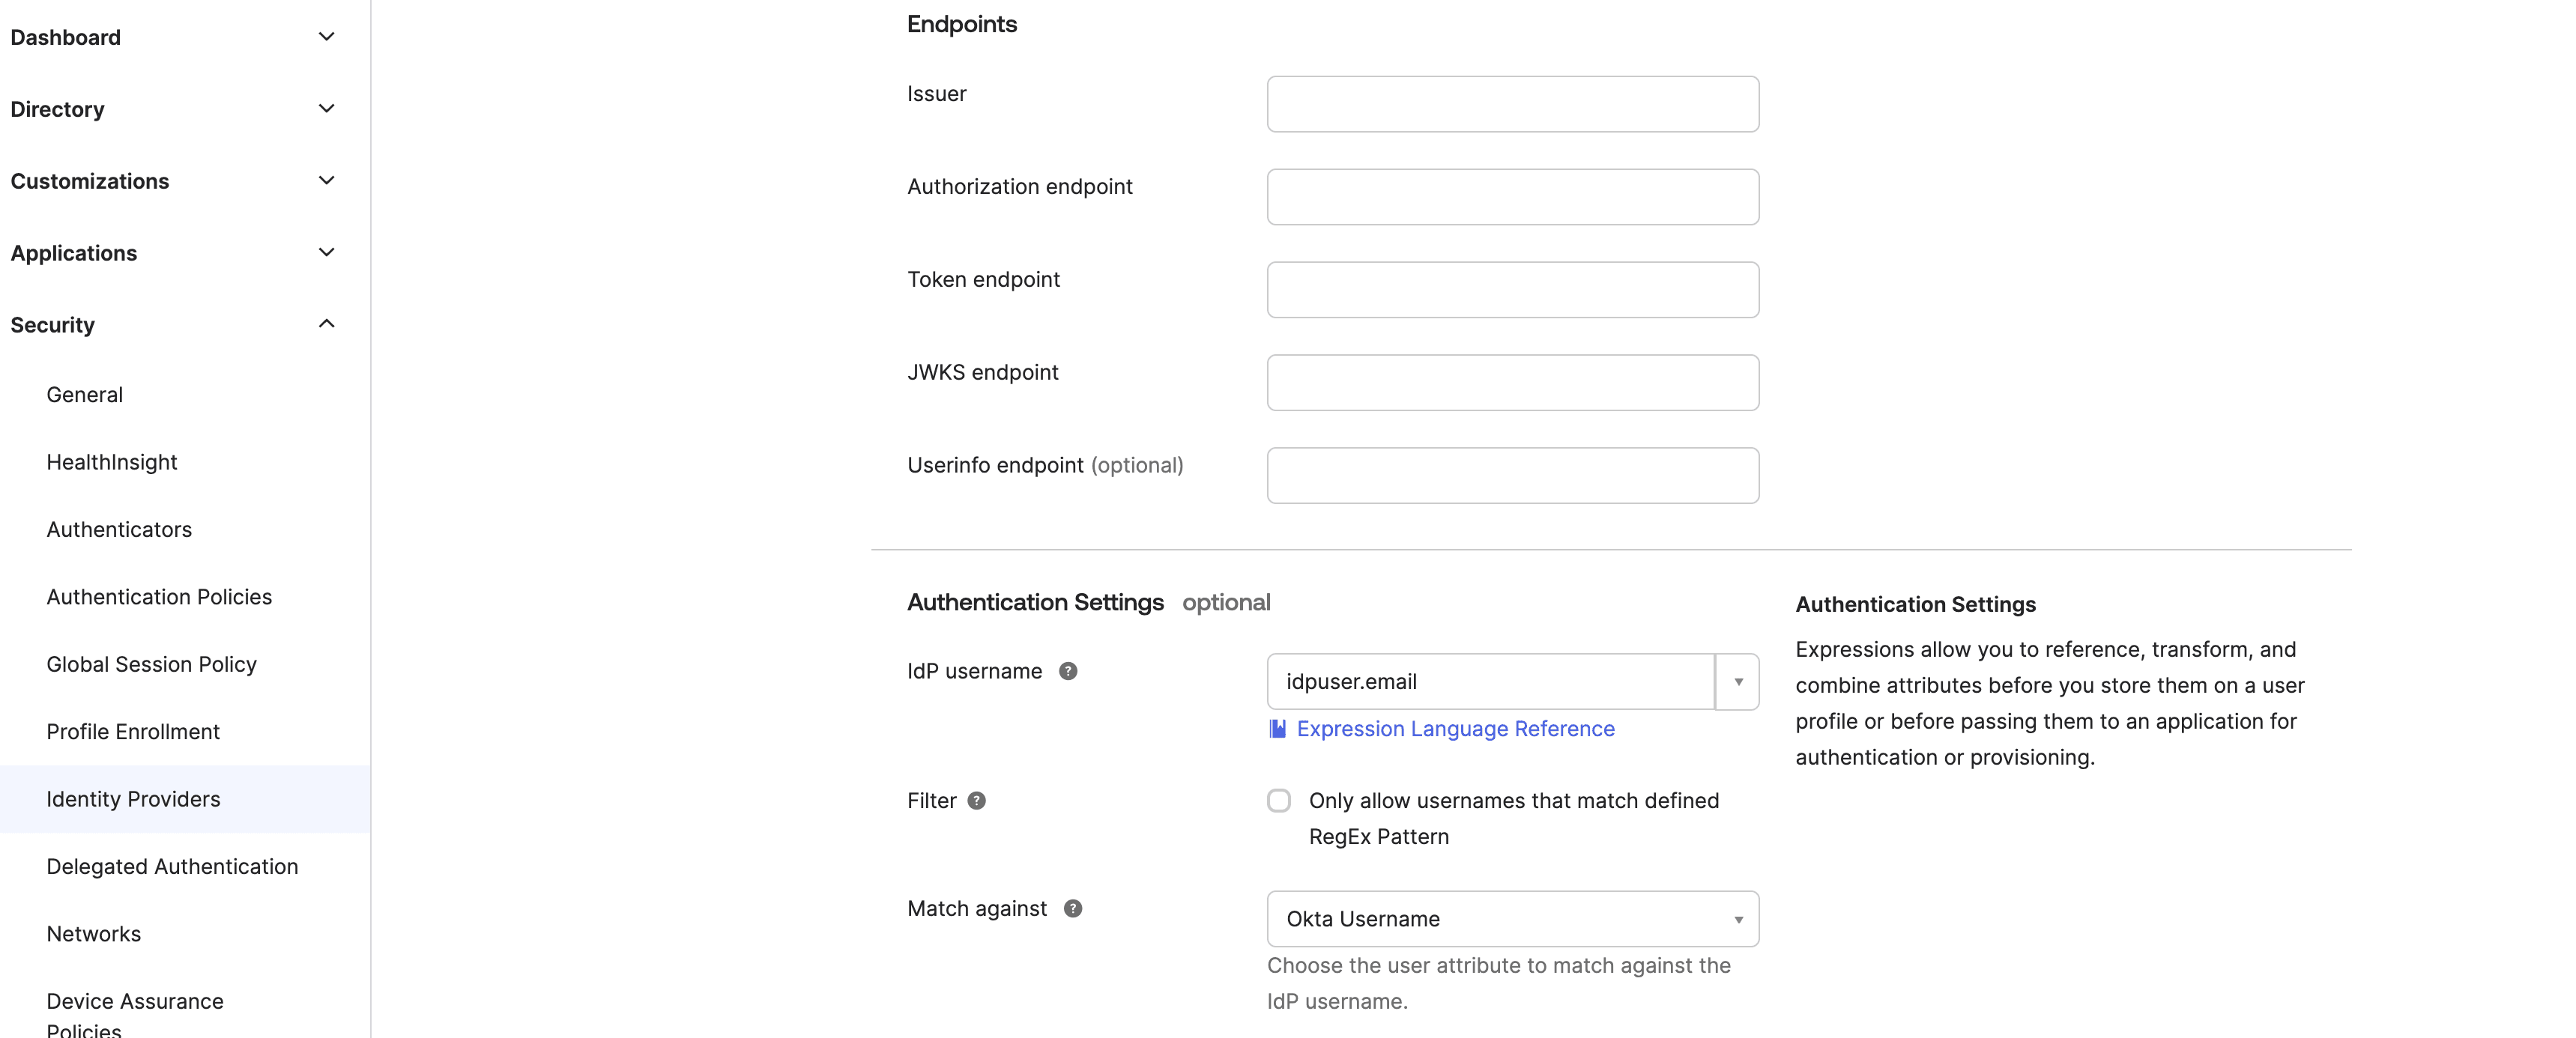
After OpenID Connect is configured, several endpoint URLs are available so that OpenID Connect clients can communicate with the OpenID Connect provider before accessing protected resources.
These endpoints will require your Project ID, and some of these required for this connection are provided as below:
Issuer:
https://api.descope.com/PROJECT_IDAuthorization endpoint:
https://api.descope.com/oauth2/v1/authorizeToken endpoint:
https://api.descope.com/oauth2/v1/tokenJWKS endpoint:
https://api.descope.com/PROJECT_ID/.well-known/jwks.jsonUserinfo endpoint:
https://api.descope.com/oauth2/v1/userinfo
To grab the details for the endpoints section, refer to this document to find endpoints specific to your project.
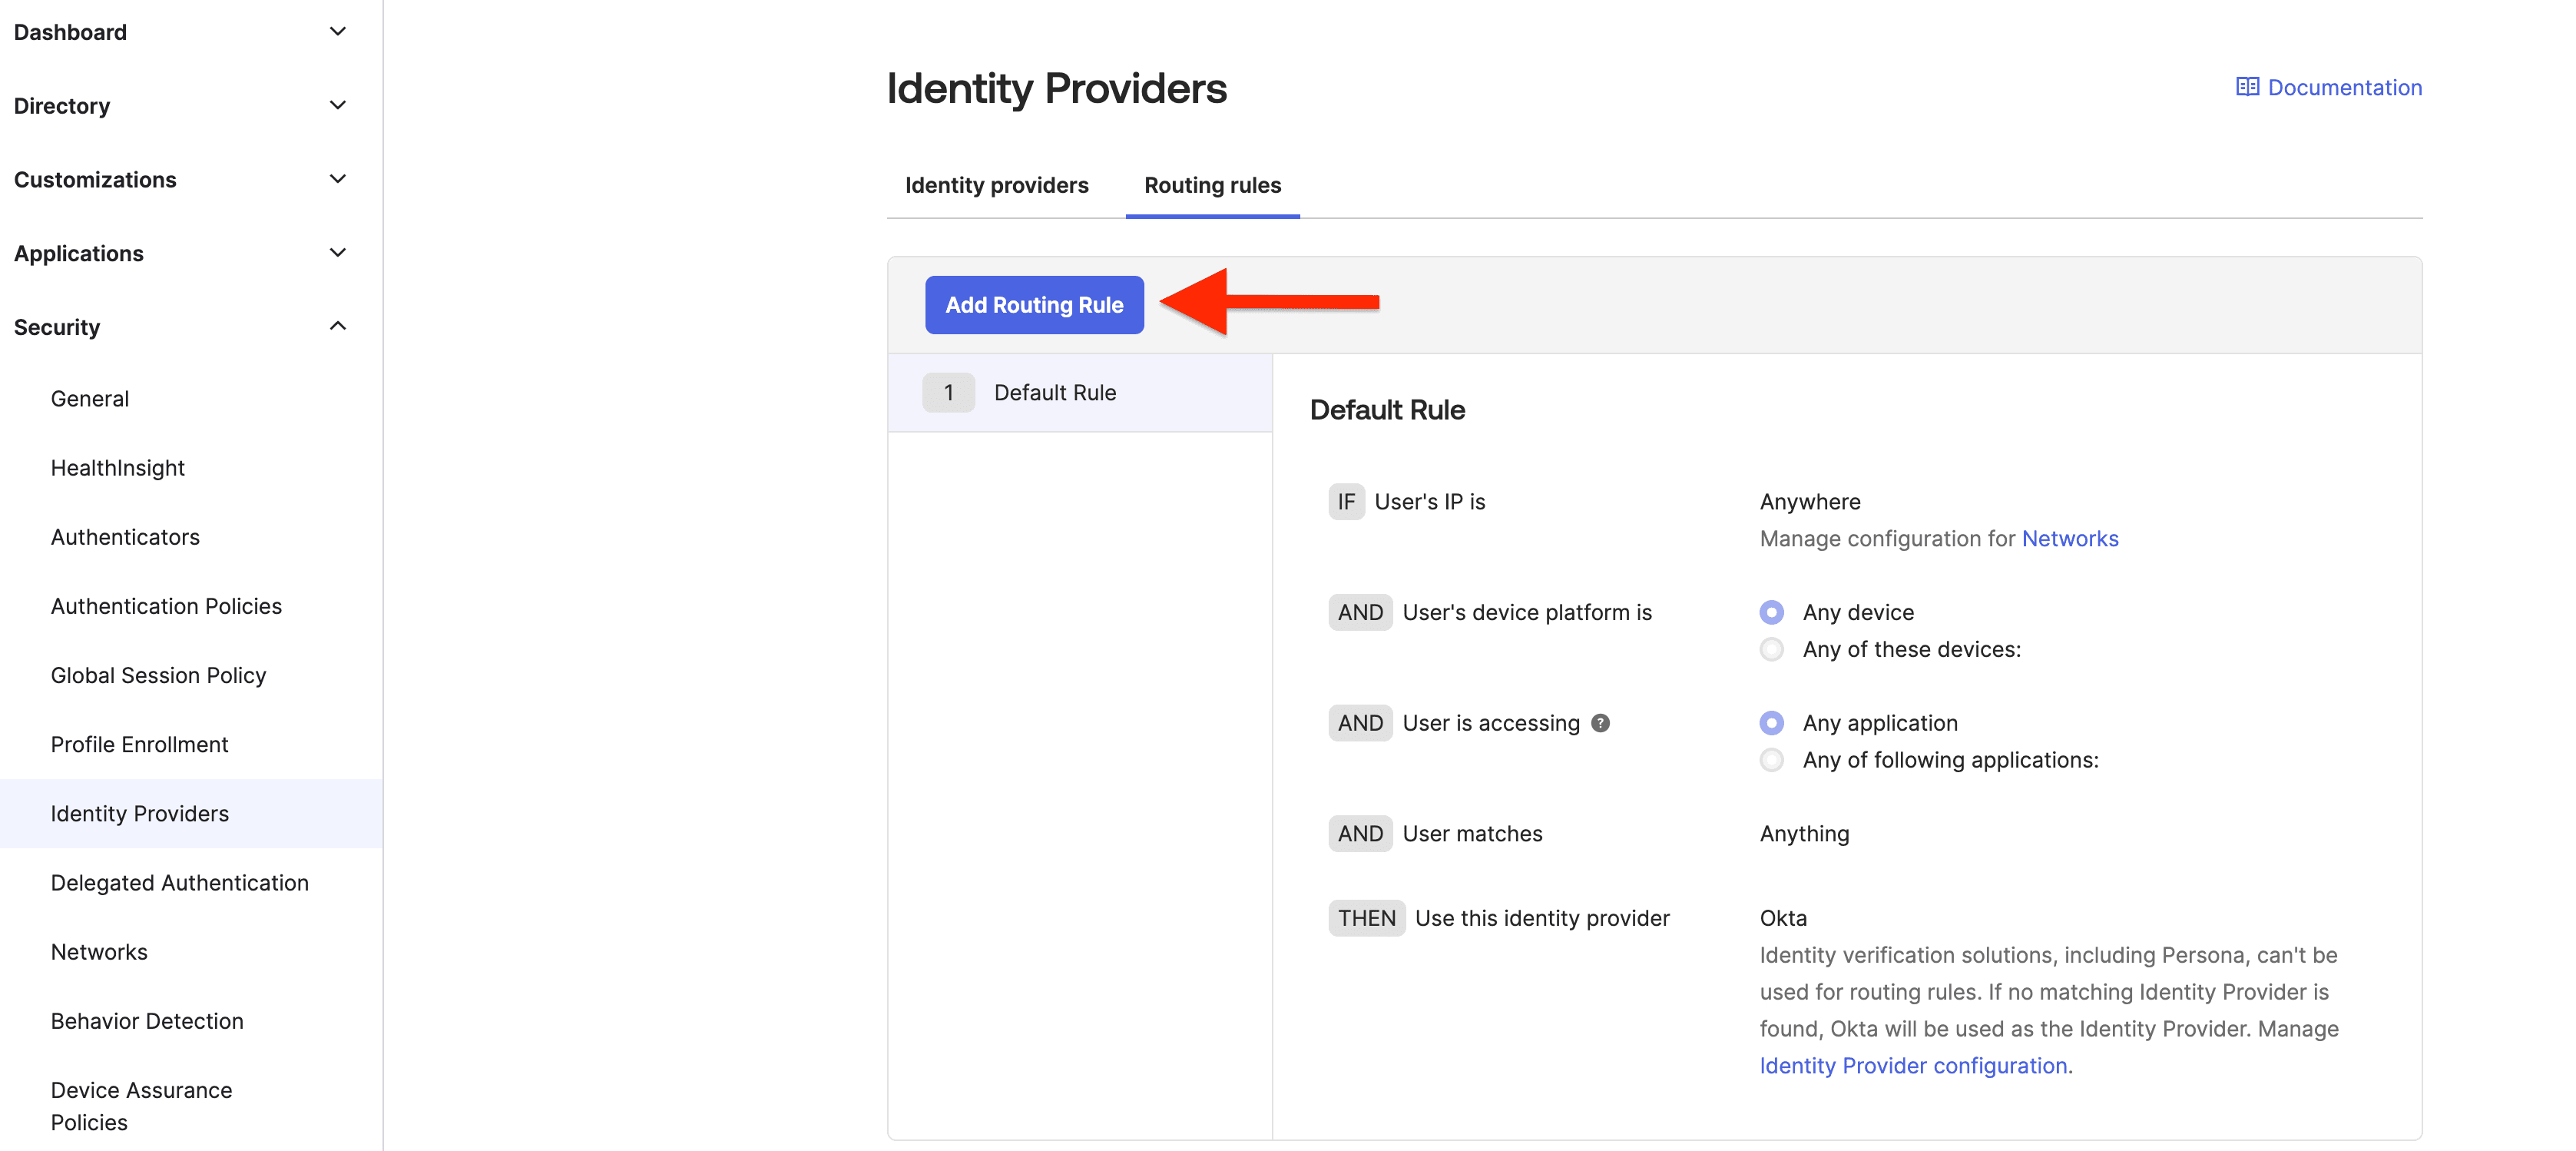
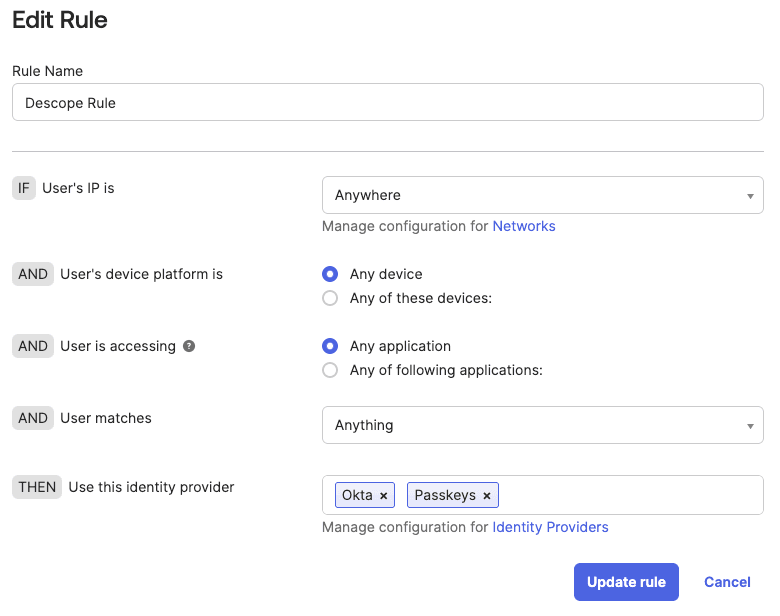
We want the passkeys option to show up on Okta’s login screen, so we’ll move over to the Routing Rules tab, which is next to the Identity Providers tab. Here, create a new rule by clicking on Add Routing Rule. This will allow us to include passkeys for your login journey.
We'll name the rule "Descope Rule" and add our "Passkeys" identity provider alongside the standard Okta IdP.
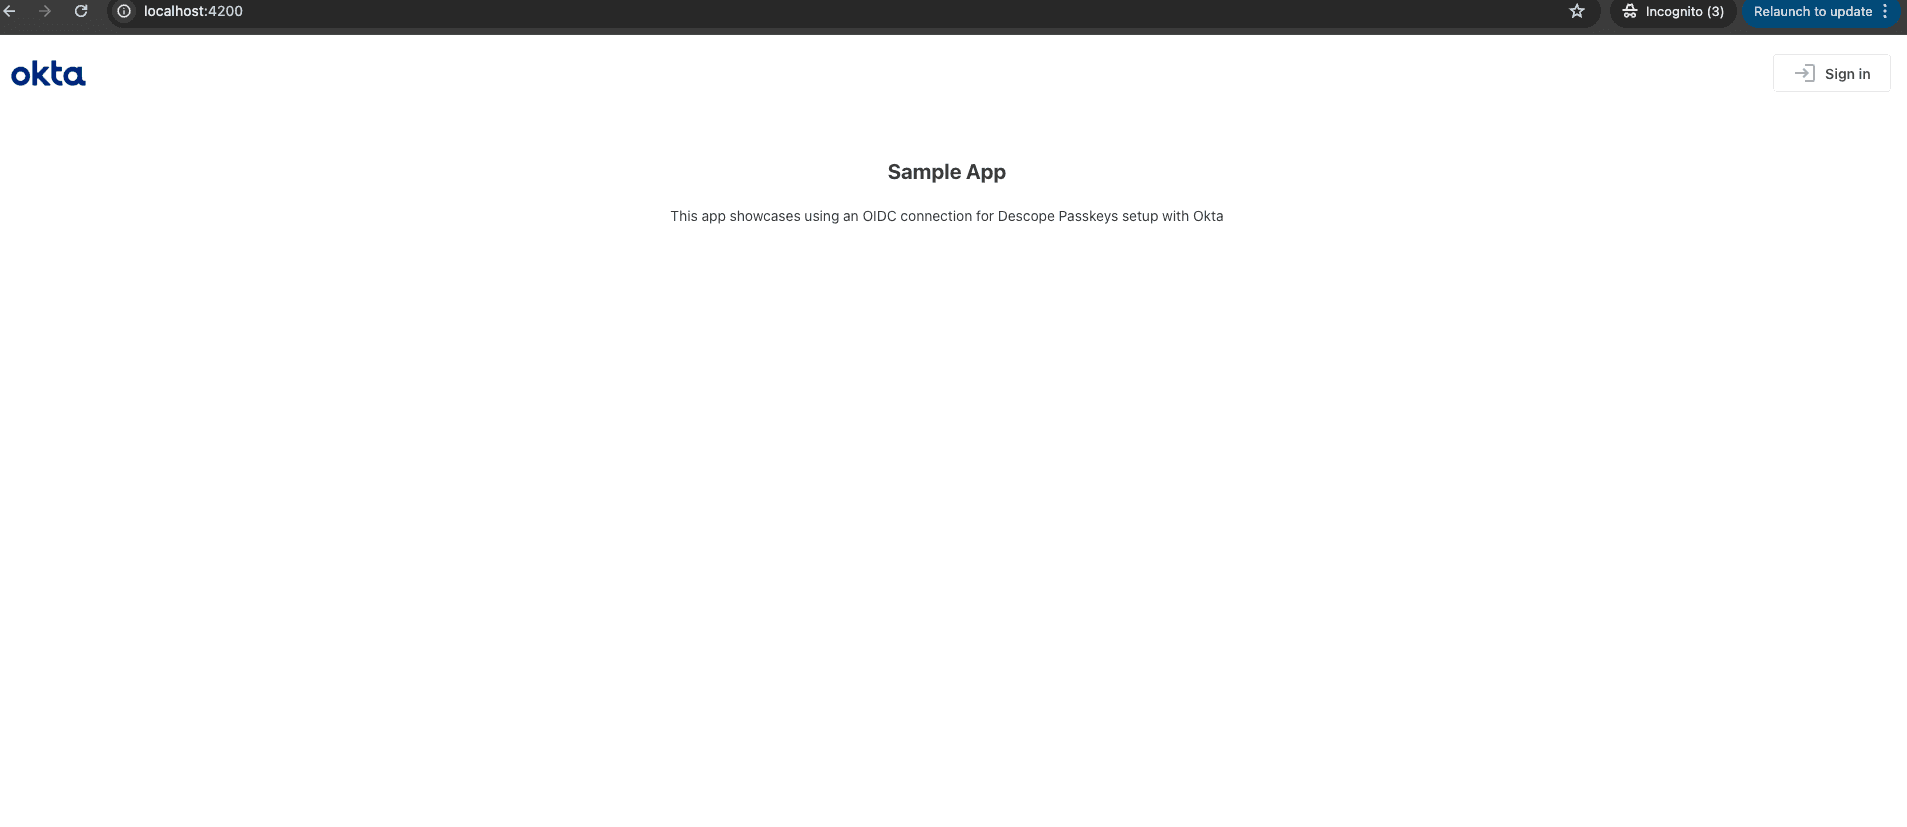
Run the app
Once you have the app running on your localhost, click on the Sign in button on the left of the sample app.
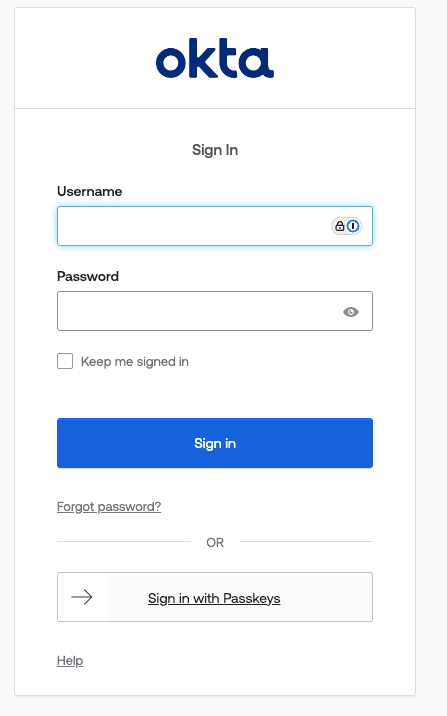
The user is now redirected to the Okta login. As seen in the screenshot below, you either can log in with password-based Okta credentials or choose to sign in with Descope passkeys.
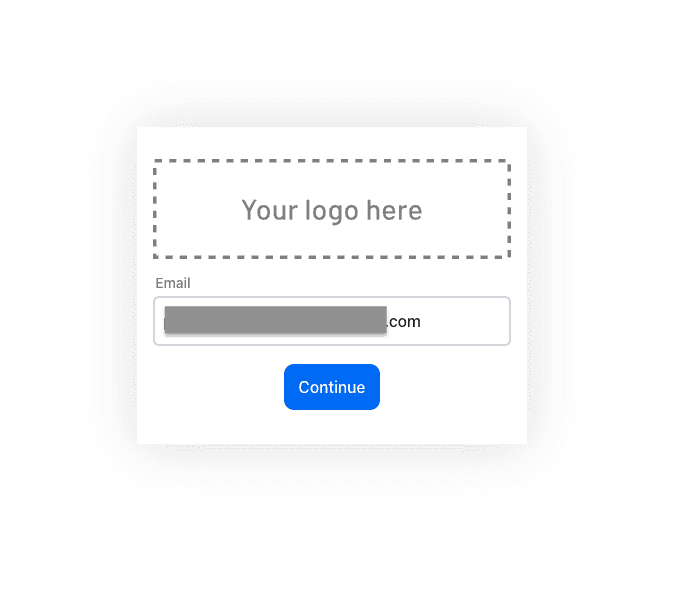
Once you click on the Sign in with Passkeys button, you are redirected to a Descope login experience. Enter your email, and you will see a prompt to sign in with passkeys.
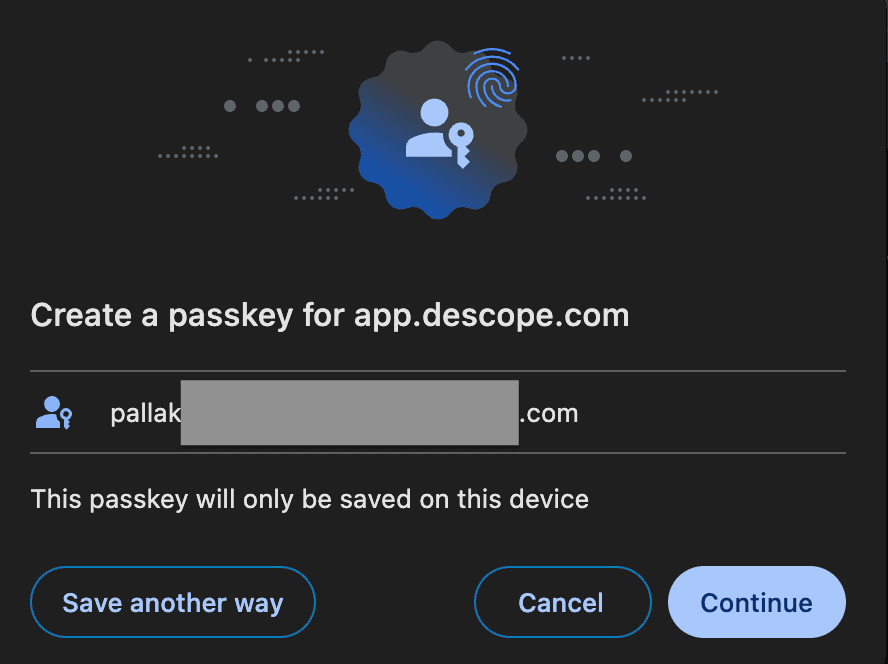
Create a passkey in your Chrome profile for this user.
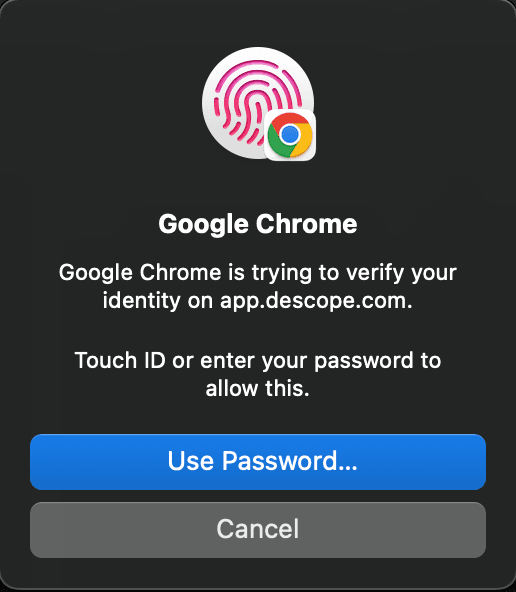
The following prompt asks you to use Touch ID to set up your passkey.
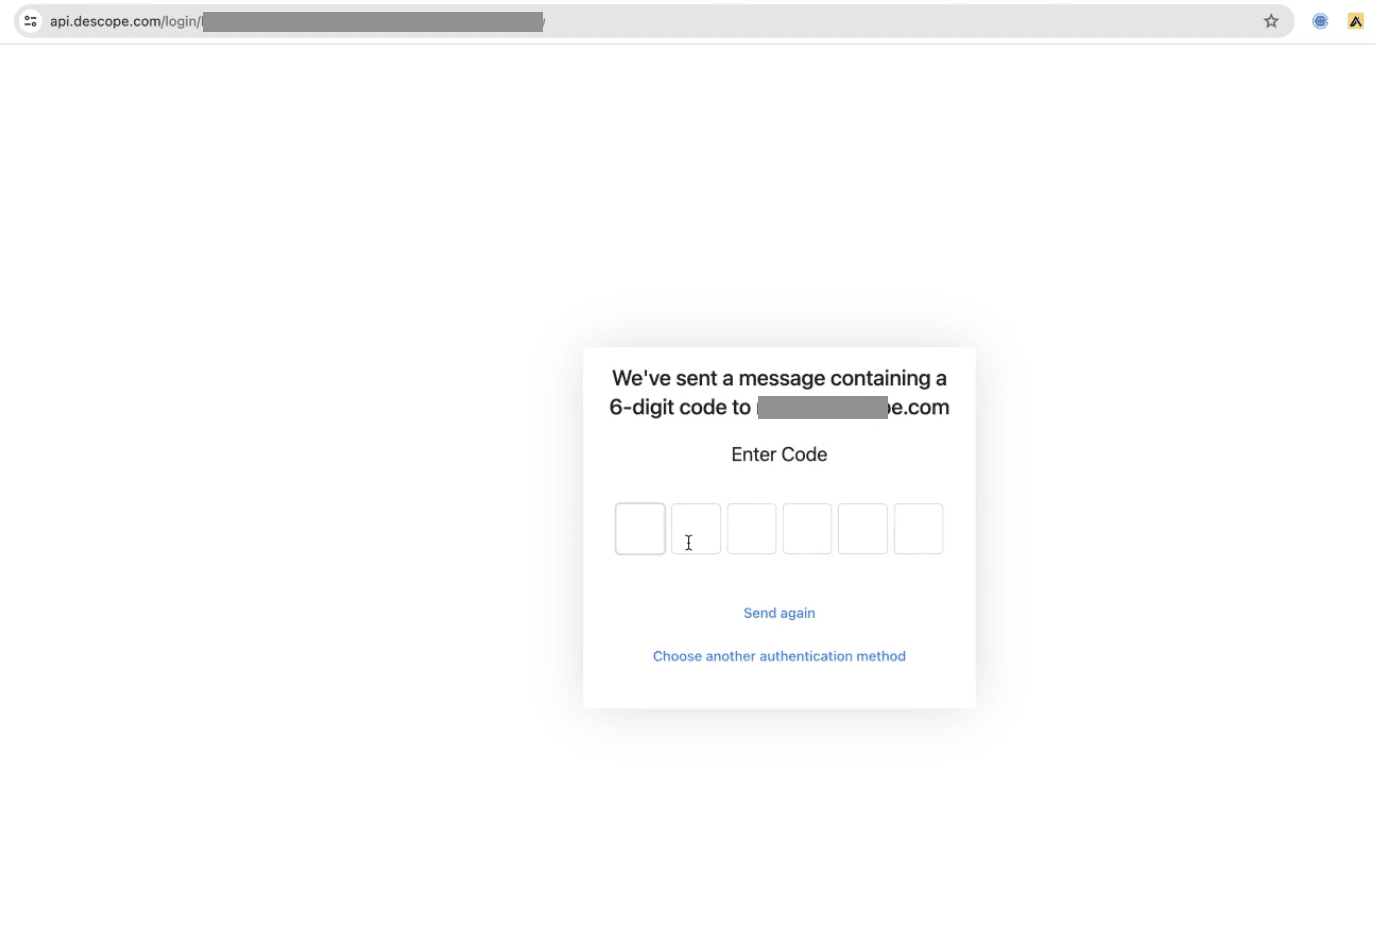
Enter the verification OTP from your email inbox as a part of user verification.
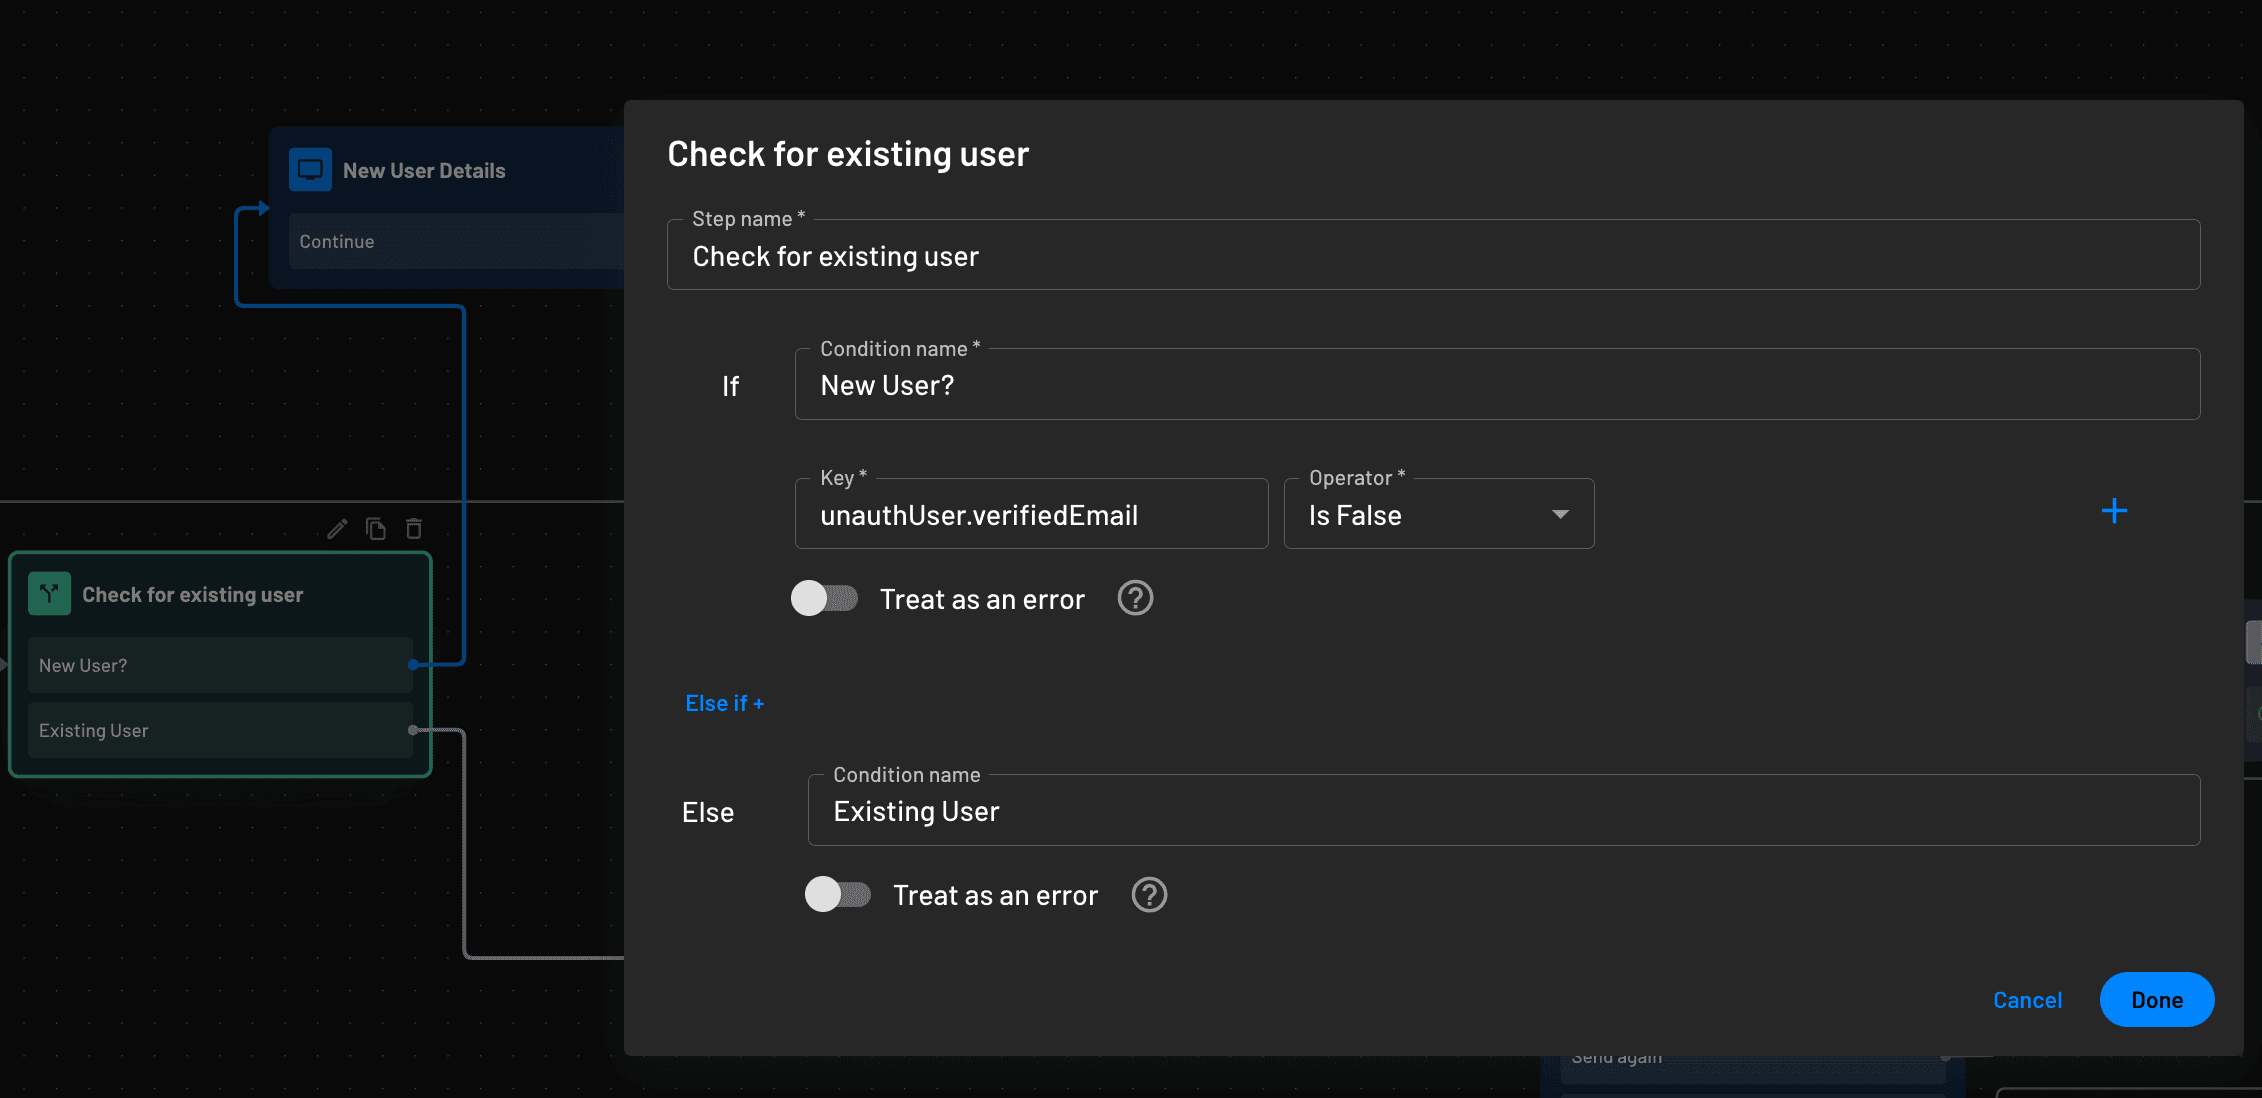
If needed, you can also add a condition that requests additional details from a new user as a part of progressive profiling. These details will not be requested of an existing user.
You can now see that you have successfully set up a passkey and signed in to the application.
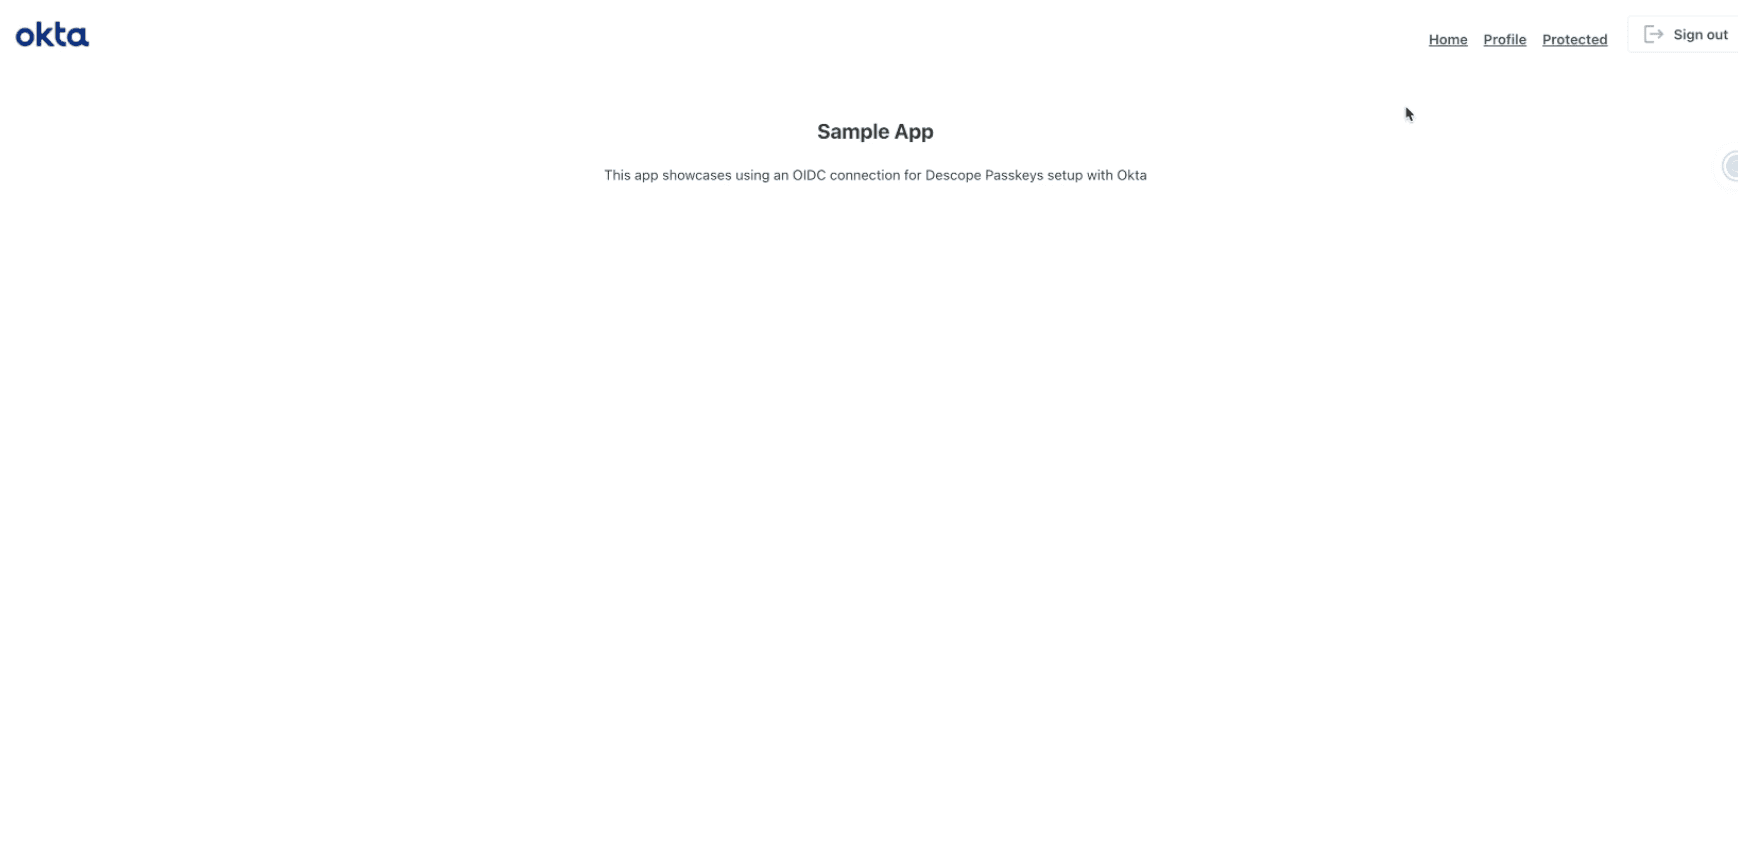
Make sure to sign out and check the sign in flow with passkeys. You can seamlessly log in by using your Touch ID on your device to access the locally stored passkeys. This way users can effortlessly access your app with Descope without having to enter any passwords.
Conclusion
Passkeys make life simpler for your end users, and they save your support team a lot of headache by reducing ticket volume—just like Descope customer Branch Insurance. Read the Branch customer story to learn how they cut auth-related support tickets in half with just 25% passkey adoption.
However, simply augmenting Okta CIS with passkeys doesn’t afford you the wealth of options you’d get by using Descope as your sole auth provider. By replacing Okta with Descope, your passkeys become a business enabler, with features like:
Cross-device passkeys: By default, passkeys are bound to the device they’re created on. Descope can give users a unified experience by connecting their passkeys across every device. Read the guide to learn more.
A/B testing: Trial different auth flows or incrementally introduce passkeys to your existing user base. A/B testing identity flows will reveal which paths lead to fewer drop-offs and higher conversions.
Post-login passkey prompts: Subtly offer passkeys to users after they log in with traditional methods. Unobtrusive reminders lead to better adoption, and more passkey benefits.
Backup auth methods: Descope Flows can silently guide users to the right path when the user’s device is not passkey compatible. Instead of reaching a dead end, they’ll be directed to an alternative auth method.
Self-service user profiles: Give users the option to add passkeys via their user profile widget, enabling them to activate strong, passwordless security outside of the login flow.
Moreover, Descope passkey augmentation isn’t limited to Okta CIS. Implementation via other services is just as quick and easy. Check out our step-by-step guides on how to incorporate passkeys into Auth0, Cognito, and Firebase.

