Table of Contents
Getting started
This ASP.NET Core auth tutorial was written by Ryan Peden, a full-stack developer passionate about clean code and keeping software dev fun. Connect with him on his LinkedIn or X to see more of his work!
Modern web apps need flexible authentication options, but implementing them securely in ASP.NET Core can be complex and time-consuming. Instead of building authentication from scratch, .NET developers can use Descope—a CIAM platform supporting OTPs, magic links, social logins, SSO and more.
This guide will show you how to implement ASP.NET Core auth with Descope SDK. We’ll cover:
Adding a login page using Descope’s prebuilt login UI
Setting up protected routes to secure your app
Retrieving and managing user profile information
Getting started
To successfully implement this ASP.NET Core auth, you need a Descope account and login flow.
Begin by signing up and creating a free Descope account. Once you’re in the console, you’ll land on the dashboard page. Click Flows in the menu, and then click Start from template:
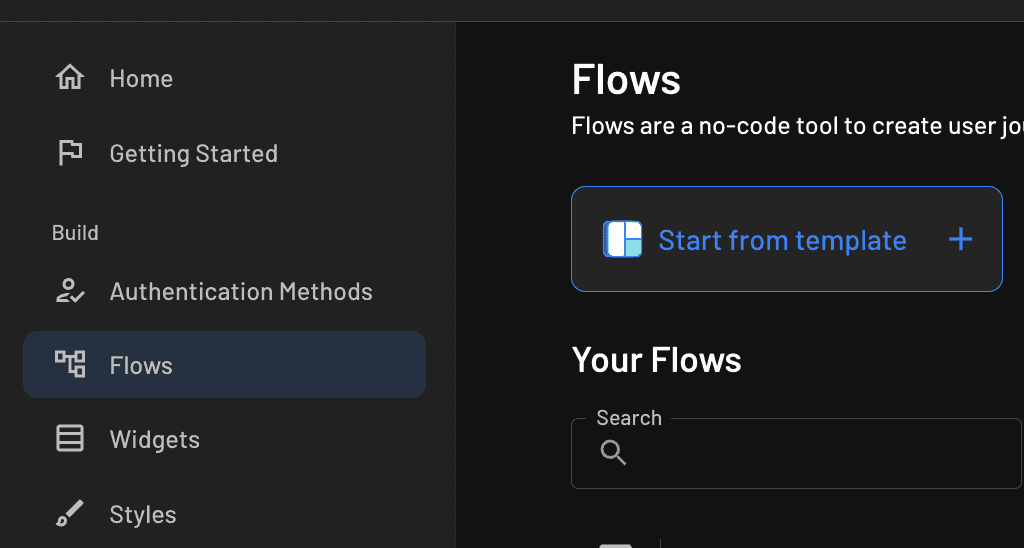
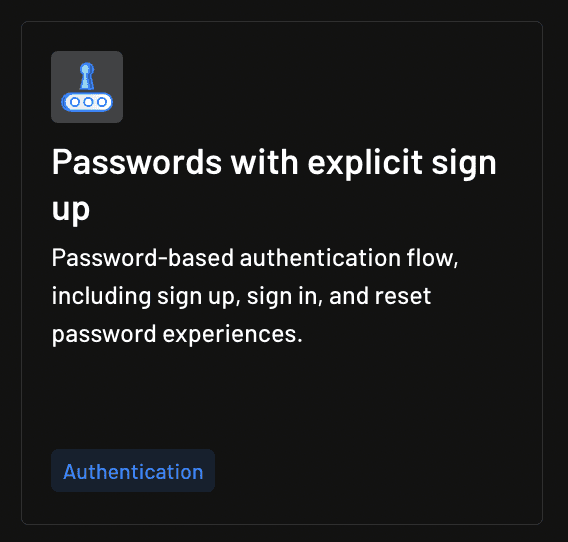
From the list, choose Passwords with explicit sign up:
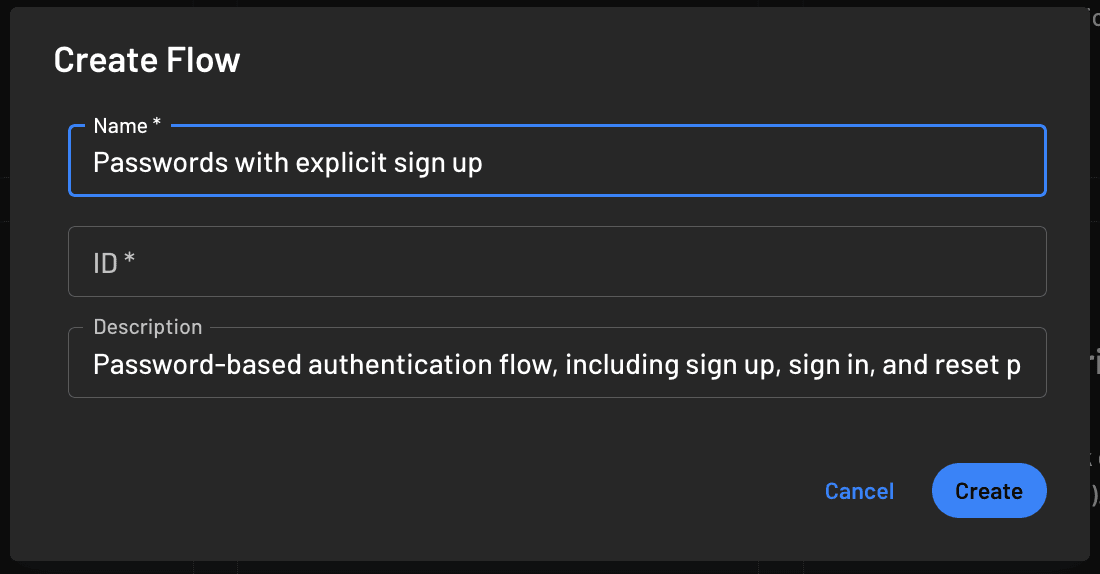
Enter an ID for this login flow or leave the ID empty and let Descope generate one for you:
You also need the following for your development environment:
Your preferred IDE (Visual Studio 2022, Visual Studio Code, and Rider all work well for this tutorial)
Creating the ASP.NET Core application
Start by creating a new ASP.NET Core application. While you can follow along with the steps outlined later, you can also find the complete source code on GitHub. Use the Razor Pages app template in Visual Studio or Rider for a quick start, or if you prefer the CLI, run dotnet new webapp -o DescopeTestApp.
Next, you need to install the Descope .NET SDK. Search for it using the NuGet package manager in Visual Studio or Rider, or run dotnet add package Descope in your project’s root directory.
Due to space constraints, this article will demonstrate how to add cookie-based authentication to a Razor Pages app because it’s the recommended approach for new ASP.NET Core applications. However, you’ll be using the Descope JSON Web Token–based authentication behind the scenes, so it’s easy to add token-based authentication to ASP.NET Core MVC controllers if you prefer to build apps that way.
The GitHub repository linked earlier contains a fully functional example of token-based authentication, including middleware to check JWTs on every request and an MVC controller to handle token refresh.
Understanding ASP.NET Core authentication
Before diving into the implementation, let’s briefly look at how authentication works in ASP.NET Core applications.
ASP.NET Core uses a claims-based identity system that provides a consistent way to represent user information throughout your app.
A claim is a piece of information about the user, such as their name, email, or any custom attributes you want to store. When working with claims, you’ll encounter three main classes:
Claim: Individual pieces of information about the user
ClaimsIdentity: A collection of claims that represents a single identity
ClaimsPrincipal: Represents a collection of identities (though, in most cases, the collection contains only one identity)
When a user is authenticated in your application, their information is stored as claims and made available through the User property in controllers and Razor Pages. This is why you often see code like User.Identity.IsAuthenticated or User.FindFirst(ClaimTypes.Email) in ASP.NET Core web apps.
Setting up the application
To integrate Descope with ASP.NET Core, you need to configure several services and middleware components. Your generated ASP.NET Core application includes a Program.cs file that configures and starts the app. Adding authentication to your app involves making some adjustments to this file.
Replace the contents of the Program.cs file with the following code:
using DescopeTestApp;
using Descope;

var builder = WebApplication.CreateBuilder(args);

var config = new DescopeConfig(
    projectId: builder.Configuration?["DescopeProjectId"]
    ?? throw new Exception("Unable to load Descope project ID."));
var descopeClient = new DescopeClient(config);

builder.Services.AddSingleton(new DescopeClient(config));

builder.Services.AddRazorPages();
builder.Services.AddDistributedMemoryCache();
builder.Services.AddAuthentication().AddCookie();
builder.Services.ConfigureApplicationCookie(options =>
{
    options.ExpireTimeSpan = TimeSpan.FromHours(24);
    options.LoginPath = "/Login";
    options.SlidingExpiration = true;
});

var app = builder.Build();

if (!app.Environment.IsDevelopment())
{
    app.UseExceptionHandler("/Error");
    app.UseHsts();
}

app.UseHttpsRedirection();
app.UseStaticFiles();
app.UseAuthentication();

app.UseRouting();
app.UseAuthorization();
app.MapRazorPages();
app.MapControllerRoute(
    name: "default",
    pattern: "{controller=Home}/{action=Index}/{id?}");

app.UseMiddleware<AuthenticationMiddleware>();
app.UseMiddleware<BearerAuthenticationMiddleware>();

app.Run();
This code alters the original file in the following ways:
It starts by creating a Descope client with your project ID. The project ID should be stored in your configuration (like appsettings.Development.json) rather than hard-coded. In production, you want to store this in a secure location like an environment variable. The app builder automatically loads it when the app starts whether you’ve stored it in an appsettings file or an environment variable.
The builder.Services.AddSingleton(new DescopeClient(config)) line registers the Descope client with ASP.NET Core’s dependency injection. This means you can automatically inject the Descope client into any Razor Page, controller, service, or middleware that needs it.
Next, the calls to AddAuthentication, AddCookie, and ConfigureApplicationCookie
add cookie-based authentication, which is how ASP.NET Core maintains user sessions. The configuration is as follows:
Sets cookies to expire after twenty-four hours
Specifies the login page to redirect to when authentication is required
Enables sliding expiration, which means the cookie’s expiration time is reset with each request
You can adjust these settings to suit your application’s needs.
Finally, the calls to UseAuthentication, UseAuthorization, and UseMiddleware enable ASP.NET Core’s authentication and authorization functionality.
The order of middleware is important; authentication must come before authorization. Next is the registration of the custom middleware you create to handle Descope authentication.
Creating the authentication middleware
You’ve set up your application and enabled authentication, and the next step is to create the middleware to validate the user’s authentication status when they try to access a protected page.
ASP.NET Core’s middleware pipeline is a series of components that are called on every request to the app. Middleware components can perform tasks like authentication, authorization, and logging.
In this case, you create a custom middleware that validates the user’s authentication status using the Descope SDK. If the user is authenticated, the middleware validates the user’s session token and refreshes it if necessary. It also updates the user’s claims in case they’ve changed.
To create the middleware, add a class named AuthenticationMiddleware to your project. Then add the following code:
using Descope;
using Microsoft.AspNetCore.Authentication;
using Microsoft.AspNetCore.Authentication.Cookies;
using Microsoft.AspNetCore.Authorization;
using System.Security.Claims;

namespace DescopeTestApp
{
    public class AuthenticationMiddleware
    {
        private readonly RequestDelegate _next;
        private readonly DescopeClient _authClient;

        public AuthenticationMiddleware(RequestDelegate next, DescopeClient descopeClient)
        {
            _next = next;
            _authClient = descopeClient;
        }

        public async Task InvokeAsync(HttpContext context)
        {
            string scheme = CookieAuthenticationDefaults.AuthenticationScheme;

            // Check if the endpoint requires authorization
            var endpoint = context.GetEndpoint();
            var requiresAuth = endpoint?.Metadata?.GetMetadata<AuthorizeAttribute>() is not null;

            // Ensure the user is authenticated if the page requires it
            if (context.User.Identity?.IsAuthenticated == true && requiresAuth)
            {
                try
                {
                    // Retrieve the JWT from the user's claims
                    var sessionToken = context.User.FindFirst("sessionToken")?.Value;
                    var refreshToken = context.User.FindFirst("refreshToken")?.Value;

                    if (sessionToken != null && refreshToken != null)
                    {
                        // Validate and refresh the session with Descope
                        var sessionInfo = await _authClient.Auth.ValidateAndRefreshSession(sessionToken, refreshToken);
                        var user = await _authClient.Auth.Me(refreshToken);

                        // If the session is valid, update the claims
                        Claim[] claims = [
                            new Claim(ClaimTypes.Name, user.Name),
                            new Claim(ClaimTypes.Email, user.Email),
                            new Claim("jwtToken", sessionInfo.Jwt),
                            new Claim("refreshToken", refreshToken),
                        ];

                        var identity = new ClaimsIdentity(claims, scheme);
                        var principal = new ClaimsPrincipal(identity);

                        // Refresh the authentication cookie with updated tokens
                        await context.SignInAsync(scheme, principal);
                    }
                    else
                    {
                        // No valid tokens found, sign the user out
                        await context.SignOutAsync(scheme);
                        context.Response.Redirect("/Login");
                        return;
                    }
                }
                catch (Exception ex)
                {
                    // Session validation failed – log the user out
                    Console.WriteLine($"Session validation failed: {ex.Message}");
                    await context.SignOutAsync("Cookies");
                    context.Response.Redirect("/Login");
                    return;
                }
            }

            // Continue to the next middleware
            await _next(context);
        }
    }

}
The code and comments are largely self-explanatory, but let’s break down the key parts of what the middleware does:
Middleware initialization: The middleware is initialized with the
RequestDelegateand theDescopeClientinstance. These are passed into the constructor by ASP.NET Core’s dependency injection system, so you don’t need to worry about creating them yourself.Endpoint authorization: The middleware checks if the endpoint targeted by this request requires authorization. If so, it ensures the user is authenticated. Otherwise, it continues to the next middleware.
Token validation and refresh: For each request that requires authentication, the middleware checks if the user has valid session tokens and validates them using the Descope SDK. Since the middleware calls
ValidateAndRefreshSession, it also refreshes the session if necessary.Claims management: The middleware then updates the user’s claims with fresh information from the tokens, ensuring your app always has current user data. This is particularly important when using features like role-based access control (RBAC) since the user’s roles and permissions might have changed since their last request to a protected endpoint.
Adding a login page
Your app needs a login page where users can enter their credentials to sign in. This page uses the Descope login web component to guide the user through the login process. The component then delivers the user’s session and refresh tokens to the app’s backend where they are validated and then used to sign the user in.
Start by updating Pages/Shared/_Layout.cshtml by adding the following to the end of the <head> element:
<script src="https://unpkg.com/@@descope/web-component@3.21.0/dist/index.js"></script>
<script src="https://unpkg.com/@@descope/web-js-sdk@1.16.0/dist/index.umd.js"></script>
Next, add a new file to the Pages folder called Login.cshtml and add the following code:
@page
@model DescopeTestApp.Pages.LoginModel
@{
}
<h3>Login</h3>

<div class="login-container">
    <div class="descope-login">
        <descope-wc project-id="your-project-id"
                    flow-id="your-flow-id"
                    theme="light" />
    </div>
</div>

<form id="login" method="post">
    <input type="hidden" name="JwtToken" />
    <input type="hidden" name="RefreshToken" />
</form>

<script>
    const wcElement = document.getElementsByTagName('descope-wc')[0];

    const onSuccess = async (e) => {
        console.log(e.detail.user.name)
        console.log(e.detail.user.email)
        const jwtToken = e.detail.sessionJwt;
        const refreshToken = e.detail.refreshJwt;

        const loginForm = document.querySelector('#login');
        const sessionField = document.querySelector('input[name="JwtToken"]');
        const refreshField = document.querySelector('input[name="RefreshToken"]');

        sessionField.value = jwtToken;
        refreshField.value = refreshToken;
        loginForm.submit();

        if (response.ok) {
            window.location.href = '/';
        } else {
            console.error('Login failed');
        }
    };
    const onError = (err) => console.log(err);

    wcElement.addEventListener('success', onSuccess);
    wcElement.addEventListener('error', onError);
</script>
Update the descope-wc tag in the Login.cshtml file with your project ID and the ID of the login flow you created earlier.
Next, add the following lines to the existing wwwroot/css/site.css file:
.login-container {
    display: flex;
    flex-direction: row;
    justify-content: center;
}

.descope-login {
   width: 350px;
}
In the Login.cshtml.cs file that was created alongside Login.cshtml, add the following code:
using Descope;
using Microsoft.AspNetCore.Authentication;
using Microsoft.AspNetCore.Authentication.Cookies;
using Microsoft.AspNetCore.Http;
using Microsoft.AspNetCore.Mvc;
using Microsoft.AspNetCore.Mvc.RazorPages;
using System.Security.Claims;

namespace DescopeTestApp.Pages
{
    public class LoginModel(DescopeClient authClient) : PageModel
    {
        private readonly DescopeClient _authClient = authClient;

        [BindProperty]
        public string JwtToken { get; set; }
        [BindProperty]
        public string RefreshToken { get; set; }

        public void OnGet()
        {
            Console.WriteLine("Getting");
        }

        public async Task<IActionResult> OnPostAsync()
        {
            Console.WriteLine("Posting");
            try
            {
                var sessionInfo = await _authClient.Auth.ValidateAndRefreshSession(JwtToken, RefreshToken);
                var user = await _authClient.Auth.Me(RefreshToken);

                Claim[] claims = [
                    new Claim(ClaimTypes.Name, user.Name),
                    new Claim(ClaimTypes.Email, user.Email),
                    new Claim("sessionToken", JwtToken),
                    new Claim("refreshToken", RefreshToken),
                ];

                var identity = new ClaimsIdentity(claims, CookieAuthenticationDefaults.AuthenticationScheme);
                var principal = new ClaimsPrincipal(identity);

                await HttpContext.SignInAsync(principal);

                return RedirectToPage("/Index");
            }
            catch (DescopeException ex)
            {
                // Authentication failed
                Console.WriteLine($"Login failed: {ex.Message}");
                return RedirectToPage("/Login");
            }
        }
    }
}
This code looks familiar since it’s very similar to the code used to validate and refresh the session in the authentication middleware. However, since this code manages the user’s initial login, it saves the session token and refresh token within the user’s claims. This allows the authentication middleware to use these tokens later to validate and refresh the session when the user returns to the app.
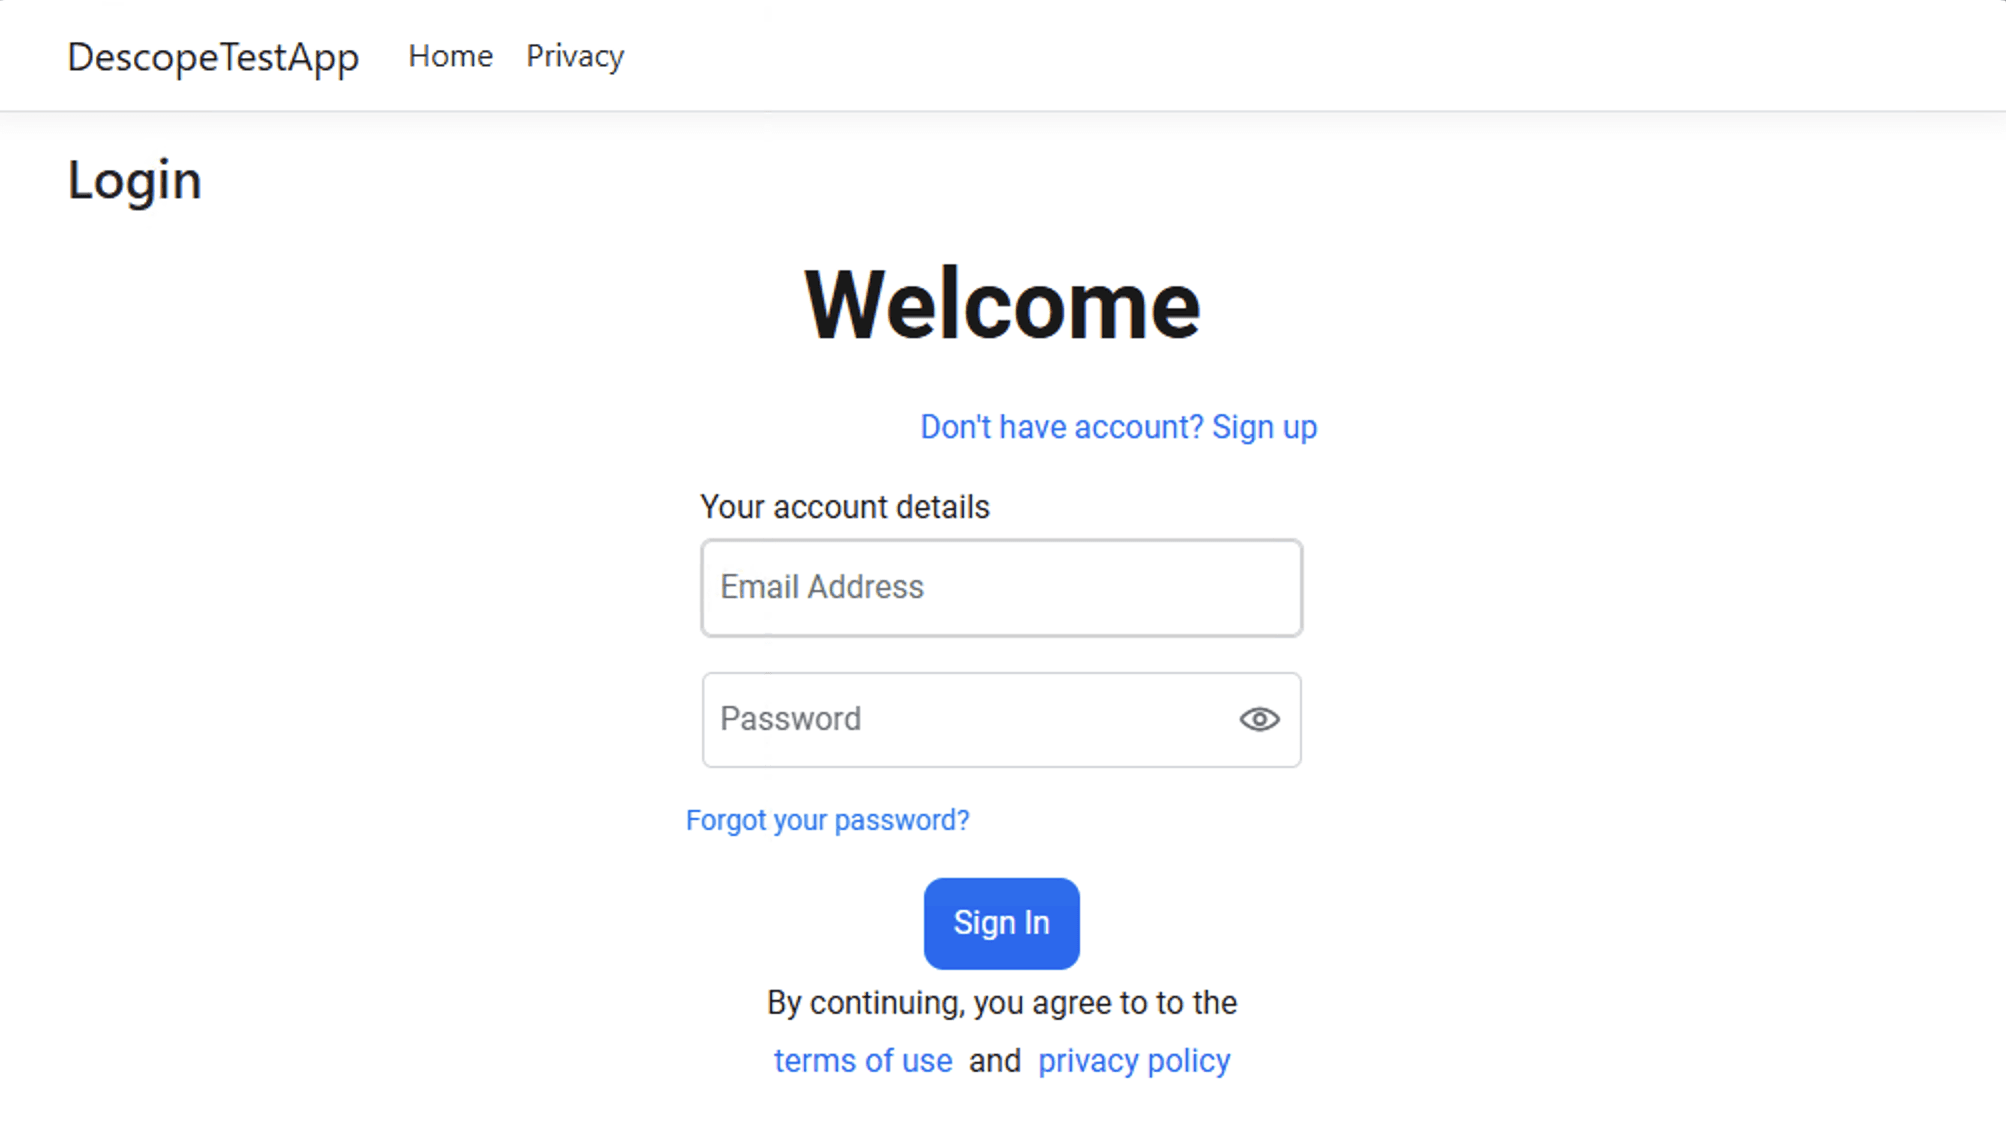
If you run the app now, you’ll be able to sign up and sign into the app using the Descope authentication flow you created earlier:
Adding a page that requires authentication
To verify that authentication works, add a new file to the Pages folder called Protected.cshtml and add the following code:
@page
@using System.Security.Claims
@model DescopeTestApp.Pages.ProtectedModel
@{
    var userName = User.Identity?.Name ?? "unknown";
    var emailAddress = User.Claims.Where(c => c.Type == ClaimTypes.Email)
                                          .Select(c => c.Value)
                                          .DefaultIfEmpty("unknown")
                                          .FirstOrDefault();
}

<h3>Secure Page</h3>

If you can see this, it means you are signed in!

<div>Name: @userName</div>

<div>Email: @emailAddress</div>
In the Protected.cshtml.cs file, add the [Authorize] attribute to the class:
using Microsoft.AspNetCore.Authorization;
using Microsoft.AspNetCore.Mvc.RazorPages;

namespace DescopeTestApp.Pages
{
    [Authorize]
    public class ProtectedModel : PageModel
    {
        public void OnGet()
        {

        }
    }
}
The [Authorize] attribute tells ASP.NET Core to require authentication for this page. The middleware you created earlier checks for the presence of this attribute. If it’s present, the middleware checks to ensure the user is authenticated and, if they’re not authenticated, sends them to the login page.
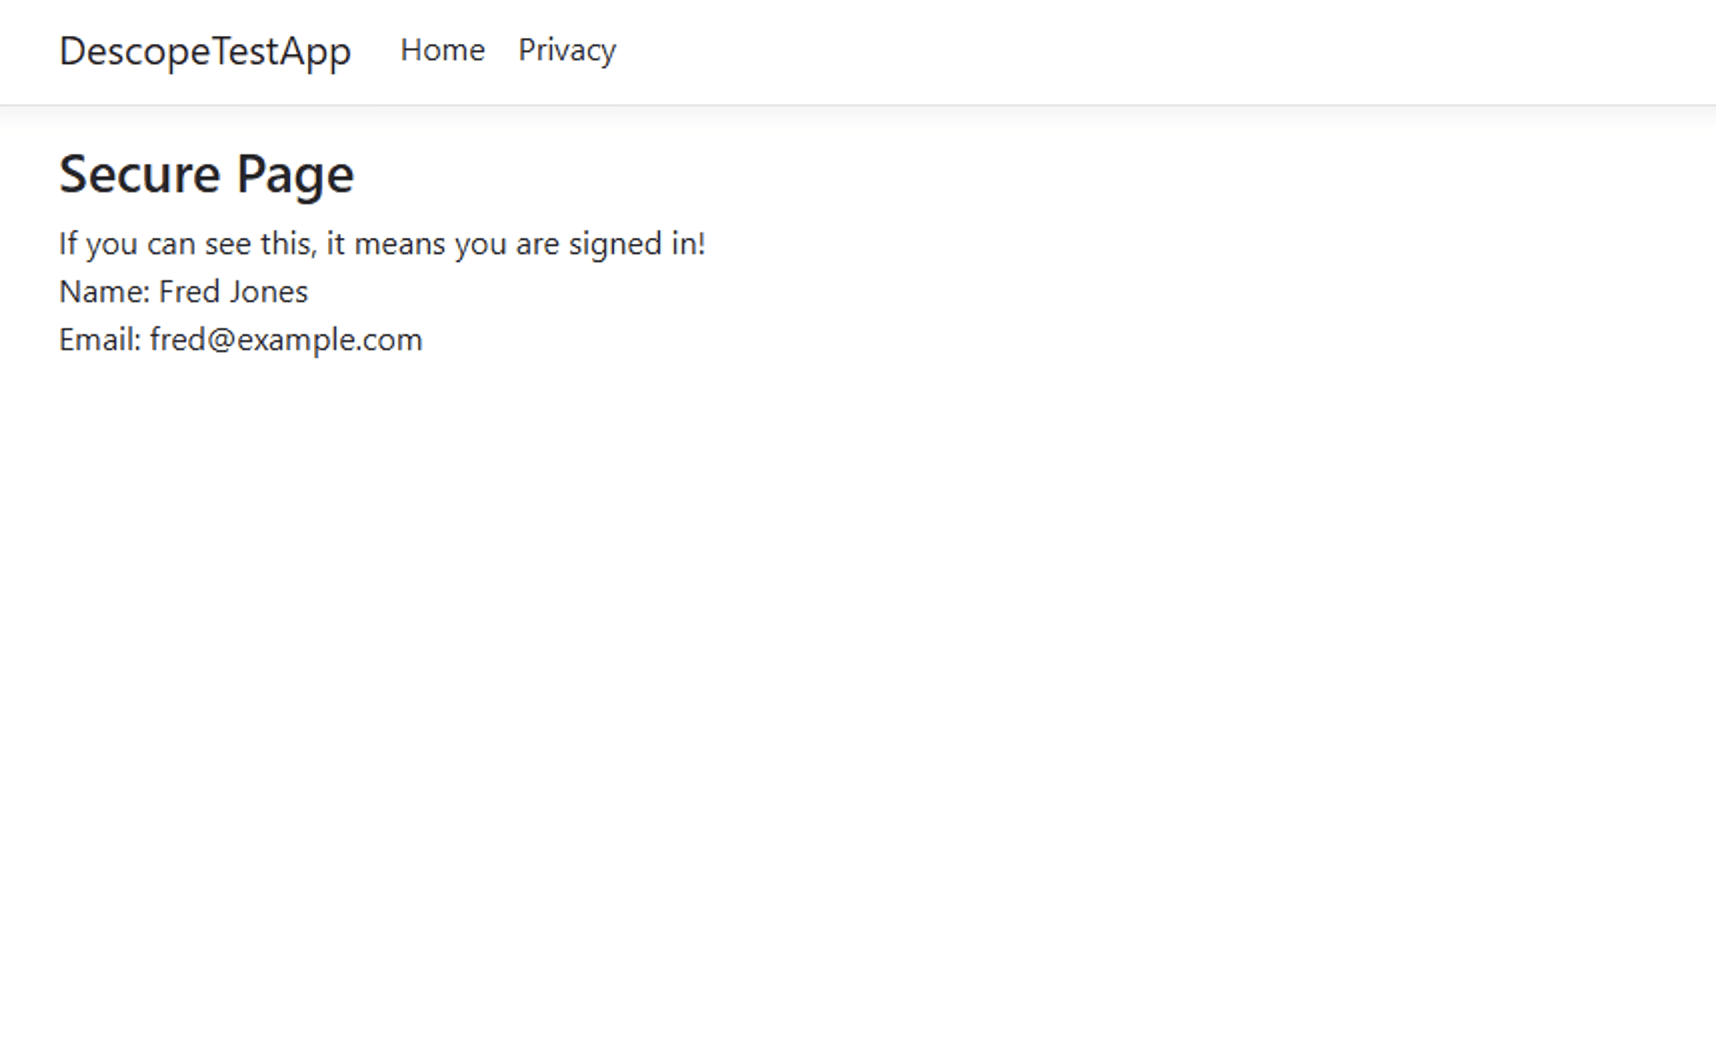
If you run the app and try to access the /Protected page, you’ll be redirected to the login page. After logging in, you’ll be able to access the /Protected page, and you’ll see some basic information from the user’s profile:
Adding a logout page
Let’s finish up by adding a page that lets the user log out. Add a new file to the Pages folder called Logout.cshtml and add the following code:
@page
@model DescopeTestApp.Pages.LogoutModel
@{
}

<h2>Log Out</h2>

<p>You've been signed out of the application.</p>
The user won’t need to take any action on this page; just loading it logs them out. Update the Logout.cshtml.cs file to look like this:
using Descope;
using Microsoft.AspNetCore.Authentication;
using Microsoft.AspNetCore.Authorization;
using Microsoft.AspNetCore.Mvc.RazorPages;

namespace DescopeTestApp.Pages
{
    [Authorize]
    public class LogoutModel(DescopeClient authClient) : PageModel
    {
        private readonly DescopeClient _authClient = authClient;

        public async void OnGet()
        {
            var refreshToken = User.FindFirst("refreshToken")?.Value;

            if (refreshToken is not null) {
                await _authClient.Auth.LogOut(refreshToken);
                await HttpContext.SignOutAsync();
            }
        }
    }
}
There’s not much to explain here: the code retrieves the user’s refresh token from the user’s claims and uses it to log the user out. By the time the user sees the logout message, their session has already been invalidated:
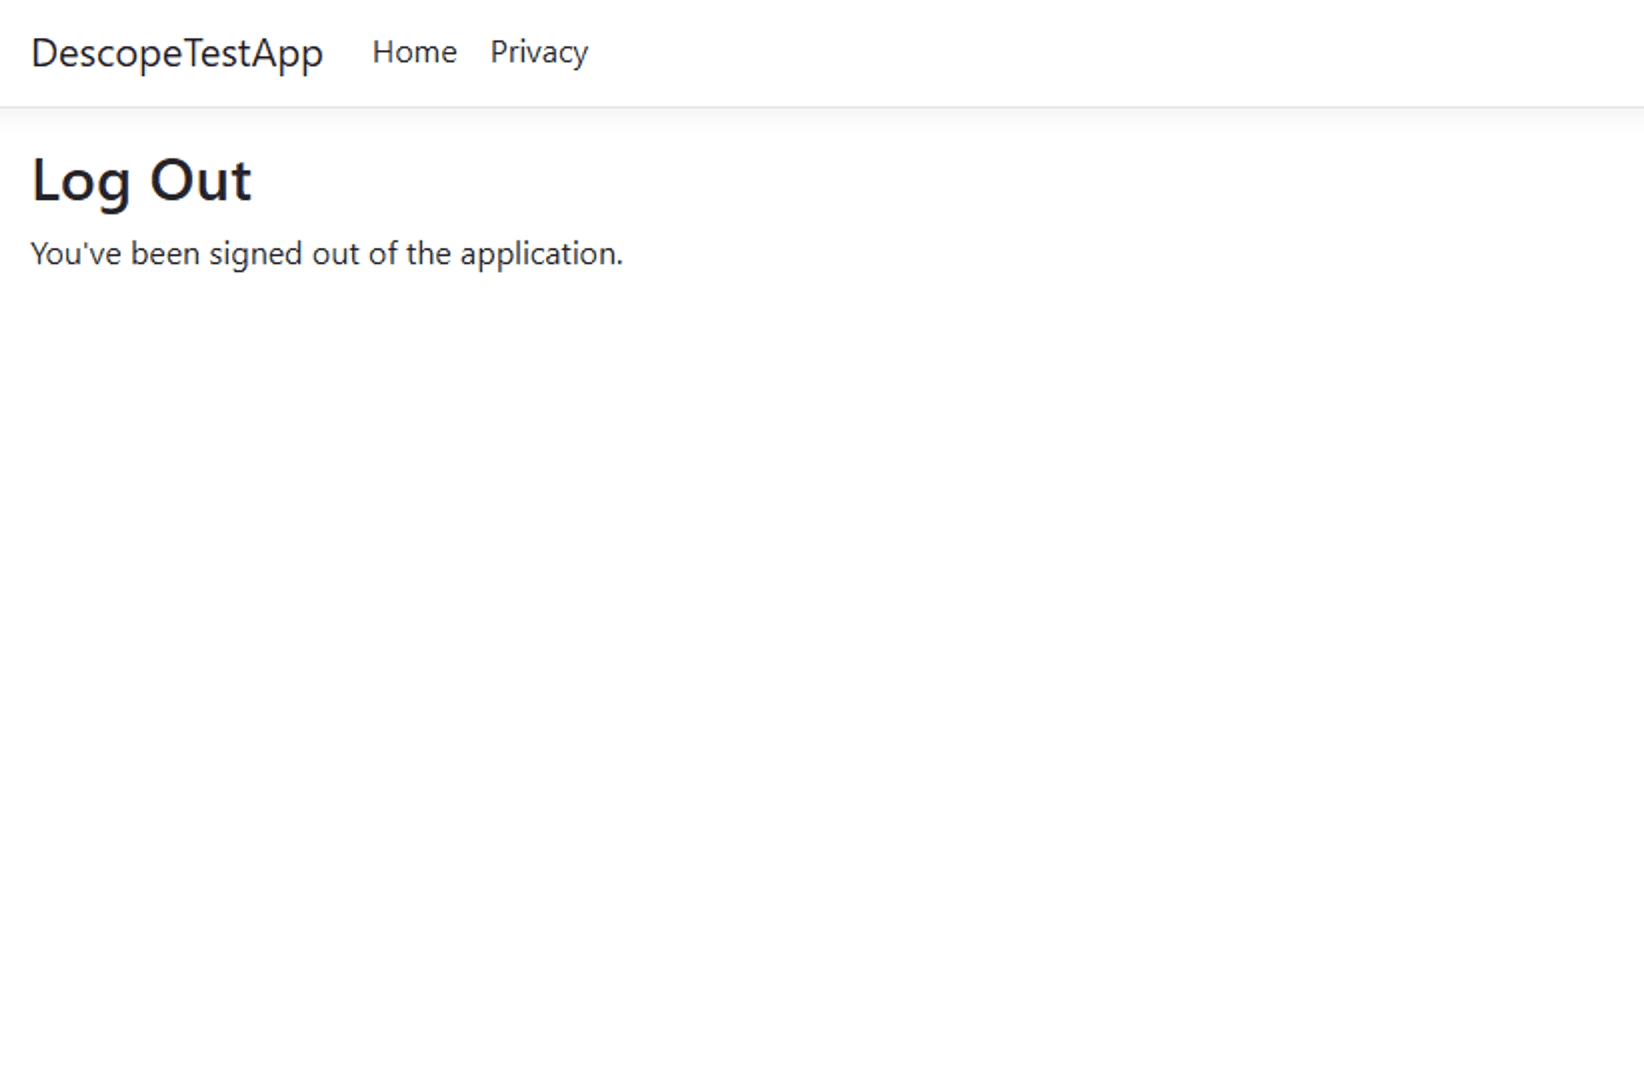
If the user tries to access a protected page after logging out, they’ll be redirected to the login page and asked to log in again. With that, you’ve added a fully functional authentication system to your ASP.NET Core app using Descope!
Adding advanced features
Next, you’ll use the Descope SDK to add some advanced features to your ASP.NET Core auth.
Adding SSO
ASP.NET is often used to build apps for enterprise users, which means you also need to support single sign-on (SSO). Fortunately, Descope makes working with SSO just as easy as username-and-password login.
Start by loading the Descope dashboard and click Getting Started to load the login flow creation wizard:
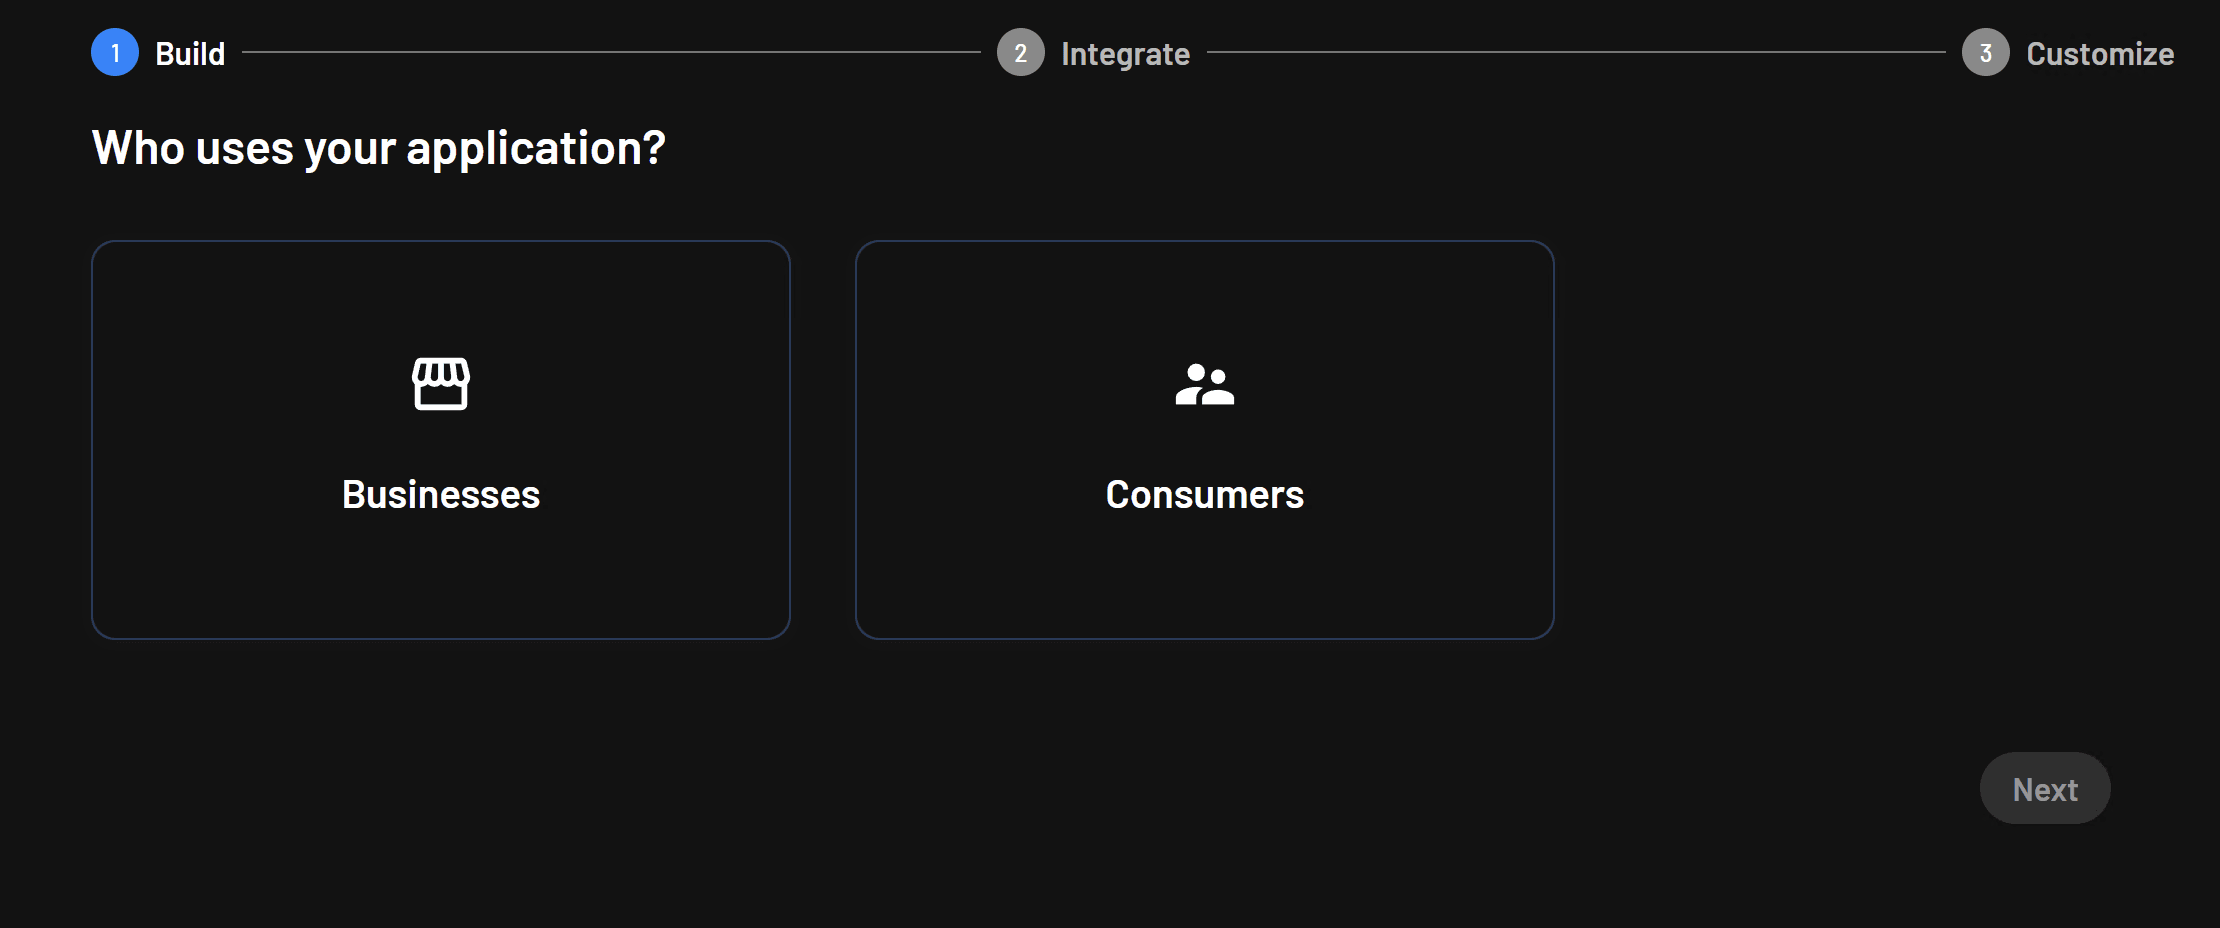
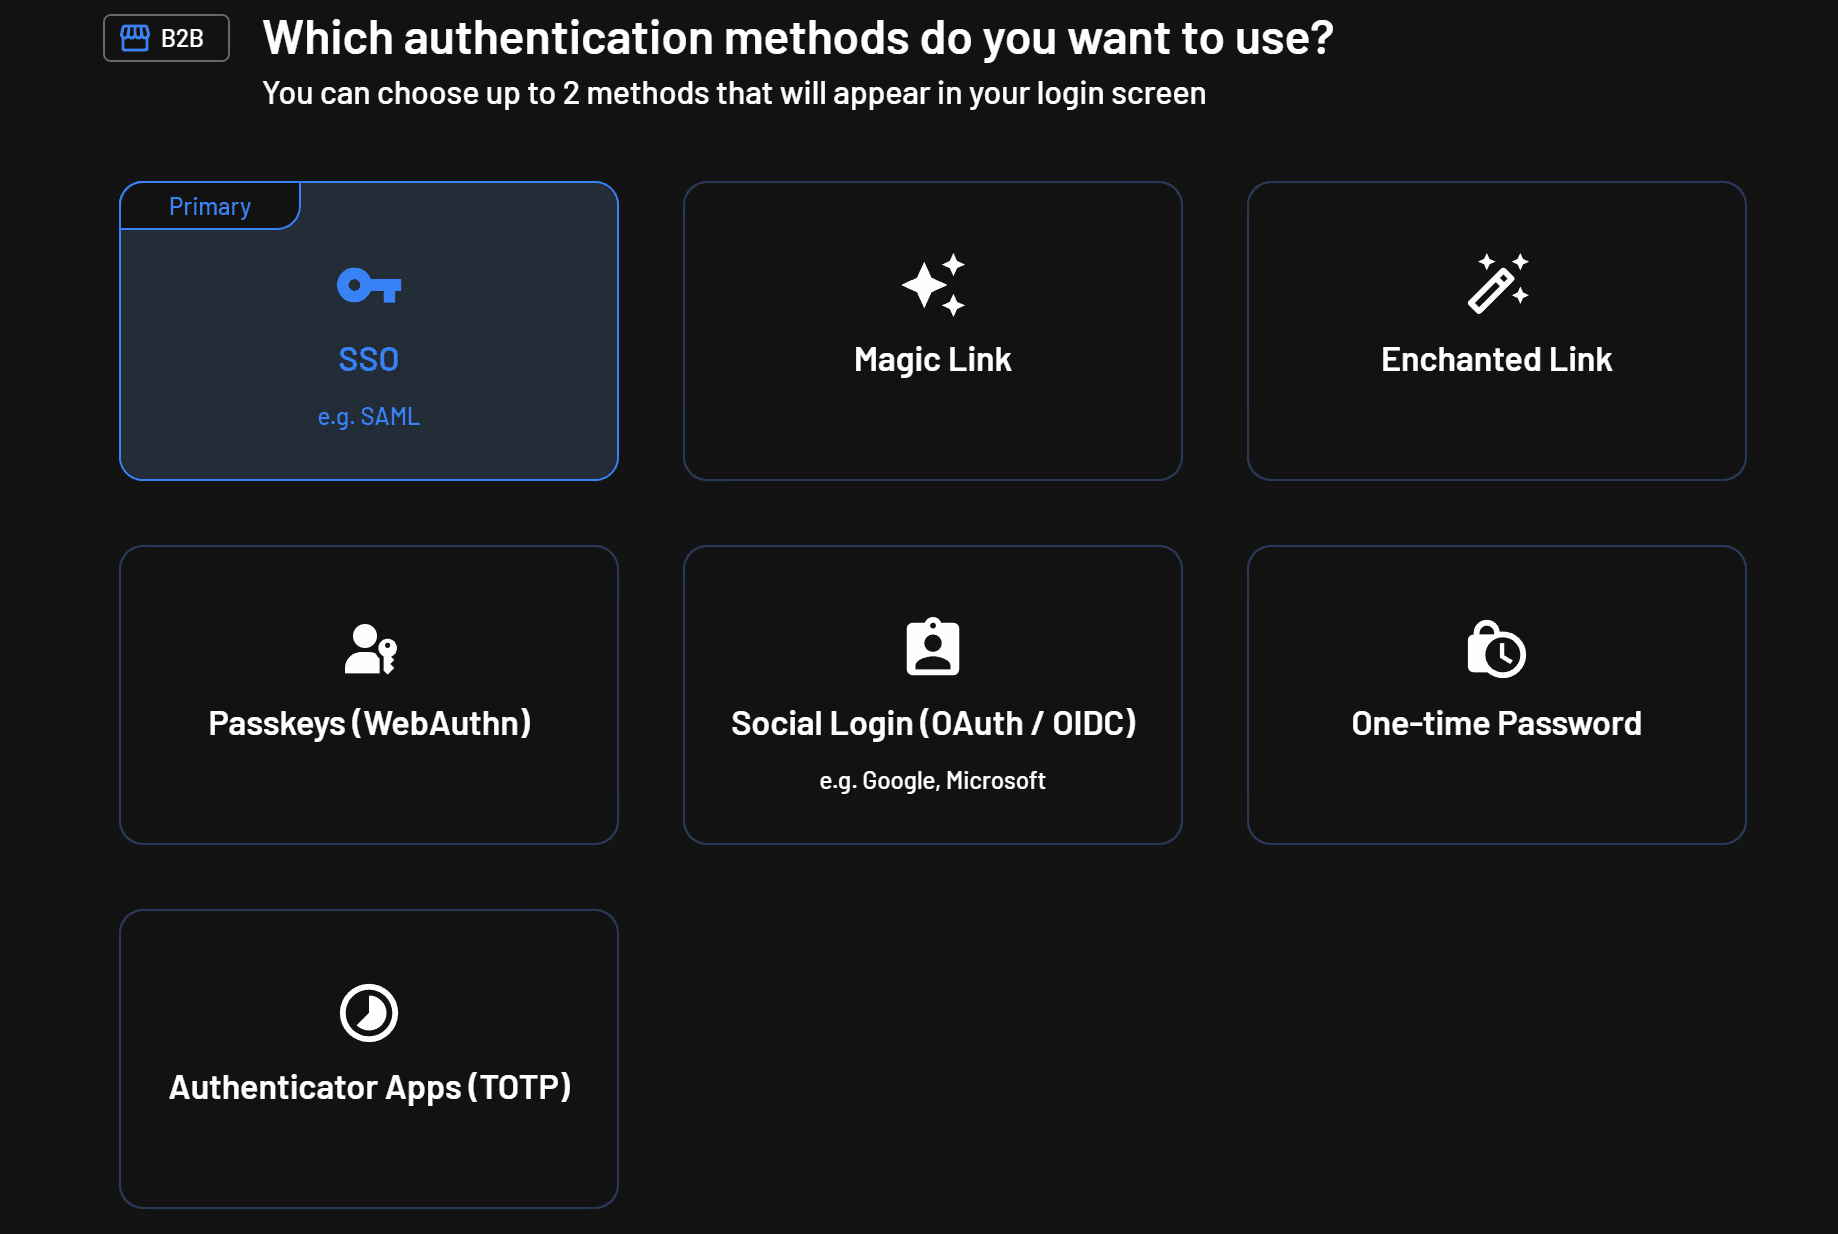
Choose Businesses. Next, choose SSO as the primary authentication method:
Then, choose the look of the login component you’d like to use in your app:
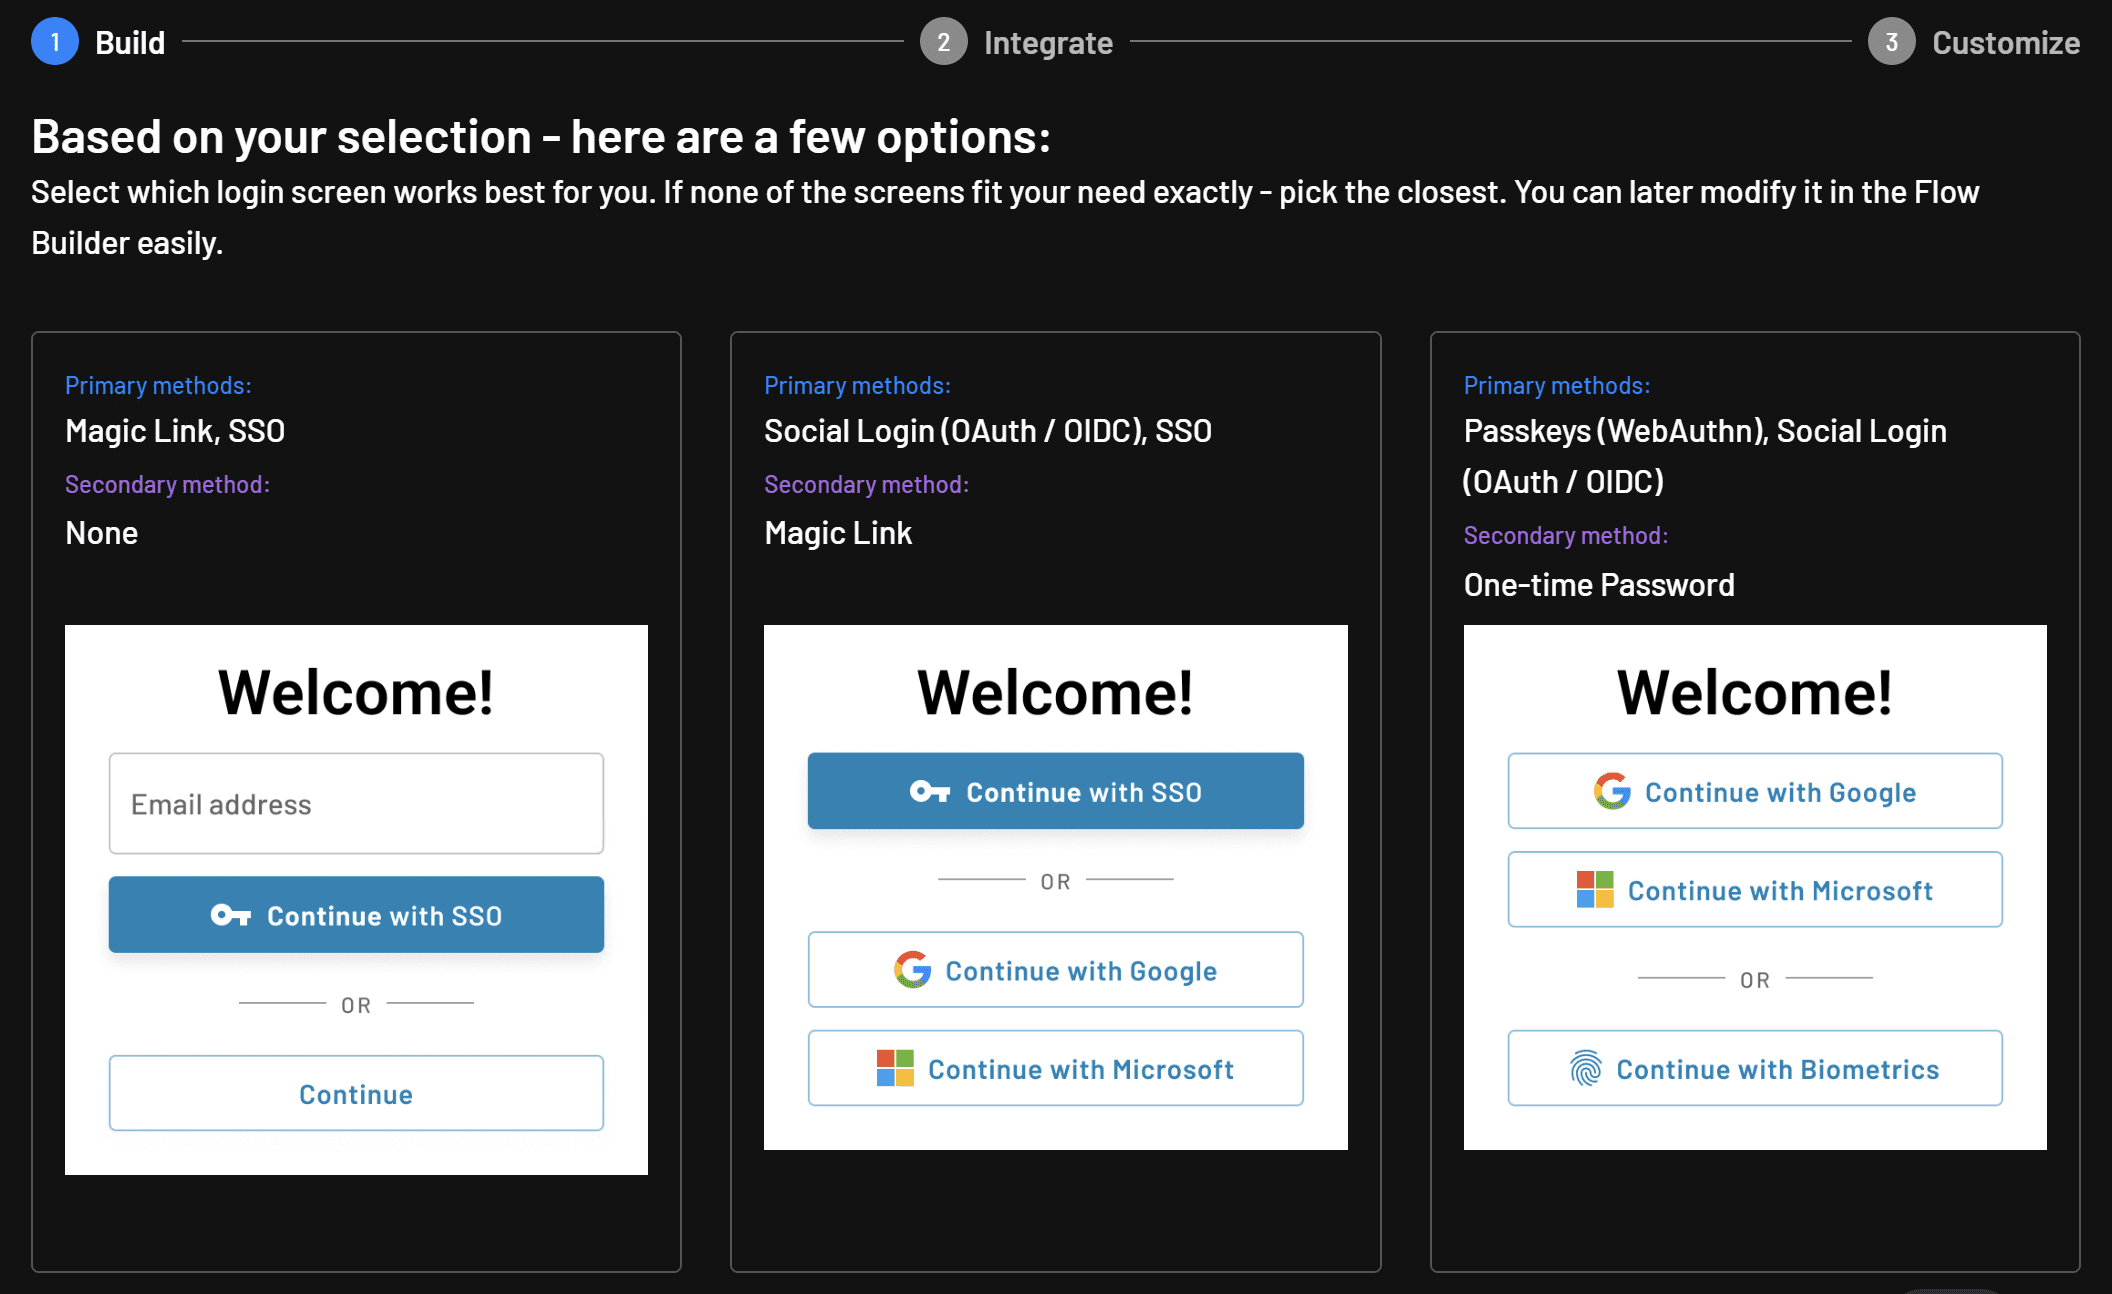
Finally, click Next until you reach the page that provides the sample code for your chosen login component.
You’ll notice that this looks identical to the code you used when adding username-and-password authentication. The difference is only the flow ID.
SSO requires access to a SAML tenant, but if you don’t have one you can use, don’t worry. You can set up a mock SAML tenant, as explained in the Descope documentation.
To test SSO in your ASP.NET Core app, update the flow ID in Login.cshtml to match the ID of the SSO flow you just created:
<descope-wc project-id="your-project-id"
            flow-id="your-sso-flow-id"
            theme="light" />
Now, run the app and navigate to the login page. You’ll see you can now sign in using SSO:
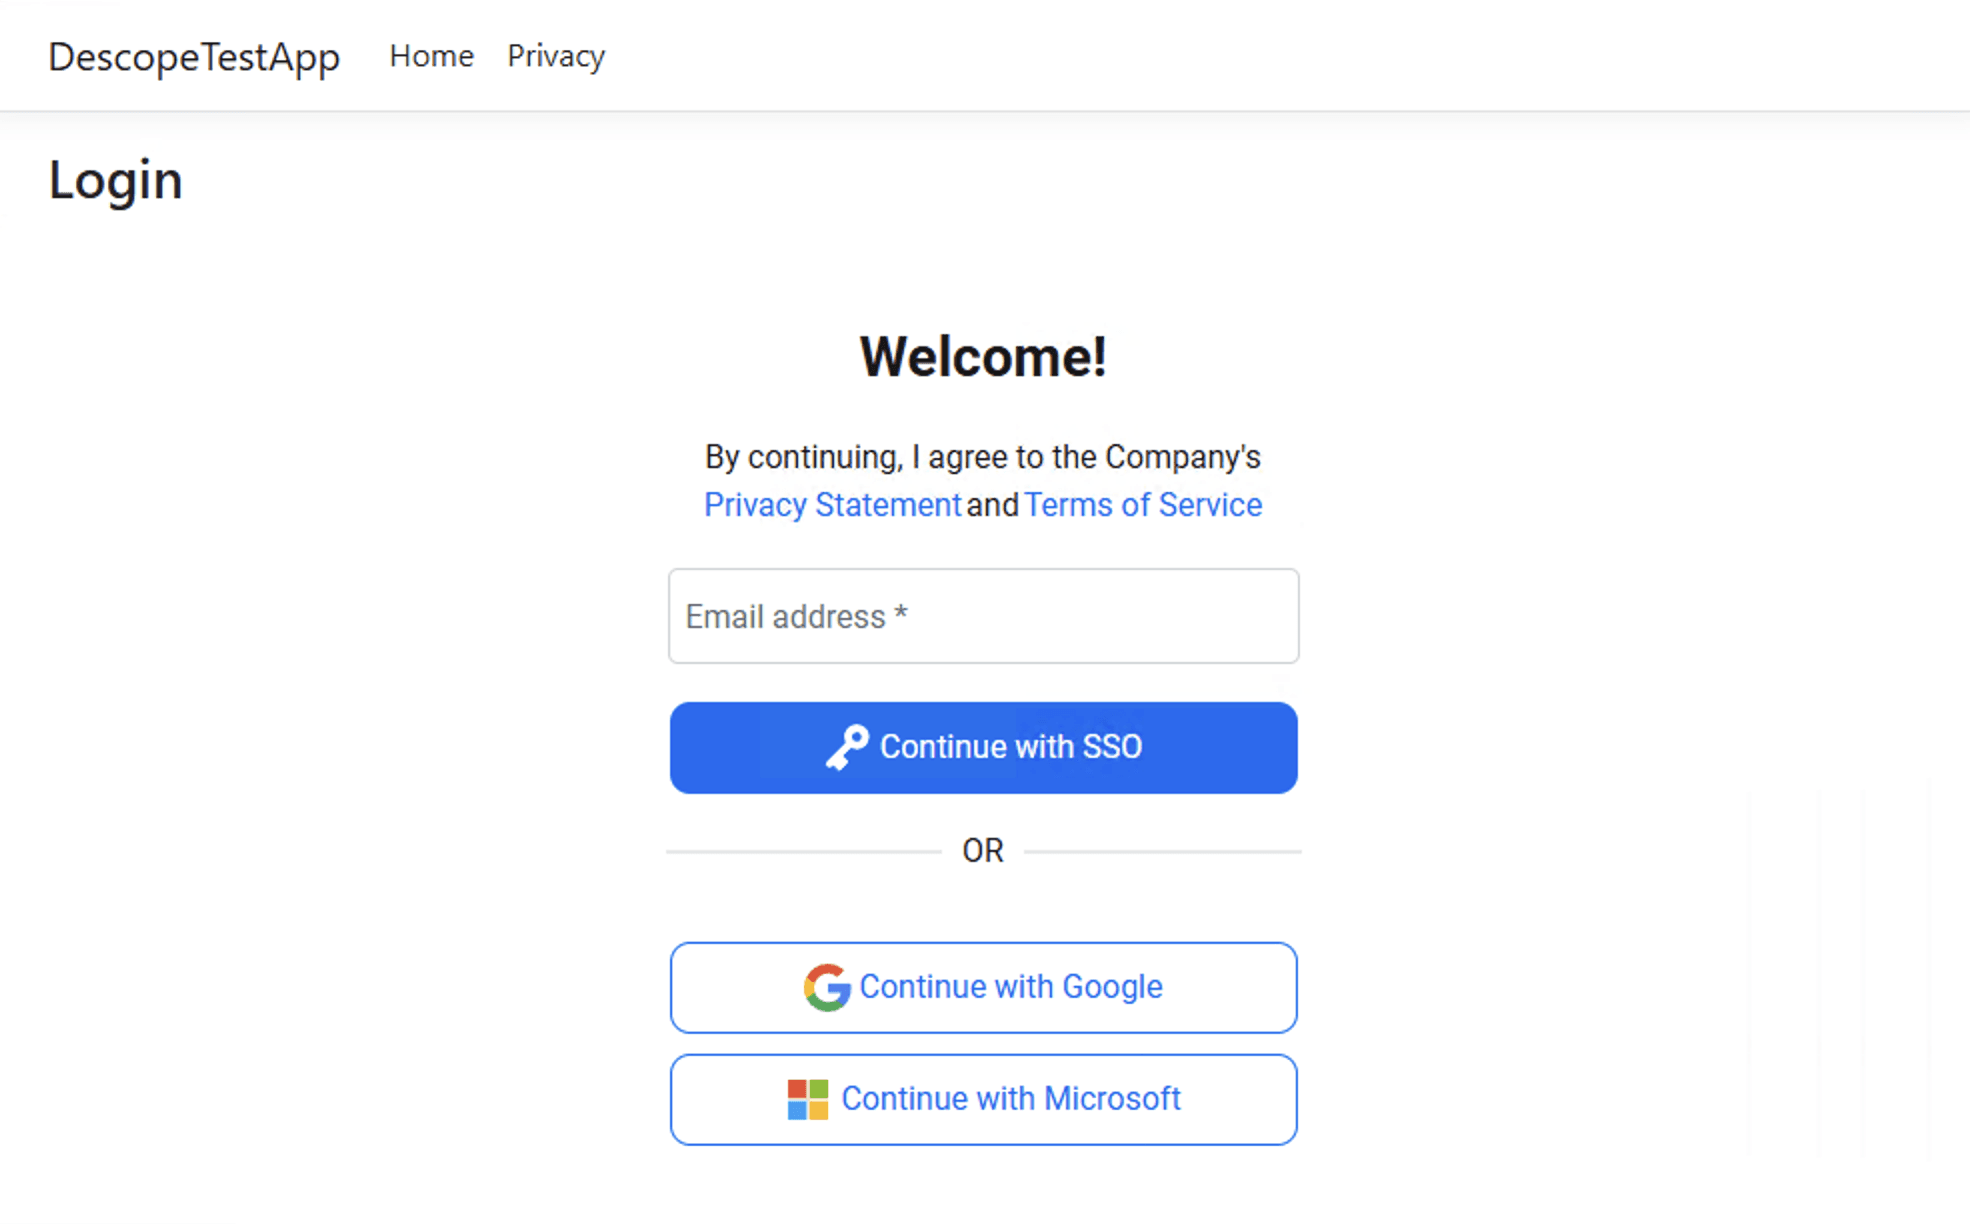
Adding a user profile widget
Descope doesn’t just handle authentication. It also saves you time by providing user management widgets you can insert into your app. Let’s add a user profile widget to the ASP.NET app.
In the Descope dashboard menu, click Widgets. You’ll see a list of widgets you can insert into your app:
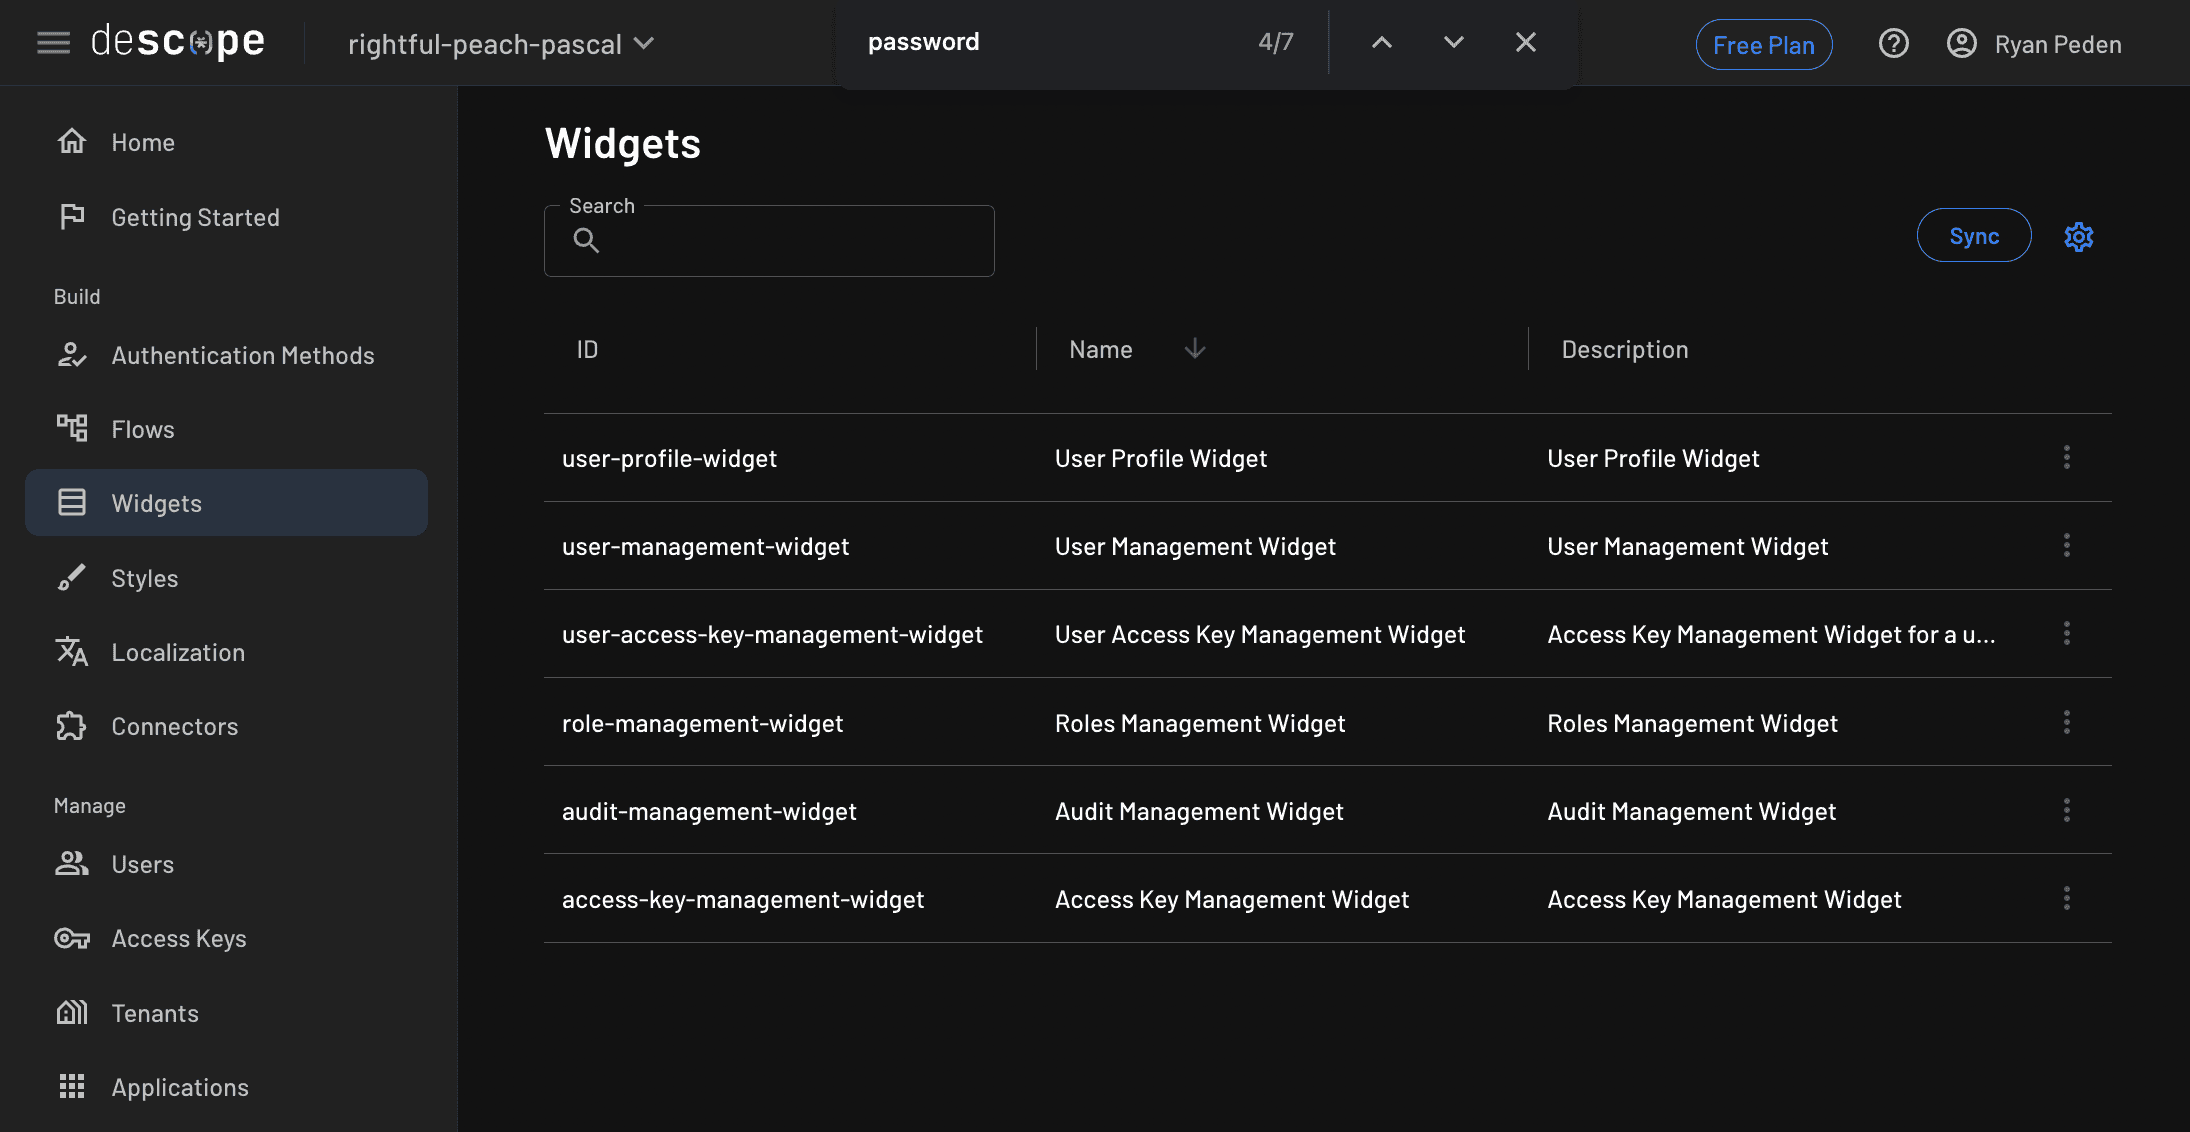
Click the User Profile Widget, and then click Show Code:
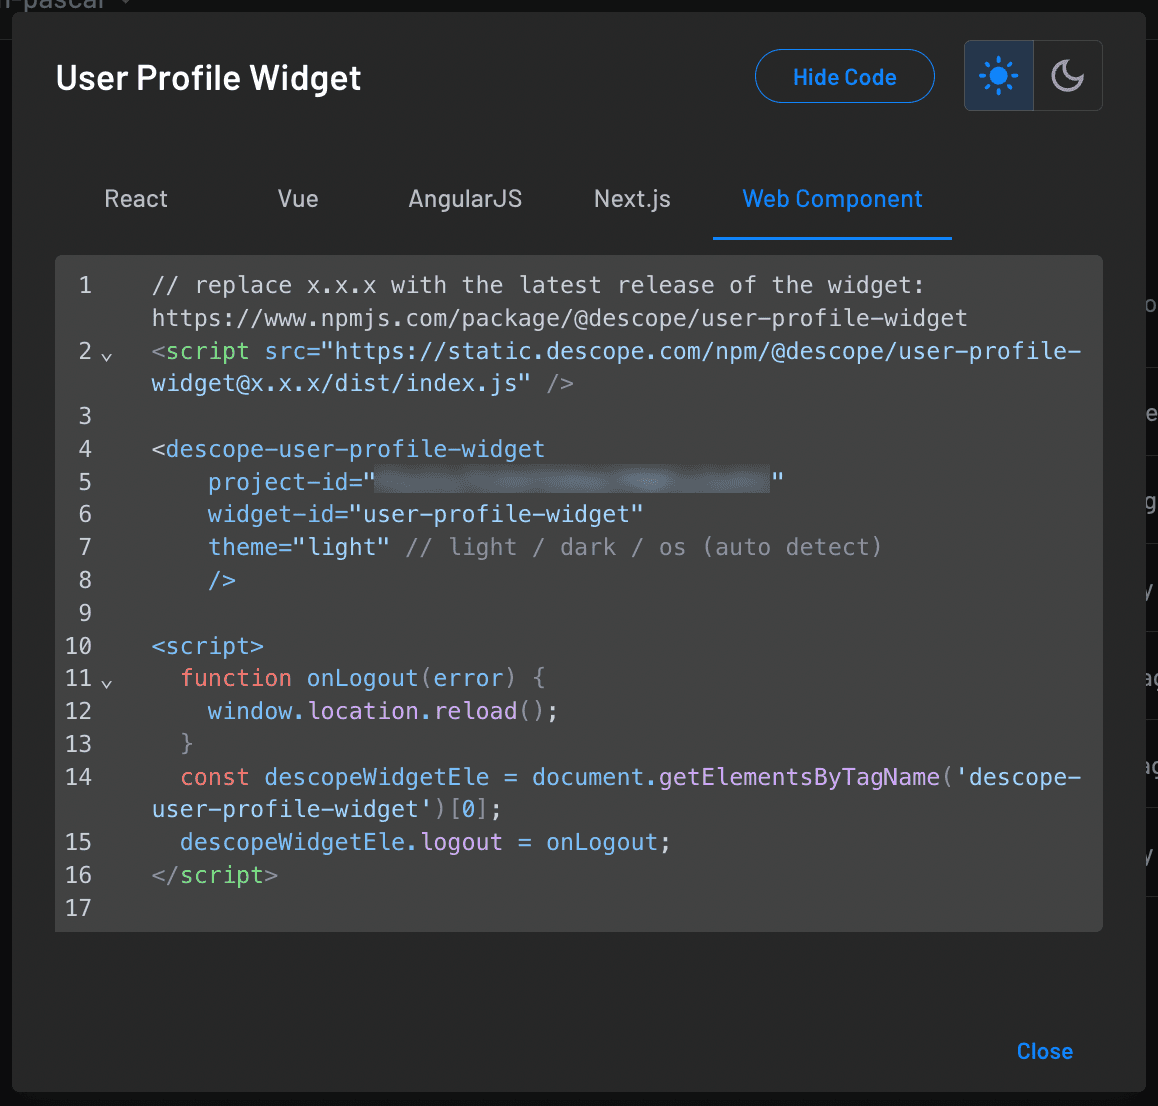
This provides everything you need to add a user profile to your app. Next, add a new page to the ASP.NET app named Profile.cshtml and add the widget code:
@page
@model DescopeTestApp.Pages.ProfileModel
@{
}

<script src="https://static.descope.com/npm/@@descope/user-profile-widget@0.0.113/dist/index.js"></script>

<descope-user-profile-widget project-id="your-project-id"
                             widget-id="user-profile-widget"
                             theme="light" />

<script>
    function onLogout(error) {
      window.location.reload();
    }
    const descopeWidgetEle = document.getElementsByTagName('descope-user-profile-widget')[0];
    descopeWidgetEle.logout = onLogout;
</script>
Then, add an [Authorize] attribute to Profile.cshtml.cs to ensure only signed-in users can view the profile page:
using Microsoft.AspNetCore.Authorization;
using Microsoft.AspNetCore.Mvc.RazorPages;

namespace DescopeTestApp.Pages
{
    [Authorize]
    public class ProfileModel : PageModel
    {
        public void OnGet()
        {
        }
    }
}
Finally, run the app, log in, and load the profile page. You’ll see a page that shows the signed-in user’s information and lets the user edit their profile information or change their password:
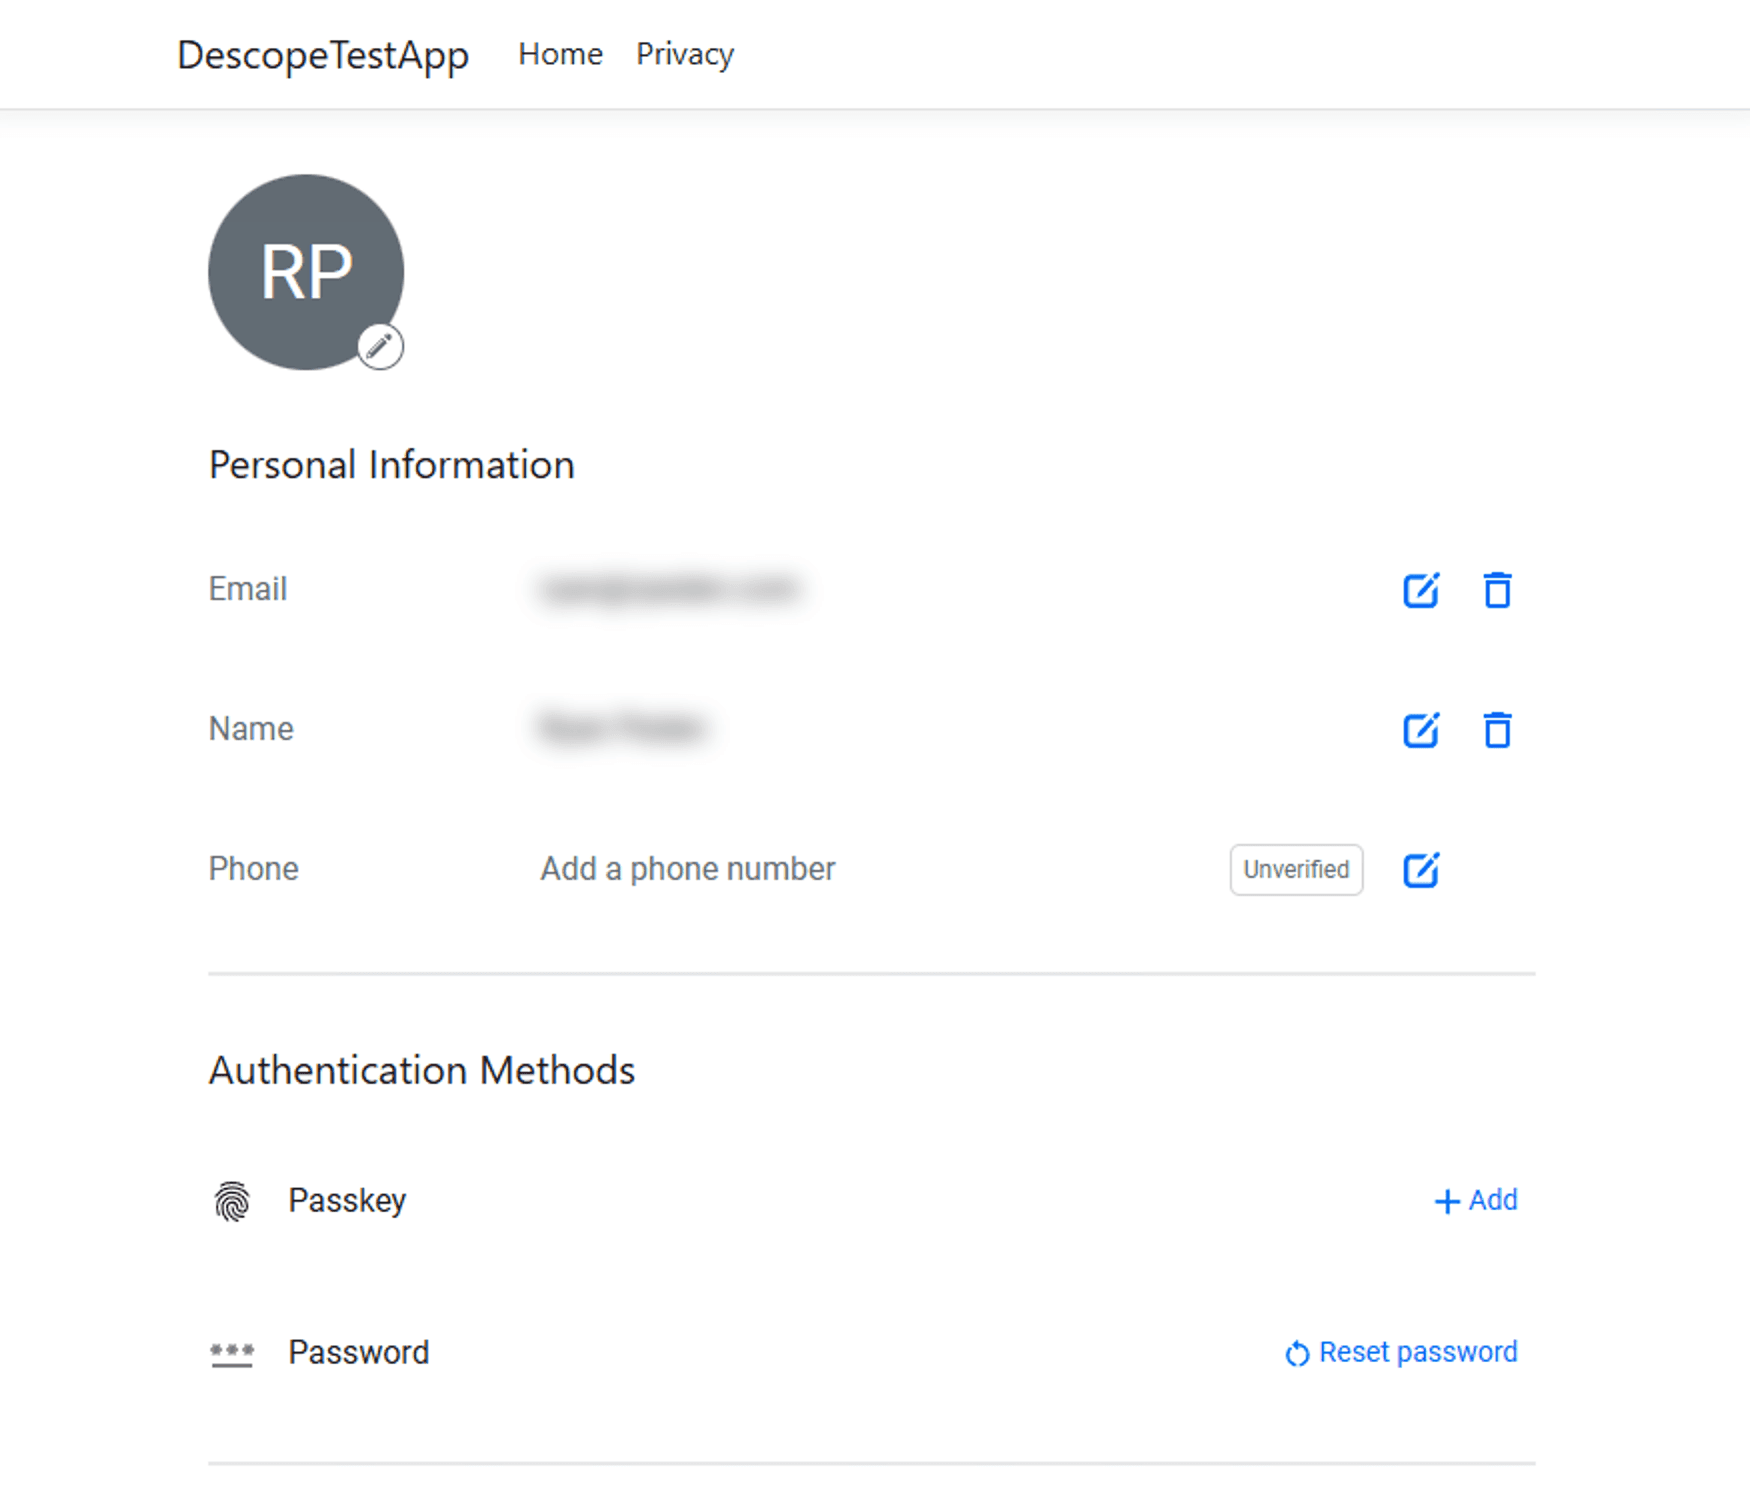
Adding custom JWT templates
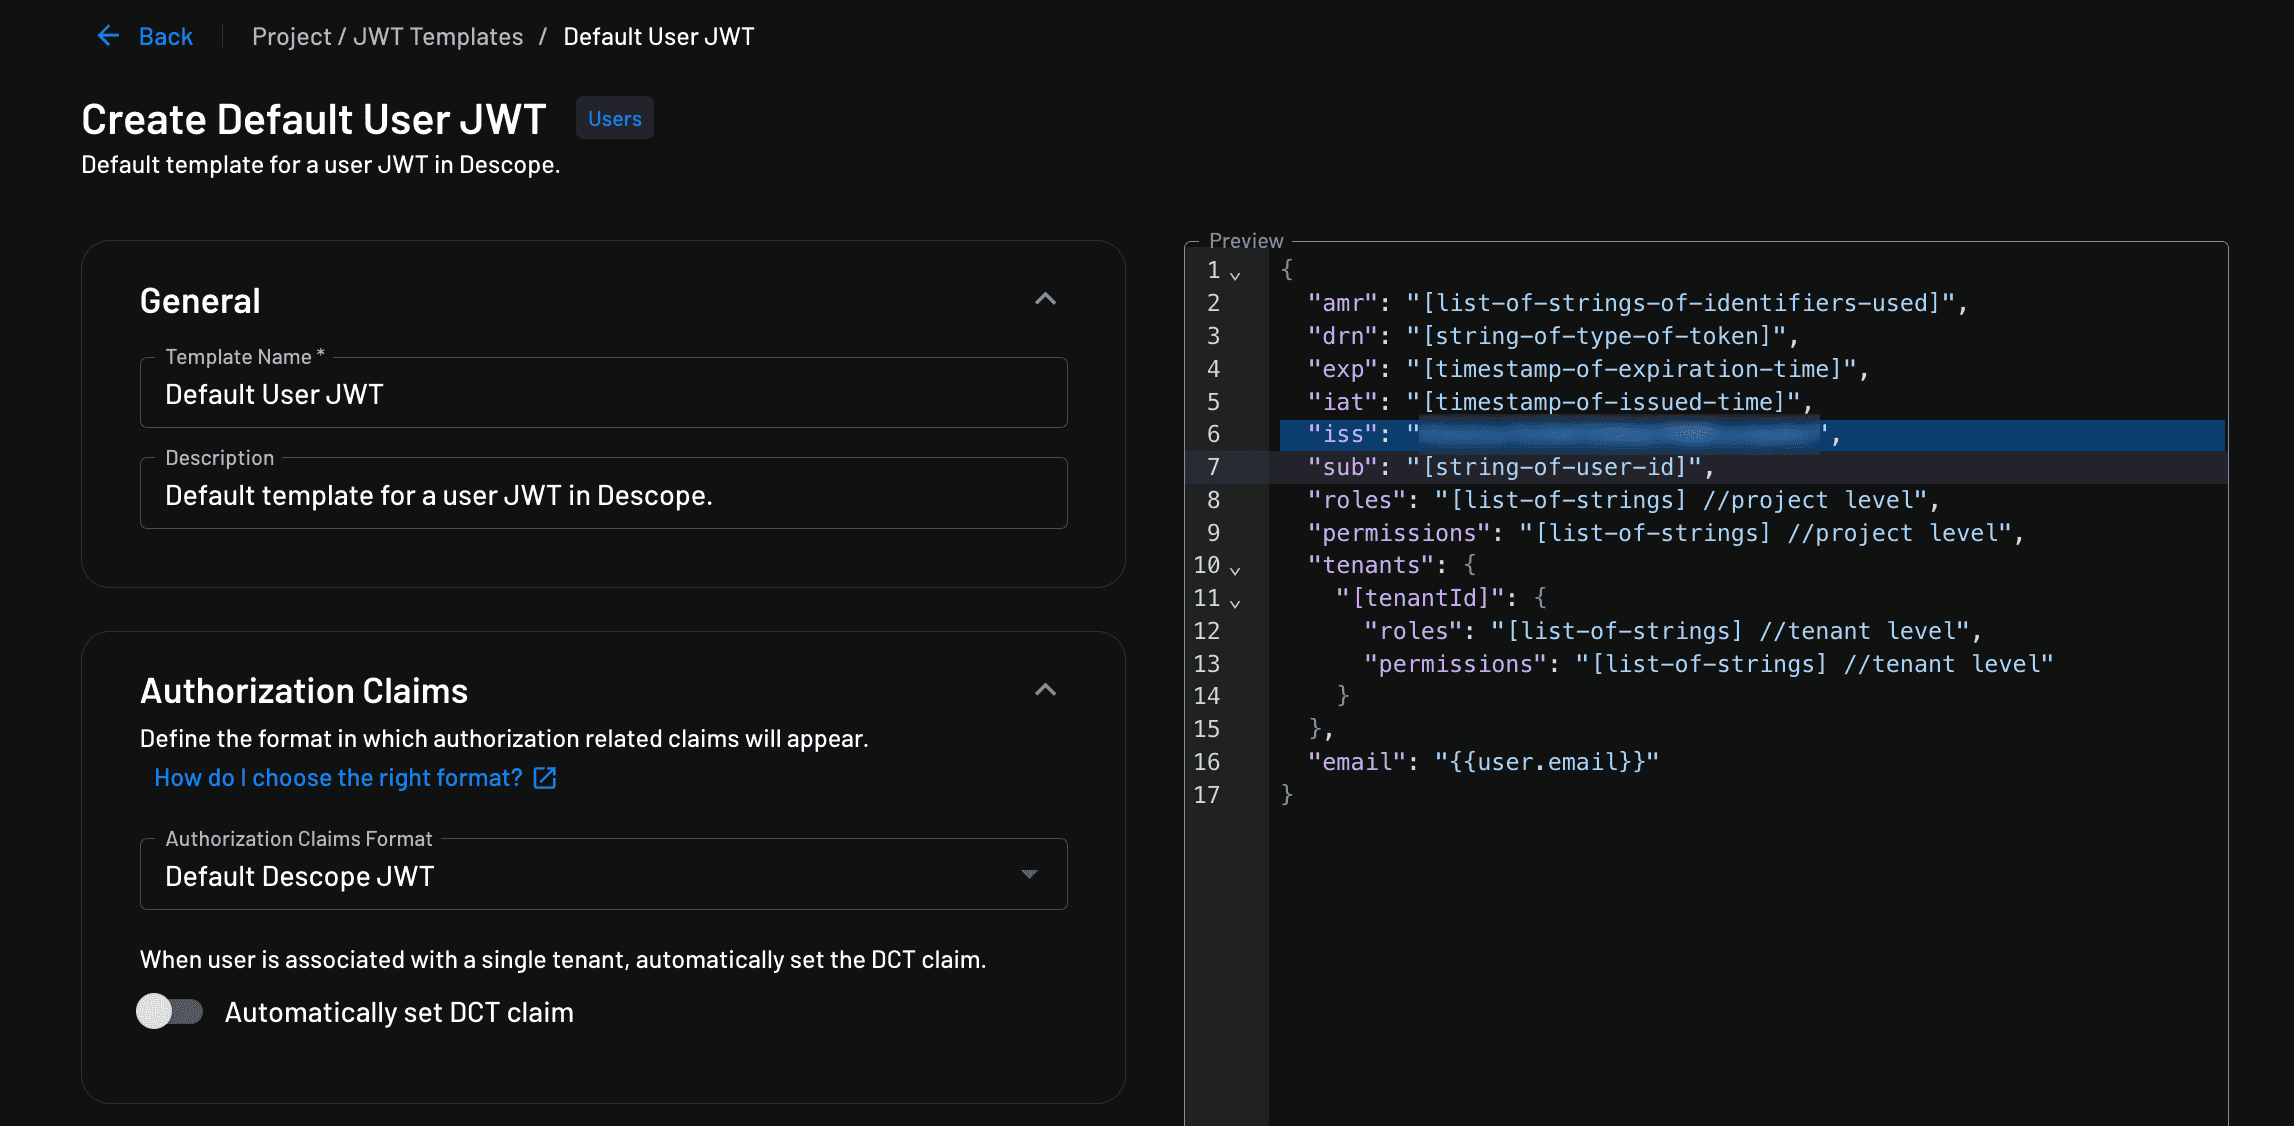
The Descope default JWT contains all the user information many apps need. However, in some cases, you may need to add custom claims, for example, specifying which company department the user works in. Fortunately, it’s easy to add custom claims in Descope JWT templates.
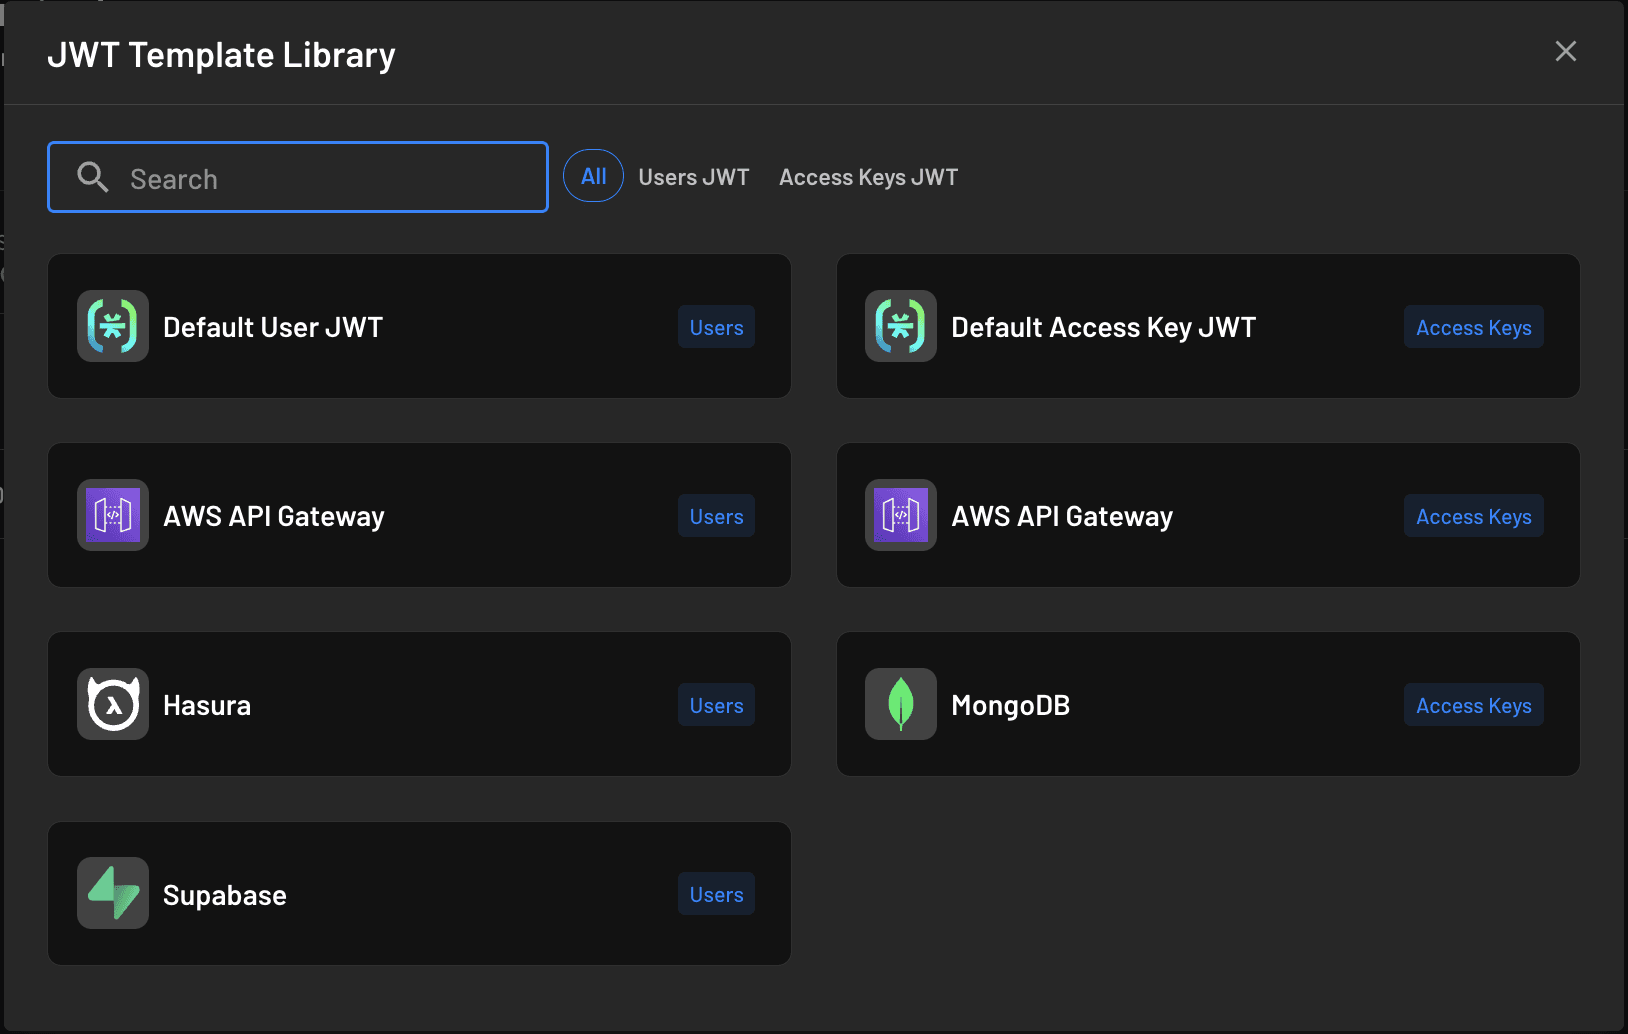
Start by clicking Project in the Descope dashboard, and then select the JWT Templates tab and click the + JWT Template button:

Choose Default User JWT:
An editor screen pops up where you can customize your project’s JWT:
Scroll down to Custom Claims, click + Add custom claim, and add a claim with a key of domain and a value of user.emailDomain:
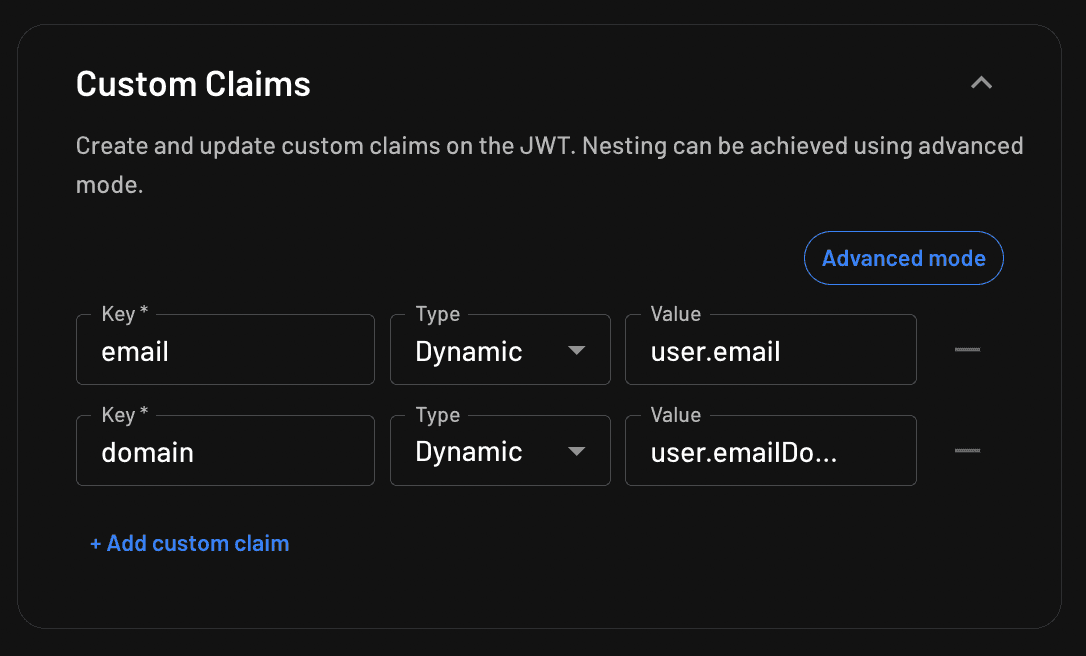
This simulates a common scenario: a line-of-business app in a multinational corporation, where employees’ email addresses have different domains depending on which country they are based in.
Having the domain as its own claim is useful because it gives you the ability to restrict access to pages based on the user’s domain. You might, for example, want to ensure that only users from the company’s Canadian division (with a .ca email domain) can access the Canada sales portal page.
Once you’ve created the JWT template, click the General tab and use the User JWT drop-down to select the template you just created; then scroll down and click Save:
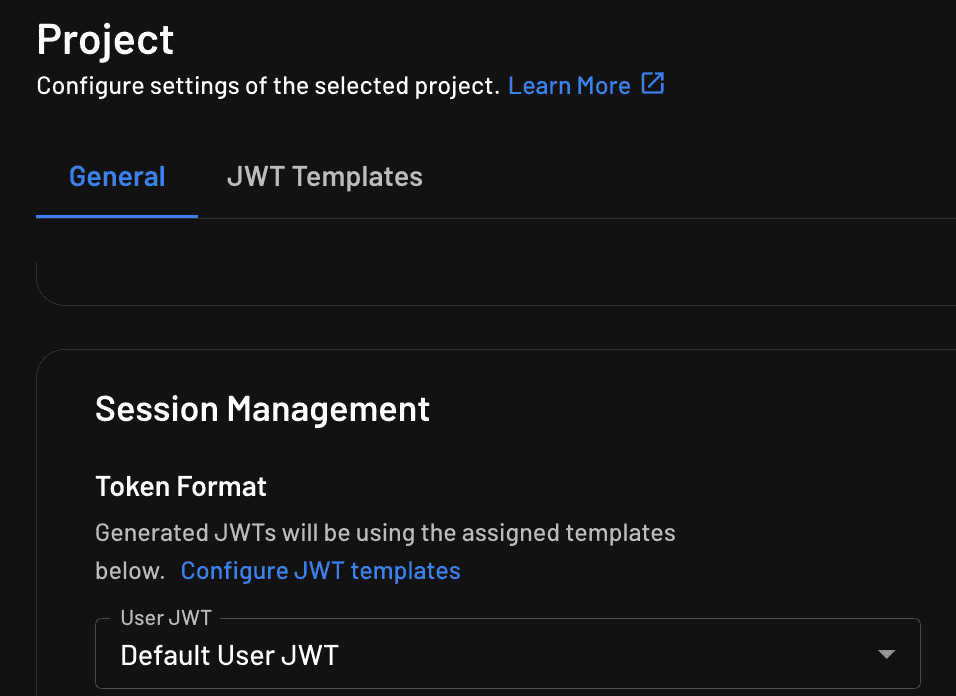
The JWT you receive when a user signs in (or when you refresh their token) now contains the custom claim you added. You can update the login page and Descope middleware page you created earlier to extract the custom claim and add it to the ASP.NET user’s claims:
var sessionInfo = await _authClient.Auth.ValidateAndRefreshSession(JwtToken, RefreshToken);
var user = await _authClient.Auth.Me(RefreshToken);
var userDomain = sessionInfo.Claims["domain"].ToString();

Claim[] claims = [
    new Claim(ClaimTypes.Name, user.Name),
    new Claim(ClaimTypes.Email, user.Email),
    new Claim("sessionToken", JwtToken),
    new Claim("refreshToken", RefreshToken),
    new Claim("userDomain", userDomain ?? "")
];
Then, in your app’s configuration in Program.cs, create a policy that checks for a specific domain:
builder.Services.AddAuthorization(options =>
{
    options.AddPolicy("CanadaOnly", policy => policy.RequireClaim("domain", "mycompany.ca"));
});
```

Now, when you add an Authorize attribute to a page, you can use the policy you just added to restrict pages to users with a specific domain:
```
[Authorize(Policy="CanadaOnly")]
public class CanadaSalesDashboardModel : PageModel
Now, when you add an Authorize attribute to a page, you can use the policy you just added to restrict pages to users with a specific domain:
[Authorize(Policy="CanadaOnly")]
public class CanadaSalesDashboardModel : PageModel
Now, only users who meet the policy’s criteria are able to view the page.
ASP.NET Core authentication that’s not complex
You’ve seen how easy it is to add secure, user-friendly authentication to an ASP.NET Core app using the Descope SDK, complete with SSO and social login support. Now, you can take what you’ve learned and apply it to your own projects.
Descope takes the complexity out of customer identity and access management, handling session management, token refreshes, and user validation—so you don’t have to. Whether you’re building a lightweight web app or a large-scale B2B platform, Descope scales with your needs. Adding new login methods, managing users across tenants, and fine-tuning security settings is straightforward.
At its core, Descope isn’t just about logging users in—it’s about giving developers a scalable, secure foundation for user management that grows with your apps.
For more tutorials and developer news, subscribe to our blog or follow us on LinkedIn.

